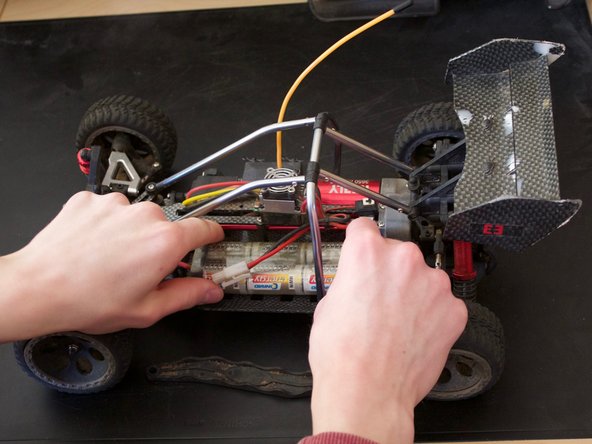
Saltar al contenido principal

Batterieausabau

Qué necesitas

  1. Batterieausabau, trim loss: paso 1, imagen 1 de 1
    • These two pins must be removed.

  2. Batterieausabau: paso 2, imagen 1 de 1
    • Here, a screwdriver or other stable thin object (in the picture: letter opener) can be helpful

  3. Batterieausabau: paso 3, imagen 1 de 2 Batterieausabau: paso 3, imagen 2 de 2
    • TIP: if you remove the cladding more often (for example, for thorough cleaning), it may be helpful to provide the splints with some insulating tape, so the use of tools is unnecessary

  4. Batterieausabau: paso 4, imagen 1 de 1
    • The panel is now dismantled

  5. Batterieausabau, Batterieausabau: paso 5, imagen 1 de 1
    • These two pins must be removed

  6. Batterieausabau: paso 6, imagen 1 de 1
    • TIP: Since this work has to be done more often, it is recommended to provide the cotter pins with some insulating tape so that they can be removed without tools

  7. Batterieausabau: paso 7, imagen 1 de 1
    • The battery holder can now be pulled off upwards

  8. Batterieausabau: paso 8, imagen 1 de 1
    • Now the battery connection is disconnected

  9. Batterieausabau: paso 9, imagen 1 de 2 Batterieausabau: paso 9, imagen 2 de 2
    • And the battery can be removed upwards

  10. Batterieausabau: paso 10, imagen 1 de 1
    • The battery can now be charged

Conclusión

Repeat the steps in order to reassemble your device.

Un agradecimiento especial a estos traductores:

de en

100%

¡ Israel nos está ayudando a reparar el mundo! ¿Quieres contribuir?
Empezar a traducir ›

Leonard Kesting

Miembro Desde 08/14/16

1,229 Reputación

9 Guías creadas

0 comentarios

Agregar Comentario

Ver Estadísticas:

Ultimas 24 horas: 2

Ultimos 7 días: 5

Ultimos 30 días: 8

Todo El Tiempo: 297