Saltar al contenido principal

Barreto Tillers E1320HTRLR 2016 Tine Replacement

Qué necesitas

  1. Barreto Tillers E1320HTRLR 2016 Tine Replacement, Disconnect the spark plug wire: paso 1, imagen 1 de 2 Barreto Tillers E1320HTRLR 2016 Tine Replacement, Disconnect the spark plug wire: paso 1, imagen 2 de 2
    • Before you begin, ensure that the engine is powered down and cool to the touch.

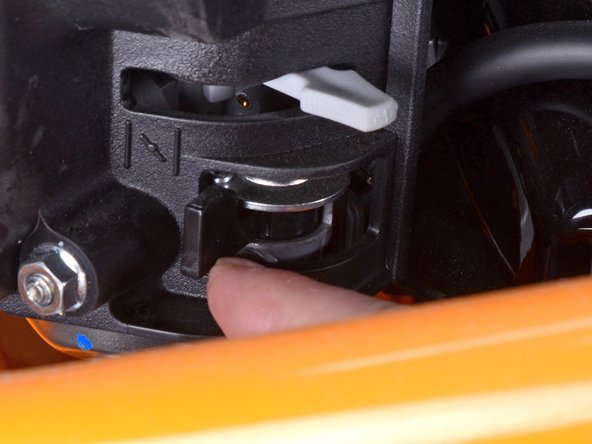
    • Grab the plastic housing at the end of the spark plug wire and pull firmly to disconnect it.

  2. Barreto Tillers E1320HTRLR 2016 Tine Replacement, Flip the engine switch to the off position: paso 2, imagen 1 de 2 Barreto Tillers E1320HTRLR 2016 Tine Replacement, Flip the engine switch to the off position: paso 2, imagen 2 de 2
    • Flip the red engine ON/OFF switch to the OFF position.

  3. Barreto Tillers E1320HTRLR 2016 Tine Replacement, Close the fuel valve: paso 3, imagen 1 de 2 Barreto Tillers E1320HTRLR 2016 Tine Replacement, Close the fuel valve: paso 3, imagen 2 de 2
    • Flip the fuel valve lever to the OFF position.

  4. Barreto Tillers E1320HTRLR 2016 Tine Replacement, Turn off the ignition: paso 4, imagen 1 de 2 Barreto Tillers E1320HTRLR 2016 Tine Replacement, Turn off the ignition: paso 4, imagen 2 de 2
    • Flip the ignition switch to the OFF position.

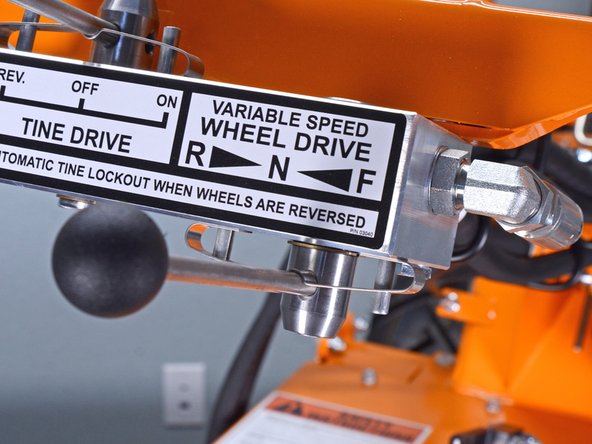
    • Ensure the wheel drive control lever is set to the neutral position.

  5. Barreto Tillers E1320HTRLR 2016 Tine Replacement, Allow the wheels to freewheel: paso 5, imagen 1 de 3 Barreto Tillers E1320HTRLR 2016 Tine Replacement, Allow the wheels to freewheel: paso 5, imagen 2 de 3 Barreto Tillers E1320HTRLR 2016 Tine Replacement, Allow the wheels to freewheel: paso 5, imagen 3 de 3
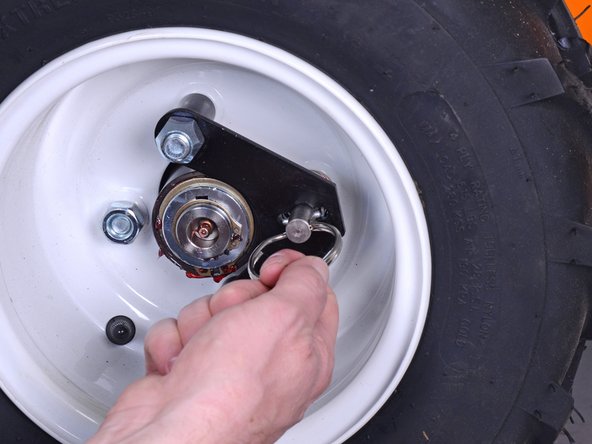
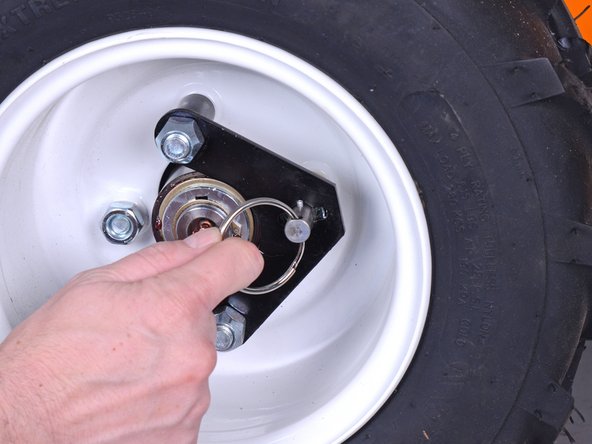
    • Pull the locking pin out and rotate it 90˚ to unlock the right wheel from the hub.

    • Repeat for the left wheel.

  6. Barreto Tillers E1320HTRLR 2016 Tine Replacement, Add wheel chocks: paso 6, imagen 1 de 1
    • Insert wheel chocks underneath each wheel to keep the device stationary during disassembly.

  7. Barreto Tillers E1320HTRLR 2016 Tine Replacement, Loosen the tine bolts: paso 7, imagen 1 de 3 Barreto Tillers E1320HTRLR 2016 Tine Replacement, Loosen the tine bolts: paso 7, imagen 2 de 3 Barreto Tillers E1320HTRLR 2016 Tine Replacement, Loosen the tine bolts: paso 7, imagen 3 de 3
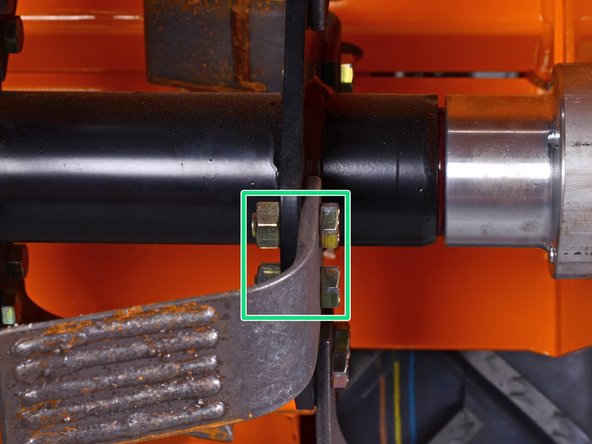
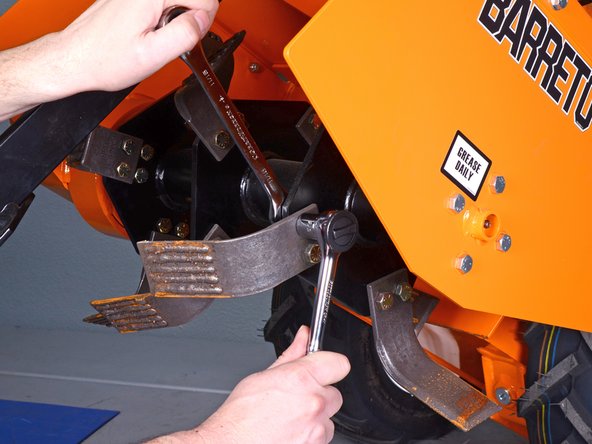
    • Use a 5/8 inch socket with an 11/16 inch wrench to loosen the two 5/8 inch bolts and two 11/16 inch nuts securing the tine to the tine shaft.

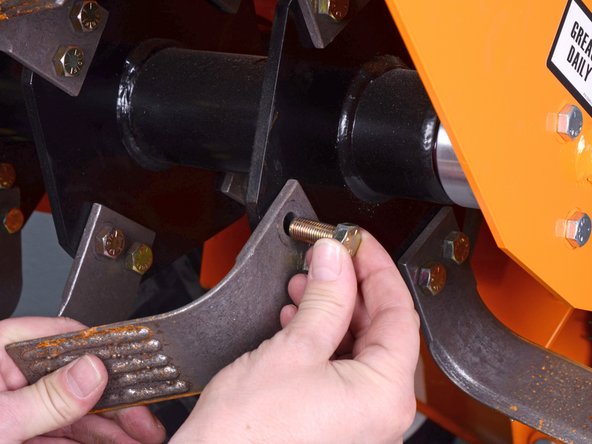
    • Remove the two tine nuts.
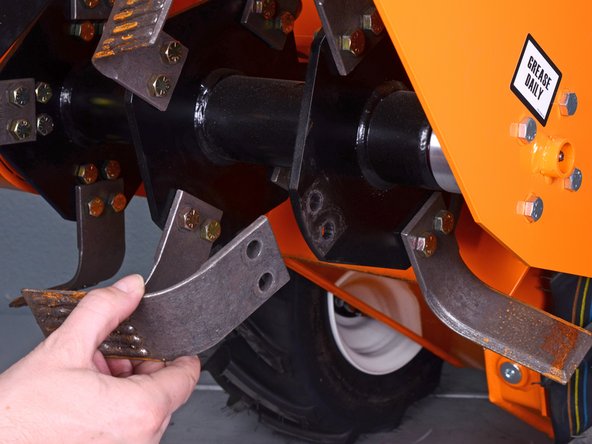
  8. Barreto Tillers E1320HTRLR 2016 Tine Replacement, Remove the tine bolts: paso 8, imagen 1 de 2 Barreto Tillers E1320HTRLR 2016 Tine Replacement, Remove the tine bolts: paso 8, imagen 2 de 2
    • Remove the two bolts holding the tine to the tine shaft.

    • During reassembly, use Loctite 271 on tine bolt threads to prevent them from loosening.

  9. Barreto Tillers E1320HTRLR 2016 Tine Replacement, Remove the tine: paso 9, imagen 1 de 2 Barreto Tillers E1320HTRLR 2016 Tine Replacement, Remove the tine: paso 9, imagen 2 de 2
    • Remove the tine.

    • Repeat this procedure for each tine you need to replace.

    • Keep track of each tine's orientation.

Conclusión

To reassemble your device, follow these instructions in reverse order.

Carsten Frauenheim

Miembro Desde 03/10/20

112,914 Reputación

338 Guías creadas

Equipo

iFixit Miembro de iFixit

Staff

135 Miembros

16,757 Guías creadas

0 comentarios

Agregar Comentario

Ver Estadísticas:

Ultimas 24 horas: 0

Ultimos 7 días: 1

Ultimos 30 días: 13

Todo El Tiempo: 498