Saltar al contenido principal

Esta guía ha sufrido modificaciones. Revisa la última versión sin revisar.

BLU Dash 3.5 Screen Assembly Replacement

Qué necesitas

  1. BLU Dash 3.5 Screen Assembly Replacement, Battery: paso 1, imagen 1 de 3 BLU Dash 3.5 Screen Assembly Replacement, Battery: paso 1, imagen 2 de 3 BLU Dash 3.5 Screen Assembly Replacement, Battery: paso 1, imagen 3 de 3
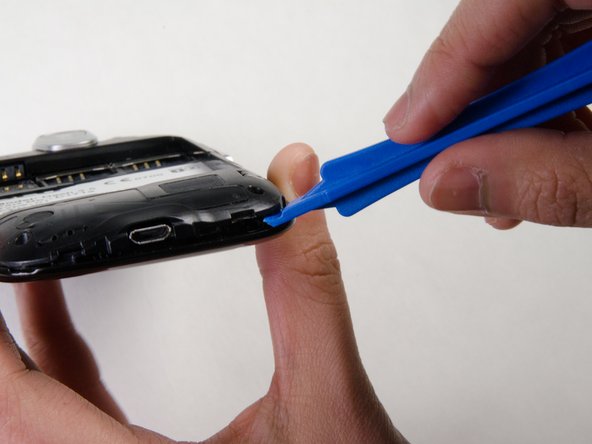
    • Start by locating the slot on the lower right corner of the device.

    • Insert the opening tool into the slot.

    • Pry the back cover off. Once the corner is off, continue around the perimeter of the phone pulling the back off with your fingers.

    • A fingernail can work to open the back in place of an opening tool.

  2. BLU Dash 3.5 Screen Assembly Replacement: paso 2, imagen 1 de 2 BLU Dash 3.5 Screen Assembly Replacement: paso 2, imagen 2 de 2
    • Locate the indentation at the bottom of the battery.

    • Insert your thumb and pull the battery out.

  3. BLU Dash 3.5 Screen Assembly Replacement, Volume and Lock Button: paso 3, imagen 1 de 2 BLU Dash 3.5 Screen Assembly Replacement, Volume and Lock Button: paso 3, imagen 2 de 2
    • Use the 000 Phillips screwdriver to remove the four 4.5 mm screws from the corners of the interior back panel.

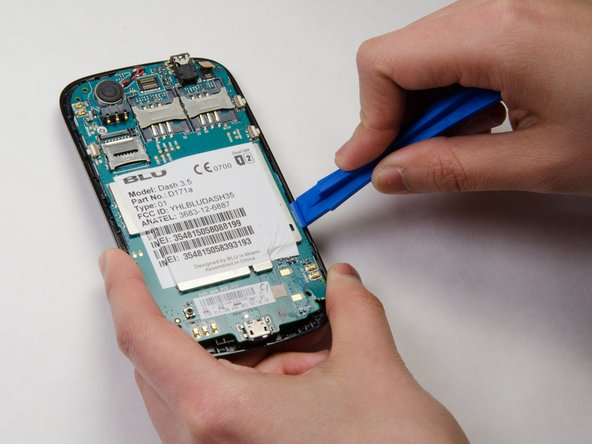
    • Use the opening tool to pry open the plastic back panel to expose the motherboard.

  4. BLU Dash 3.5 Screen Assembly Replacement: paso 4, imagen 1 de 2 BLU Dash 3.5 Screen Assembly Replacement: paso 4, imagen 2 de 2
    • Remove volume and lock buttons by lifting them gently from the casing.

  5. BLU Dash 3.5 Screen Assembly Replacement, Screen Assembly: paso 5, imagen 1 de 2 BLU Dash 3.5 Screen Assembly Replacement, Screen Assembly: paso 5, imagen 2 de 2
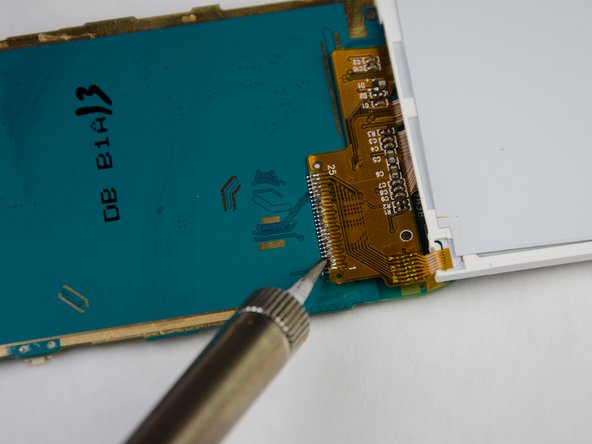
    • Use tweezers to lift the tab where the cable is connected.

    • Use the opening tool to pry the motherboard from the front face plate.

  6. BLU Dash 3.5 Screen Assembly Replacement: paso 6, imagen 1 de 2 BLU Dash 3.5 Screen Assembly Replacement: paso 6, imagen 2 de 2
    • Use opening tool to pry off the screen.

    • Use a soldering tool to melt the contact between the motherboard and the screen

    • Solder new screen contacts to the motherboard.

Conclusión

To reassemble your device, follow these instructions in reverse order.

Una persona más ha completado esta guía.

Jeffrey Dlugosz

Miembro Desde 09/29/15

104 Reputación

1 Guía escrita

Equipo

Ohio State, Team 1-2, Garvin Fall 2015 Miembro de Ohio State, Team 1-2, Garvin Fall 2015

OSU-GARVIN-F15S1G2

4 Miembros

2 Guías creadas

0 comentarios

Agregar Comentario

Ver Estadísticas:

Ultimas 24 horas: 0

Ultimos 7 días: 1

Ultimos 30 días: 6

Todo El Tiempo: 690