Esta versión puede contener ediciones incorrectas. Cambiar a la última instantánea verificada.
Qué necesitas
-
Este paso está sin traducir. Ayuda a traducirlo
-
Turn the laptop upside down.
-
Remove all ten screws using a 00 Phillips head screwdriver.
-
-
Este paso está sin traducir. Ayuda a traducirlo
-
Use a plastic opening tool to take the keyboard off of the base.
-
Gently take off the keyboard from the base.
-
-
-
Este paso está sin traducir. Ayuda a traducirlo
-
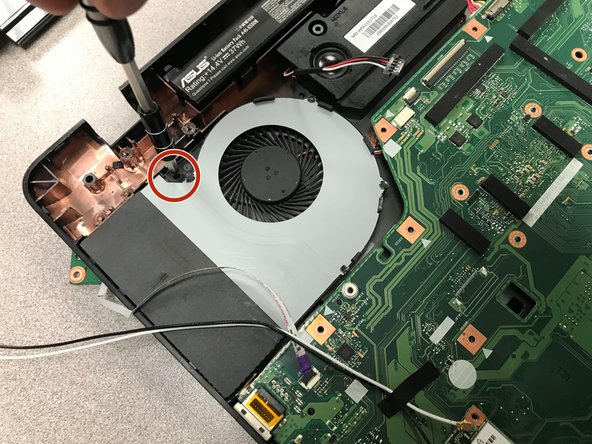
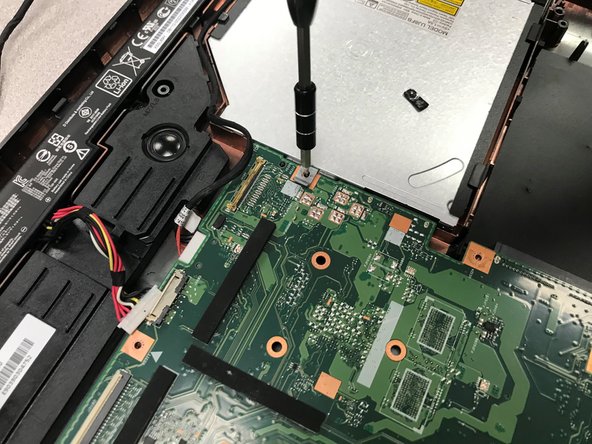
Unscrew the 11 screws that hold the motherboard to the base of the computer with a 00 Phillips screwdriver.
-
-
Este paso está sin traducir. Ayuda a traducirlo
-
Remove the one screw on the right side of the motherboard that keeps the cd tray in place.
-
-
Este paso está sin traducir. Ayuda a traducirlo
-
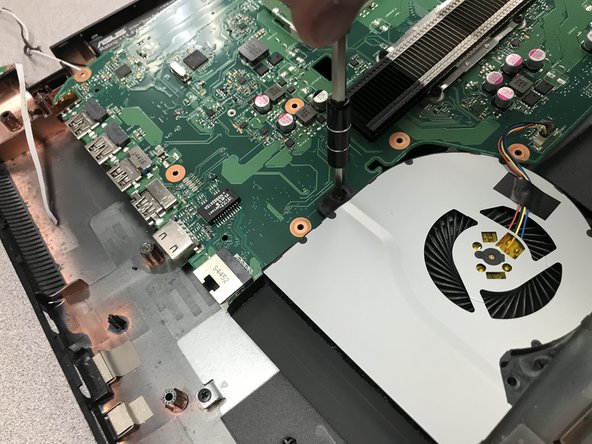
Gently take the motherboard off the base and flip it over.
-
Remove the screws securing the fan to the motherboard.
-
-
Este paso está sin traducir. Ayuda a traducirlo
-
Remove the Phillips #00 screw that holds the fan to the motherboard.
-
-
Este paso está sin traducir. Ayuda a traducirlo
-
On the bottom of the motherboard, locate the wire plugged in and pull it out to completely detach the fan from the motherboard.
-


Cancelar: No complete esta guía.
Una persona más ha completado esta guía.
Equipo

University of North Texas, Team S1-G1, Thomas Spring 2020 Miembro de University of North Texas, Team S1-G1, Thomas Spring 2020
UNT-THOMAS-S20S1G1
3 Miembros
3 Guías creadas