Esta versión puede contener ediciones incorrectas. Cambie a la última instantánea verificada.
Qué necesitas
-
Este paso está sin traducir. Ayuda a traducirlo
-
Using the JIS #0 Screwdriver, unscrew the ten 10 mm screws that hold the back casing in place
-
-
Este paso está sin traducir. Ayuda a traducirlo
-
Insert the flat edge of the opening tool in between the back casing to remove the back casing.
-
-
-
Este paso está sin traducir. Ayuda a traducirlo
-
Using the JIS #0 Screwdriver, remove the five 3.0 mm screws that hold down the hard drive casing.
-
-
Este paso está sin traducir. Ayuda a traducirlo
-
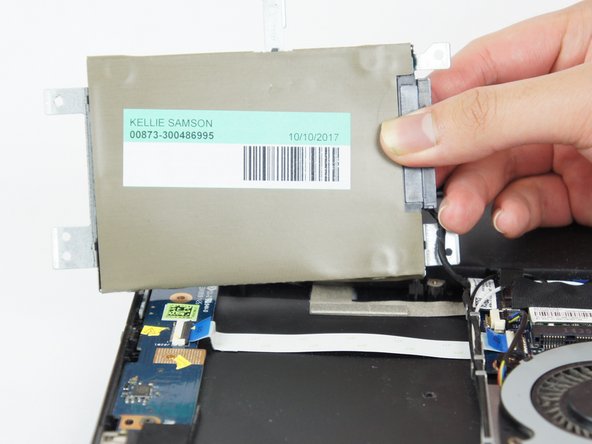
Lift the hard drive up and remove the power supply cable connected to it.
-
-
Este paso está sin traducir. Ayuda a traducirlo
-
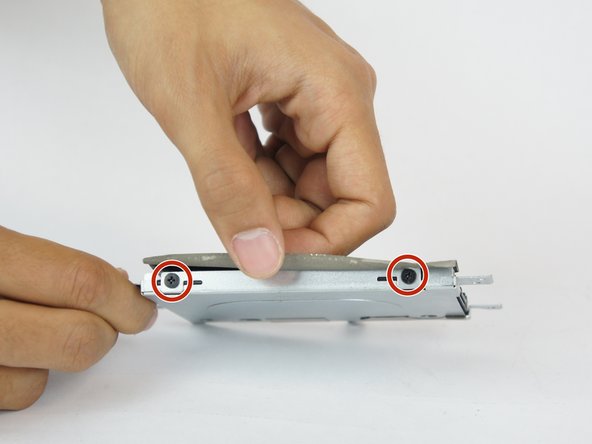
Carefully peel back and remove the plastic hard drive cover to reveal the two 3.0 mm screws on the hard drive casing.
-
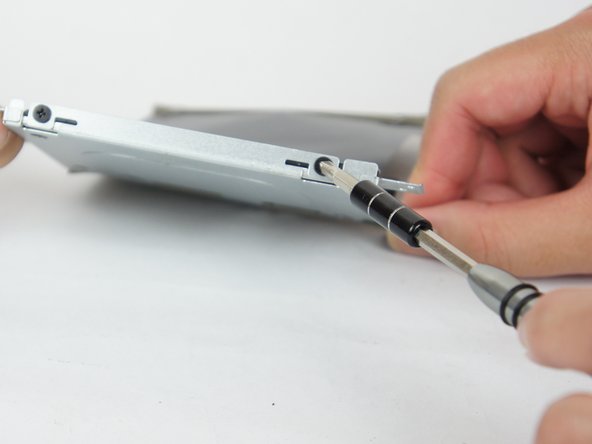
Using a JIS #0 screwdriver, unscrew the two 3.0 mm screws on the side of the metal casing to remove the hard drive itself.
-


Cancelar: No complete esta guía.
2 personas más completaron esta guía.

Equipo

USF Tampa, Team S5-G5, Eyestone Spring 2018 Miembro de USF Tampa, Team S5-G5, Eyestone Spring 2018
USFT-EYESTONE-S18S5G5
4 Miembros
5 Guías creadas