Qué necesitas
-
Este paso está sin traducir. Ayuda a traducirlo
-
This Transformer Pad Infinity has crossed the wrong desk and is about to be torn asunder. Let the Games Begin!
-
First, turn the power off :)
-
-
Este paso está sin traducir. Ayuda a traducirlo
-
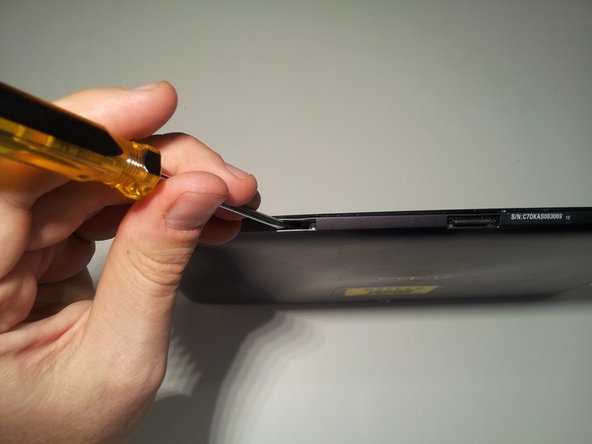
Insert a small flat head screwdriver into the 2 docking station guide ports on the bottom of the tablet.
-
There is a small tab inside the bottom of the port. Use your screwdriver to push the tab to the right until it clicks. This unlocks the bottom tabs that hold the screen to the casing.
-
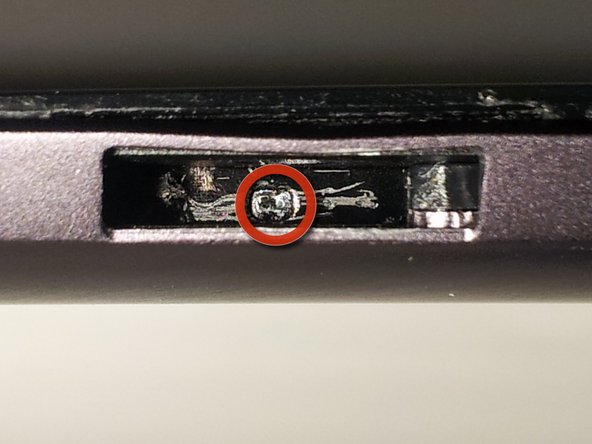
If you have successfully unlocked it, you should see a small arrow in the bottom of the port that points to the left. This indicates which way to push the tab to relock the tabs during re-assembly.
-
Be sure to unlock the tabs in both docking station guide ports.
-
-
Este paso está sin traducir. Ayuda a traducirlo
-
Here is a look at the locking assembly that you disengaged during Step 2.
-
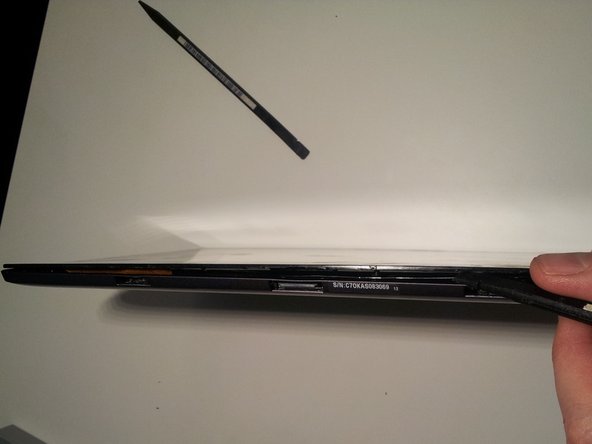
Next, use your spudger or other opening tool to push upward (towards the screen) on the small plastic tabs that are located on the top of the docking station guide ports. This should push the screen away from the frame and provide you enough room to insert the flat side of another spudger to start freeing the bottom of the screen from the case.
-
Work the flat end of your spudger along the bottom edge of the tablet to disengage the plastic tabs from the locking mechanism inside.
-
-
Este paso está sin traducir. Ayuda a traducirlo
-
Next, use your spudger to pop open the plastic tabs located on either side of the tablet. There are 4 tabs on each side located in the same position on each side.
-
BE CAREFUL! These tabs are fairly fragile. I managed to break just about every one of them on my tablet :(
-
I think the safest way to open them is to apply light pressure to the case and pry it away from the screen until the tab pops free (not just rip it open like I did.)
-
You should now be able to hinge the screen open along the top edge then disengage it completely from the body.
-
-
Este paso está sin traducir. Ayuda a traducirlo
-
Now that the hard part is done, lets see some guts.
-
Use your spudger to release the 2 digitizer ribbon cables from the mainboard. They are located on the left side of the tablet between the micro-HDMI and the microSD slot.
-
Use your spudger to release the LCD cable from the back of the LCD.
-
You should now be able to separate the screen assembly from the body of the tablet. Set it aside for later disection.
-
-
Este paso está sin traducir. Ayuda a traducirlo
-
The inside of your tablet will more than likely look less battle scarred than mine at this point. I decided to take my photos during the re-assembly stage - thus all the scars.
-
To remove the front facing camera (right,) use your spudger to unlock the ribbon cable and slide the camera out.
-
To remove the rear facing camera (left,) unplug it from it's socket by applying light lifting pressure to the back of the cable.
-
Remove the backup battery on the right side by unplugging the cable from the motherboard with your spudger and then prying it out. It is glued down lightly with adhesive.
-
-
-
Este paso está sin traducir. Ayuda a traducirlo
-
We can now remove the motherboard, daughterboard, and dock connector by removing 14 screws.
-
Be sure to unplug the speaker plug from the motherboard before removing it.
-
Flip The motherboard from the top edge of the tablet down (towards the battery) to reveal the battery connector. Unplug it with light pressure from your spudger.
-
Then disconnect the motherboard from the daughterboard by unlocking the ribbon cable on the back side of the daughterboard.
-
-
Este paso está sin traducir. Ayuda a traducirlo
-
To remove the battery, remove the 8 screws then work your spudger underneath the battery between the 2 cells to work it free of the adhesive that fastens it to the case.
-
-
Este paso está sin traducir. Ayuda a traducirlo
-
To remove the speaker, simply work your spudger underneath it and work it free of the adhesive that holds it to the case.
-
To remove the bottom screen attachment locking mechanism, remove the 8 screws and lift the pieces out.
-
-
Este paso está sin traducir. Ayuda a traducirlo
-
Now that we're left with a boring empty shell, let's return to the LCD assembly that we set aside in Step 5.
-
Remove the 4 screws. Then work your spudger underneath the edges of the LCD to separate it from the Gorilla Glass front. It has a light adhesive around all edges.
-
-
Este paso está sin traducir. Ayuda a traducirlo
-
With the LCD free, you should now be able to lay it out in a big pile of parts and the teardown is complete. Now let's see what's under all those heatsinks and tape.
-
-
Este paso está sin traducir. Ayuda a traducirlo
-
The back side of the motherboard offers very little of interest...
-
-
Este paso está sin traducir. Ayuda a traducirlo
-
The front side of the motherboard is where all the action is.
-
Tegra 3 quad core processor T33-P-A3
-
2x Elpida memory J4216EBBG-GNL-F
-
Realtek? ALCS631
-
Hynix H26M64002BNR e-NAND
-
-
Este paso está sin traducir. Ayuda a traducirlo
-
Close-ups.
-
That's all I've got. I apologize for any blurry pics as all I had on hand was my cell phone ( <3 Samsung Galaxy Note.) I hope your teardowns are far less destructive than mine was. Good Luck.
-
...and yes, it still works after reassembly. Thanks for asking.
-


33 comentarios
Does anyone know what the internal on/off switch does on the motherboard? Right next to the battery connector. How can you see that in a tear down and not mention it?
It is a master on/off switch. When the switch is flipped to the off position, the tablet will not operate. You can see the switch labels on the second picture of Step 13.
Matt -
Ya its for when your doing work inside the tablet your supposed to flick that off so you dont accidentally short anything. Like the on/off switch on your power supply on the back of your desktop
Thanks for this teardown! Could the "mushy" power / volume buttons be due to poor placement of the buttons / board? Could slight nudging of the board in one direction or the other help the "mushy" buttons?