Esta versión puede contener ediciones incorrectas. Cambie a la última instantánea verificada.
Qué necesitas
-
Este paso está sin traducir. Ayuda a traducirlo
-
Disconnect the dock and make sure the power is turned off.
-
Use plastic opening tool to pry screen up and remove the main tablet body from outer rim casing.
-
Be gentle with the plastic opening tool near charging port. The thinner plastic may break easily.
-
-
Este paso está sin traducir. Ayuda a traducirlo
-
Pull up on the black circuit board protector.
-
Turn off the hard power switch before working with the tablet. Use plastic tool to slide the switch to the position marked "off".
-
-
-
Este paso está sin traducir. Ayuda a traducirlo
-
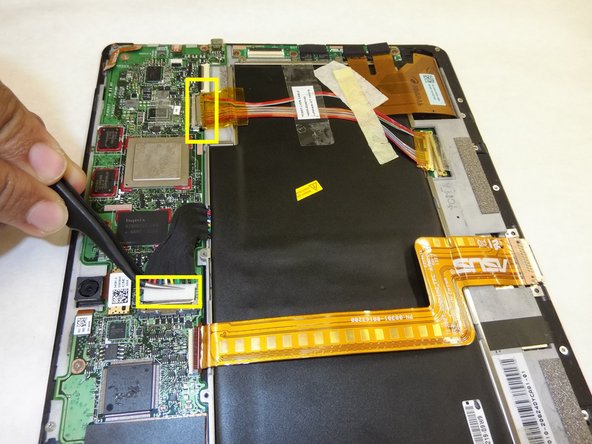
Use a Phillips #00 Screwdriver to remove the six 3mm screws that connect the upper part of the motherboard.
-
Use tweezers to remove red connecting wires. Remove the motherboard by lifting it upward.
-
-
Este paso está sin traducir. Ayuda a traducirlo
-
Use tweezers to pull out the gold flap connected to the front camera.
-
Pull the disconnected gold flap to take out the camera.
-


Equipo

IUPUI, Team S2-G2, Wilson Summer 2017 Miembro de IUPUI, Team S2-G2, Wilson Summer 2017
IUPUI-WILSON-SU17S2G2
3 Miembros
8 Guías creadas