Introducción
This is a very simple Teardown/Repair/ Upgrade, whatever you want to call it. But for the people who are new to repair like me, I'm going to break it down like Barney The Purple Dinosaur was teaching it to kindergardners. I'm doing this on the GX531GS but the disassembly is very similar on all of the Asus Zephyrus gaming laptops with the forward placed keyboard.
Qué necesitas
-
-
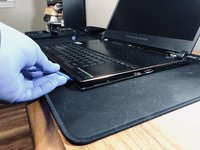
First, unplug anything that is plugged into the ports of the laptop.
-
Next, Shut Down the laptop completely.
-
Make sure you have the tools you need and make sure you have space to work unobstructed.
-
-
-
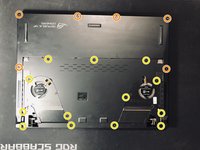
Next, flip your laptop upside down and remove the 2 sets of screws highlighted in yellow with your Phillips 0 screwdriver, There are 2 sets of 2.
-
Then open the laptop to roughly 45 degrees and place it on its side as shown. From this position you can wiggle the dust cover off.
-
If you are having trouble then open or close the lid a little further. When you have it in the right position it will require no force, it will slide right off.
-
-
-
Now remove the 13 Philips 0 screws marked in yellow .
-
Next remove the 6 T5 Torx screws circled in orange
-
flip the laptop over and you are going to gently pry the hinge cover off.
-
Once loose, carefully disconnect the 2 cables marked in yellow that are attaching it to the motherboard.
-
-
-
-
It should now look like this.
-
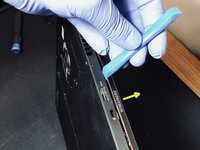
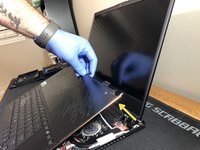
Now flip open the lid. Use your opening tool to pry apart the seam shown.
-
Work your way around the seam until it is loose all the way around but do not lift the keyboard off yet.
-
-
-
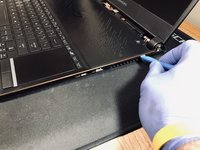
Very carefully lift the keyboard from the side closest to the screen while not pulling the attaching cables too tight
-
.Once you have space to reach in, then you can unclip the 4 cables from their connectors marked with yellow boxes here and then set the entire keyboard assembly to the side.
-
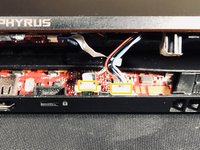
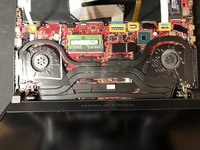
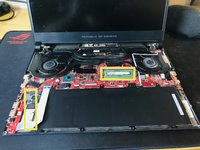
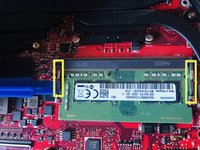
Your laptop should look like this now.
-
The yellow box on the left is around the SSD and the one on the right is the RAM.
-
-
-
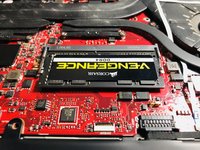
Push the retaining clip on each side of the RAM module to the left and right away from it. This will release the RAM and it will pop up at a 45 degree angle. You can now slide it out.
-
Next slide your new stick of RAM in and push it down until it clicks.
-
-
-
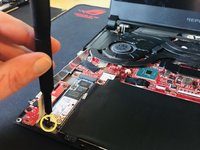
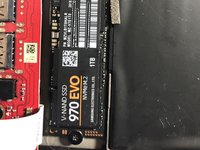
Next, fold the ribbon out of the way that is covering the SSD and remove the SSD retaining screw.
-
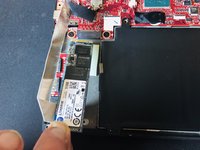
Now gently pry up on that same end until it lifts off the sticky thermal pad underneath. It doesn't take much. Once you are clear of the pad you can pull the SSD out of it's M.2 socket.
-
Now install your new SSD and secure it with the retaining screw.
-
-
-
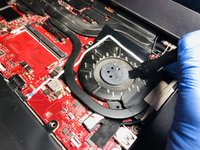
While it is apart, clean your fans from above and underneath. Get all the dust out you can. Once done you can start putting it back together in reverse order.
-


To reassemble your device, follow these instructions in reverse order.
To reassemble your device, follow these instructions in reverse order.
Cancelar: No complete esta guía.
28 personas más completaron esta guía.

34 comentarios
What about the software on the old drive, operating system and all? How to clone the m.2 drive?
I used an external m.2 enclosure like the one I’ll link below and the free maxium reflect software to clone my existing drive. Once the swap is completed you can use the enclosure with your old ssd as an external drive if you want. https://www.amazon.com/Sabrent-NGFF-Alum...
The $12 or $45 one? There are two on that Amazon link
The product on that link has changed but I would use the $50 one depending on the SSD you buy.
Thank you! It worked for me