Introducción
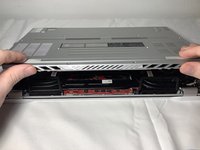
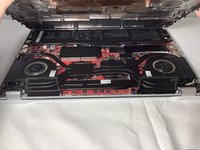
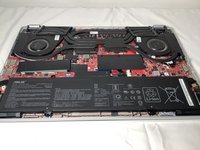
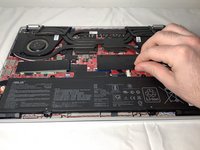
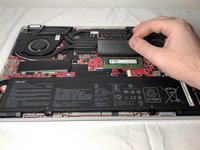
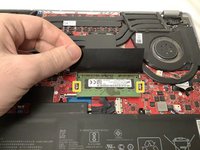
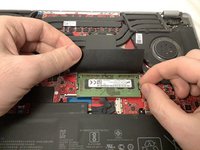
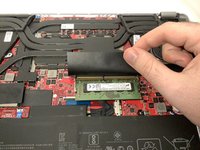
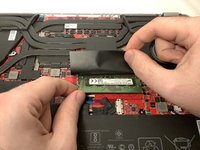
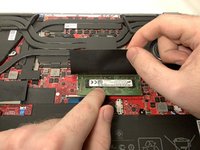
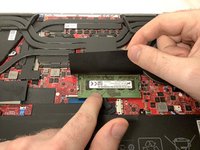
The Zephyrus G14 has two RAM slots. The first slot of Ram is soldered to the board. The second slot of Ram is accessible by taking off the backplate of the laptop. It is necessary to have these two slots of Ram filled can take advantage of Dual-Channel Memory. Dual-Channel Memory allows the Ram to function at its full potential in gaming and productivity applications. To take advantage of Dual-Channel Memory, ensure that the replacement stick is the same size and speed as the soldered stick.
Qué necesitas
-
-
-
Once the RAM clicks into place, check to make sure that the RAM is locked in place.
1. 2020-2021 Models (like GA401):
These G14 models (such as the GA401 series) have one slot for upgradeable RAM in addition to the soldered 8GB (or 16GB) RAM. This means you can add or upgrade the RAM in these versions, but one of the RAM modules will still be soldered.
2. 2022-2023 Models (like GA503):
In later models, like the GA503 series, ASUS switched back to soldering all RAM. This means that the RAM is non-upgradable and cannot be replaced or expanded.
3. 2024 Models (like GA403):
For the GA403 series (which includes your G14.R94060 model), the RAM is entirely soldered to the motherboard. There is no slot for expansion or replacement.
-


To reassemble your device, follow these instructions in reverse order.
To reassemble your device, follow these instructions in reverse order.
Cancelar: No complete esta guía.
6 personas más completaron esta guía.

Equipo

Embry-Riddle Aeronautical University, Team S7-G7, Rauch Spring 2021 Miembro de Embry-Riddle Aeronautical University, Team S7-G7, Rauch Spring 2021
ERAU-RAUCH-S21S7G7
1 Miembro
3 Guías creadas
Un comentario
Something that might be helpful for this guide is including the RAM specifications needed for an upgrade if people are looking for information on what to buy.
Otherwise, great guide!