Introducción
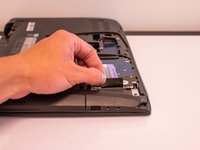
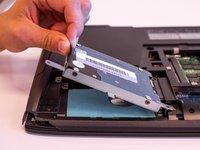
The hard drive is essential to the Laptop’s ability to store information. If your laptop's hard drive begins to make strange clicking noises and crashes frequently use this guide to replace it.
Caution!
- Keep the hard drive away from magnets. Magnets can wipe data from the drive and render it unrecoverable.
- Keep the hard drive away from any and all liquids. Similar to magnets, water damage can prevent data recovery.
Qué necesitas
-
-
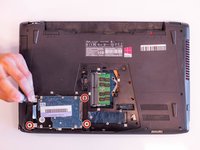
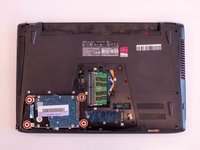
Remove the 16 mm and 9 mm screws on the small panel on the bottom of the laptop using the Phillips #1 screwdriver.
-
-


Casi Terminas!
To reassemble your device, follow these instructions in reverse order.
Conclusión
To reassemble your device, follow these instructions in reverse order.
Equipo

Embry-Riddle Aeronautical University, Team S15-G3, Lamothe Fall 2019 Miembro de Embry-Riddle Aeronautical University, Team S15-G3, Lamothe Fall 2019
ERAU-LAMOTHE-F19S15G3
4 Miembros
6 Guías creadas