Esta versión puede contener ediciones incorrectas. Cambie a la última instantánea verificada.
Qué necesitas
-
Este paso está sin traducir. Ayuda a traducirlo
-
Lift up the rubber tab located in the upper-right corner of the backing plate.
-
-
Este paso está sin traducir. Ayuda a traducirlo
-
Use a Phillips #1 screwdriver to remove the 5.2 mm screw behind the rubber tap.
-
-
Este paso está sin traducir. Ayuda a traducirlo
-
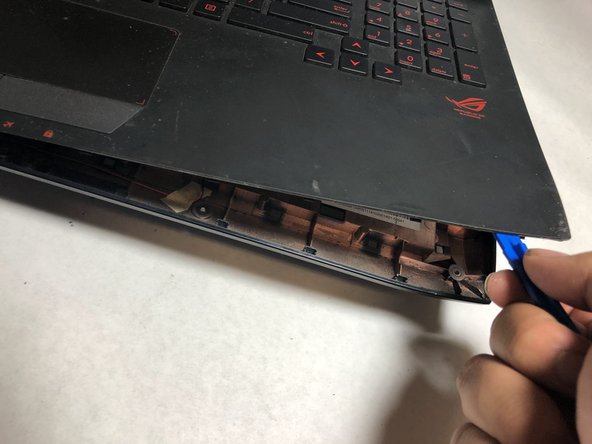
Carefully pull the backing plate off. If you have a pry tool, you can pry on the edges carefully.
-
-
Este paso está sin traducir. Ayuda a traducirlo
-
Use a Phillips #1 screwdriver to remove the 5mm screw on the right side.
-
-
-
Este paso está sin traducir. Ayuda a traducirlo
-
Pull out the optical drive to revel the screws holding the laptop cover.
-
-
Este paso está sin traducir. Ayuda a traducirlo
-
Remove all 10 5.2mm Phillips screws holding the main back cover using the Phillips #1 screwdriver.
-
-
Este paso está sin traducir. Ayuda a traducirlo
-
Remove the four 5.2mm screws directly behind the backing plate using the Phillips #1 screwdriver.
-
-
Este paso está sin traducir. Ayuda a traducirlo
-
Remove the two 6.8mm Phillips screws directly below the vent covers using the Phillips #1 screwdriver.
-
-
Este paso está sin traducir. Ayuda a traducirlo
-
Carefully, pull on the side tabs to release the RAM card.
-


Equipo

UC Davis, Team S7-G4, Lore Fall 2018 Miembro de UC Davis, Team S7-G4, Lore Fall 2018
UCD-LORE-F18S7G4
2 Miembros
3 Guías creadas