Introducción
This guide will show you how to replace the hard drive from your Asus ROG FX60VM laptop.
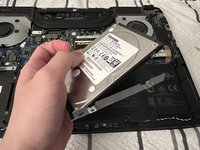
The hard drive is a component that stores and retrieves data in your computer. If your hard drive is running low on storage or failing (making irregular noises or constantly crashing), it may be time to replace your hard drive.
However, before you start, make sure you've made a copy of your data so you don’t lose it while you’re doing the replacement. Also be sure to power off your device and unplug from the power outlet before you begin the repair.
Qué necesitas
-
-
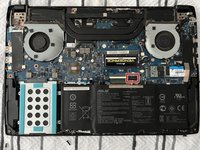
Before disassembling the laptop, turn the laptop off and make sure it's unplugged from the power supply.
-
-
-
Herramienta utilizada en este paso:Halberd Spudger$2.99
-
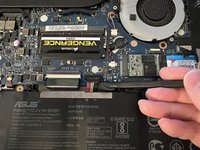
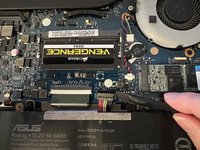
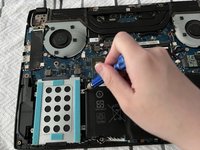
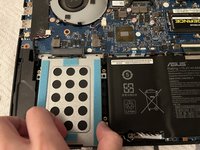
Put the tip of Halberd spudger under the battery connector and lift it gently to disconnect it from the motherboard.
-


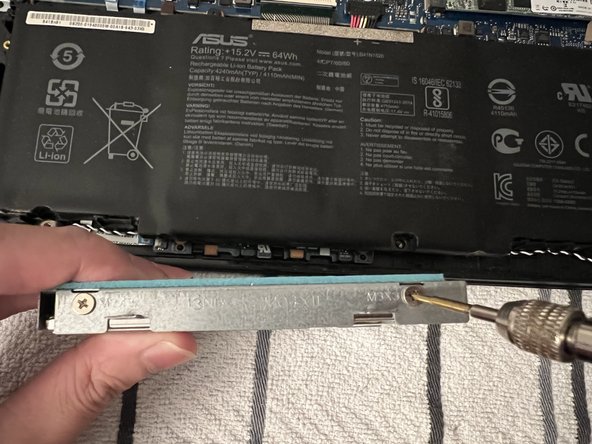

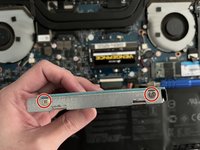

To reassemble your device, follow these instructions in reverse order.
After install a new HDD or SSD, for better performace, initialize the new disk.
Take your e-waste to an R2 or e-Stewards certified recycler.
To reassemble your device, follow these instructions in reverse order.
After install a new HDD or SSD, for better performace, initialize the new disk.
Take your e-waste to an R2 or e-Stewards certified recycler.
Cancelar: No complete esta guía.
Una persona más ha completado esta guía.

Equipo

York University, Team M-13, Allen Summer 2022 Miembro de York University, Team M-13, Allen Summer 2022
YORK-ALLEN-SU22SMG13
1 Miembro
1 Guía escrita
Un comentario
Thank you so much JingZhao Liang for the concise and to the point guide. It's easy to follow and I am very impressed that you mentioned how to dispose the e-waste properly in conclusion part.