Esta versión puede contener ediciones incorrectas. Cambie a la última instantánea verificada.
Qué necesitas
-
Este paso está sin traducir. Ayuda a traducirlo
-
Using the Jimmy tool, gently wedge it into the seam of the device at the side.
-
Pry the Jimmy tool gently all around the seam. Use up and down motions until the back panel is detached.
-
-
Este paso está sin traducir. Ayuda a traducirlo
-
From the top of the tablet, locate the white cable connector.
-
Use the blue plastic opening tool to push the white cable connector out of the port.
-
-
-
Este paso está sin traducir. Ayuda a traducirlo
-
Use the Phillips #000 screwdriver to remove the seven screws.
-
There should be two silver and five black screws for a total of seven screws.
-
-
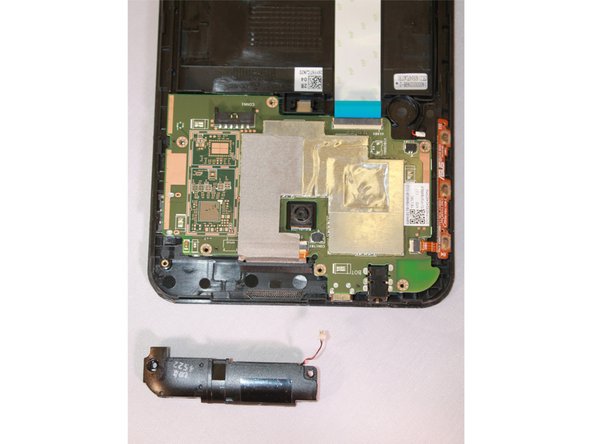
Este paso está sin traducir. Ayuda a traducirlo
-
Use the slender, metal spudger tool to gently lift up the edge of the speaker to remove the device.
-


Cancelar: No complete esta guía.
Una persona más ha completado esta guía.

Equipo

Eastern Washington University, Team 2-3, Plummer Fall 2015 Miembro de Eastern Washington University, Team 2-3, Plummer Fall 2015
EWU-PLUMMER-F15S2G3
5 Miembros
9 Guías creadas