Saltar al contenido principal

Asus G75VW-BHI7N07 Trackpad Buttons Replacement

Qué necesitas

  1. Asus G75VW-BHI7N07 Trackpad Buttons Replacement, Trackpad Buttons: paso 1, imagen 1 de 3 Asus G75VW-BHI7N07 Trackpad Buttons Replacement, Trackpad Buttons: paso 1, imagen 2 de 3 Asus G75VW-BHI7N07 Trackpad Buttons Replacement, Trackpad Buttons: paso 1, imagen 3 de 3
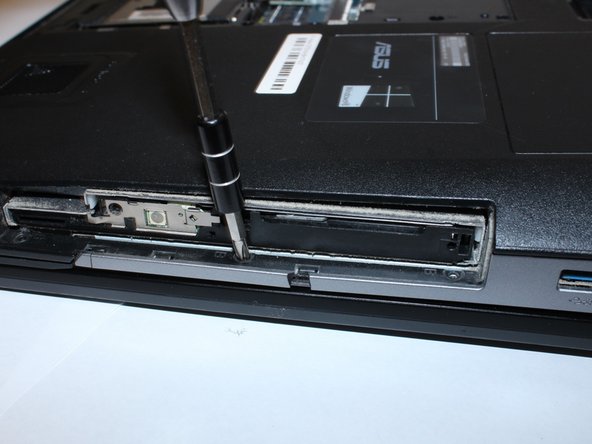
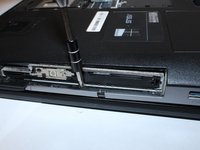
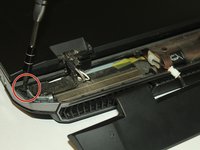
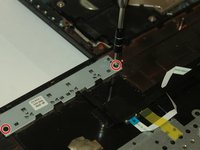
    • Remove the 5 (9 mm screws) around the outside edges of the back cover with the PH1 Phillips-head screwdriver.

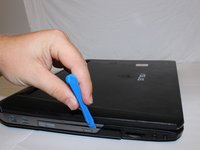
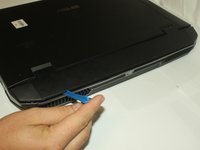
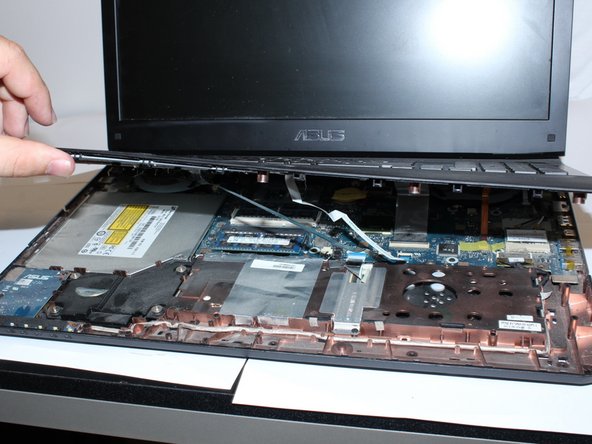
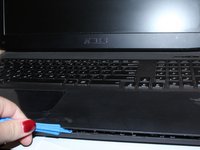
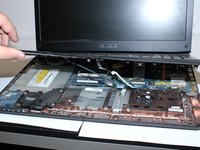
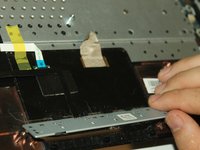
    • Lift off the back cover using the opening tool.

  2. Asus G75VW-BHI7N07 Trackpad Buttons Replacement: paso 2, imagen 1 de 3 Asus G75VW-BHI7N07 Trackpad Buttons Replacement: paso 2, imagen 2 de 3 Asus G75VW-BHI7N07 Trackpad Buttons Replacement: paso 2, imagen 3 de 3
    • Remove the 10 (9 mm) screws marked 'A' using the PH1 Phillips-head screwdriver.

    • Remove the battery by pressing the slide release button.

    • Remove 2 more (9 mm) 'A' marked screws within the battery compartment using the PH1 Phillips-head screwdriver.

  3. Asus G75VW-BHI7N07 Trackpad Buttons Replacement: paso 3, imagen 1 de 2 Asus G75VW-BHI7N07 Trackpad Buttons Replacement: paso 3, imagen 2 de 2
    • Remove the cover for the disc drive with the opening tool.

    • Remove the 6 (4 mm) 'B' marked screws with the PH1 Phillips-head screwdriver. (3 screws are in the battery compartment and 3 are under the disc drive cover)

  4. Asus G75VW-BHI7N07 Trackpad Buttons Replacement: paso 4, imagen 1 de 2 Asus G75VW-BHI7N07 Trackpad Buttons Replacement: paso 4, imagen 2 de 2
    • Take off the henge cover using the opening tool.

    • Remove the 2 black outside edge (9 mm) screws with the J0 Phillips screwdriver.

  5. Asus G75VW-BHI7N07 Trackpad Buttons Replacement: paso 5, imagen 1 de 3 Asus G75VW-BHI7N07 Trackpad Buttons Replacement: paso 5, imagen 2 de 3 Asus G75VW-BHI7N07 Trackpad Buttons Replacement: paso 5, imagen 3 de 3
    • Pry open the keypad platform with the opening tool.

    • You will need to lift the keypad platform with your hands.

    • Remove all electrical connections using your hands.

  6. Asus G75VW-BHI7N07 Trackpad Buttons Replacement: paso 6, imagen 1 de 2 Asus G75VW-BHI7N07 Trackpad Buttons Replacement: paso 6, imagen 2 de 2
    • Take the 2 (3 mm) screws out of the trackpad using the PH1 Phillips screwdriver.

    • Remove the trackpad buttons using your hands.

Conclusión

To reassemble your device, follow these instructions in reverse order.

Una persona más ha completado esta guía.

0Guía Comentarios

Agregar Comentario

Ver Estadísticas:

Ultimas 24 horas: 1

Ultimos 7 días: 3

Ultimos 30 días: 21

Todo El Tiempo: 1,398