Introducción
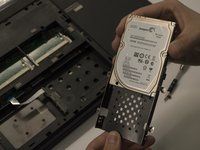
This guide will teach you how to reach the hard drive of your Asus. The hard drive is required for the computer to function, so knowing how to replace your hard drive is vital to computer repair. If you're looking to upgrade the storage capabilities of your computer or your computer's hard drive isn't functioning, the guide will give you the tools to do so.
Qué necesitas
-
-
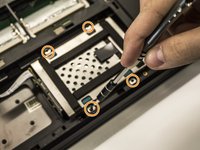
Using a flathead screwdriver, spudger, or large coin such as a quarter, remove the large screw on the bottom of the laptop.
-
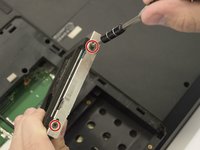
After the screw is removed, take off the back panel.
-
-


To reassemble your device, follow these instructions in reverse order.
To reassemble your device, follow these instructions in reverse order.
Cancelar: No complete esta guía.
Una persona más ha completado esta guía.
Equipo

Cal Poly, Team 5-10, Maness Spring 2015 Miembro de Cal Poly, Team 5-10, Maness Spring 2015
CPSU-MANESS-S15S5G10
4 Miembros
6 Guías creadas