Saltar al contenido principal

Asus G73JW-XT1 Hard Drive Replacement

Qué necesitas

  1. Asus G73JW-XT1 Hard Drive Replacement, Battery: paso 1, imagen 1 de 1
    • Flip the device over so the battery port is easy to access.

  2. Asus G73JW-XT1 Hard Drive Replacement: paso 2, imagen 1 de 2 Asus G73JW-XT1 Hard Drive Replacement: paso 2, imagen 2 de 2
    • Slide the left slider to the left so that it locks in place.

    • Slide the right slider to the right while pushing the battery away from you. The battery should disconnect.

  3. Asus G73JW-XT1 Hard Drive Replacement, Hard Drive: paso 3, imagen 1 de 3 Asus G73JW-XT1 Hard Drive Replacement, Hard Drive: paso 3, imagen 2 de 3 Asus G73JW-XT1 Hard Drive Replacement, Hard Drive: paso 3, imagen 3 de 3
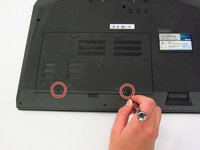
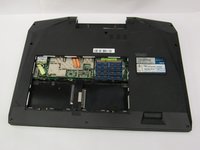
    • Remove the two 5.5 mm Phillips #0 screws from the back cover.

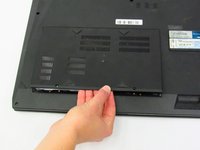
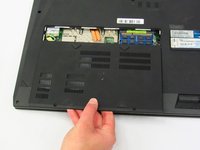
    • Gently lift and remove the back cover.

  4. Asus G73JW-XT1 Hard Drive Replacement: paso 4, imagen 1 de 3 Asus G73JW-XT1 Hard Drive Replacement: paso 4, imagen 2 de 3 Asus G73JW-XT1 Hard Drive Replacement: paso 4, imagen 3 de 3
    • Remove the four 5.5 mm Phillips #0 screws.

    • Gently lift the hard drive starting on the far side.

Conclusión

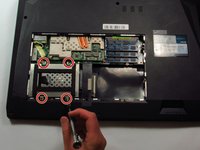
To reassemble your device, follow these instructions in reverse order.

0 comentarios

Agregar Comentario

Ver Estadísticas:

Ultimas 24 horas: 0

Ultimos 7 días: 1

Ultimos 30 días: 1

Todo El Tiempo: 213