Saltar al contenido principal

Asus Chromebook C300MA DB01 Repair Screen Replacement

Qué necesitas

  1. Asus Chromebook C300MA DB01 Repair Screen Replacement, Screen: paso 1, imagen 1 de 3 Asus Chromebook C300MA DB01 Repair Screen Replacement, Screen: paso 1, imagen 2 de 3 Asus Chromebook C300MA DB01 Repair Screen Replacement, Screen: paso 1, imagen 3 de 3
    • Use the Jimmy tool from the iFixit Pro Tech Toolkit, or a comparable tool for prying, to pop off the hinge cover.

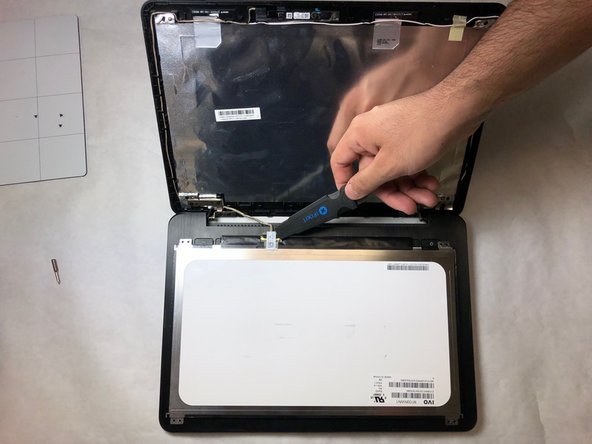
  2. Asus Chromebook C300MA DB01 Repair Screen Replacement: paso 2, imagen 1 de 2 Asus Chromebook C300MA DB01 Repair Screen Replacement: paso 2, imagen 2 de 2
    • Run the tool along the edges of the screen frame to free it from its snap connectors.

    • Remove the screen frame by hand.

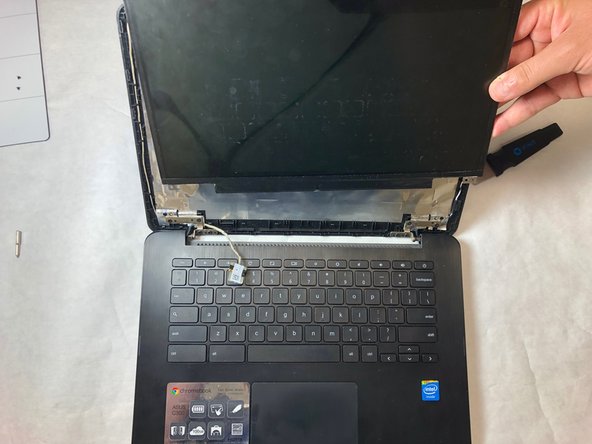
  3. Asus Chromebook C300MA DB01 Repair Screen Replacement: paso 3, imagen 1 de 3 Asus Chromebook C300MA DB01 Repair Screen Replacement: paso 3, imagen 2 de 3 Asus Chromebook C300MA DB01 Repair Screen Replacement: paso 3, imagen 3 de 3
    • Use a Phillips head screwdriver to remove the four screws on each corner of the screen.

    • Separate the screen from the top of the Chromebook.

    • Avoid pulling the screen too far away from the device. There is a wire connector at the bottom.

    • Use the screwdriver to lift the latch on the wire jack.

    • Remove the wires by hand and detach the screen from the device.

Conclusión

To reassemble your device, follow these instructions in reverse order.

Earl Gill IV

Miembro Desde 04/01/19

193 Reputación

2 Guías creadas

Equipo

IUPUI, Team S10-G10, Wilson Spring 2019 Miembro de IUPUI, Team S10-G10, Wilson Spring 2019

IUPUI-WILSON-S19S10G10

3 Miembros

3 Guías creadas

0 comentarios

Agregar Comentario

Ver Estadísticas:

Ultimas 24 horas: 0

Ultimos 7 días: 0

Ultimos 30 días: 0

Todo El Tiempo: 67