Saltar al contenido principal

Asus A52F XE2 Lower Case Replacement

Qué necesitas

  1. Asus A52F XE2 Lower Case Replacement, Battery: paso 1, imagen 1 de 2 Asus A52F XE2 Lower Case Replacement, Battery: paso 1, imagen 2 de 2
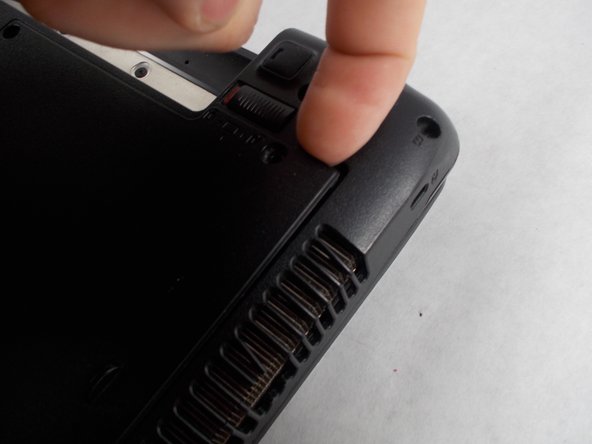
    • Place the laptop face down with the battery facing away from you.

    • Locate the two buttons next to the battery.

    • Slide the right slider to the unlocked (red) position.

  2. Asus A52F XE2 Lower Case Replacement: paso 2, imagen 1 de 2 Asus A52F XE2 Lower Case Replacement: paso 2, imagen 2 de 2
    • Hold the left button to the left.

    • Slide the battery with your other hand away from you and it should disconnect.

  3. Asus A52F XE2 Lower Case Replacement, Lower Case: paso 3, imagen 1 de 3 Asus A52F XE2 Lower Case Replacement, Lower Case: paso 3, imagen 2 de 3 Asus A52F XE2 Lower Case Replacement, Lower Case: paso 3, imagen 3 de 3
    • Remove the five Phillips # 0 screws from the back panel.

    • Using your finger or a plastic spudger start to carefully pry up the back planel.

  4. Asus A52F XE2 Lower Case Replacement: paso 4, imagen 1 de 2 Asus A52F XE2 Lower Case Replacement: paso 4, imagen 2 de 2
    • Slide the back panel away and remove the panel.

Conclusión

To reassemble your device, follow these instructions in reverse order.

Una persona más ha completado esta guía.

Michael Benson

Miembro Desde 03/08/17

149 Reputación

1 Guía escrita

Equipo

0 comentarios

Agregar Comentario

Ver Estadísticas:

Ultimas 24 horas: 0

Ultimos 7 días: 1

Ultimos 30 días: 4

Todo El Tiempo: 395