Introducción
Is the speaker on your answering machine not working well? This is the guide for you!
Qué necesitas
-
-
Turn the base over. You will see four 11mm Phillips #0 screws, one in each corner.
-
Use a screwdriver to remove all four 11mm Phillips #0 screws.
-
-
-
-
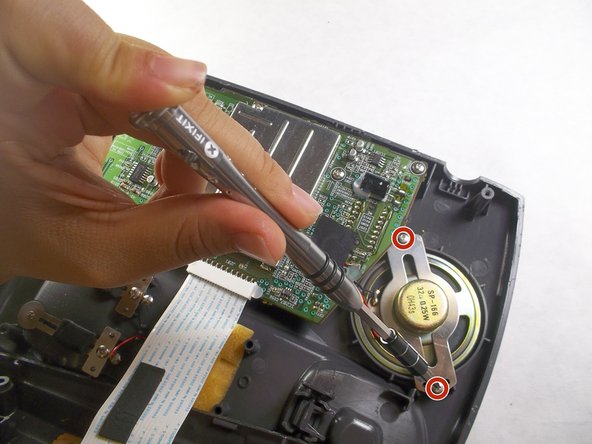
Locate the speaker at the top left of the base as pictured. It is the silver, conical component. Two 7mm Phillips #0 screws hold the speaker in place.
-
Use a screwdriver to remove the two 7mm Phillips #0 screws.
-
-
-
Solder your replacement speaker into the circuit. For assistance with soldering check out the iFixit Solder and Desolder Guide.
-


To reassemble your device, follow these instructions in reverse order.
To reassemble your device, follow these instructions in reverse order.
Equipo

IUPUI, Team 3-3, Harley Fall 2016 Miembro de IUPUI, Team 3-3, Harley Fall 2016
IUPUI-HARLEY-F16S3G3
4 Miembros
17 Guías creadas