Saltar al contenido principal

Anker Soundcore Flare Mini Audio Drivers Replacement

Qué necesitas

  1. Anker Soundcore Flare Mini Audio Drivers Replacement, Bottom Cover: paso 1, imagen 1 de 3 Anker Soundcore Flare Mini Audio Drivers Replacement, Bottom Cover: paso 1, imagen 2 de 3 Anker Soundcore Flare Mini Audio Drivers Replacement, Bottom Cover: paso 1, imagen 3 de 3
    • The rubber cover of the speaker is glued down.

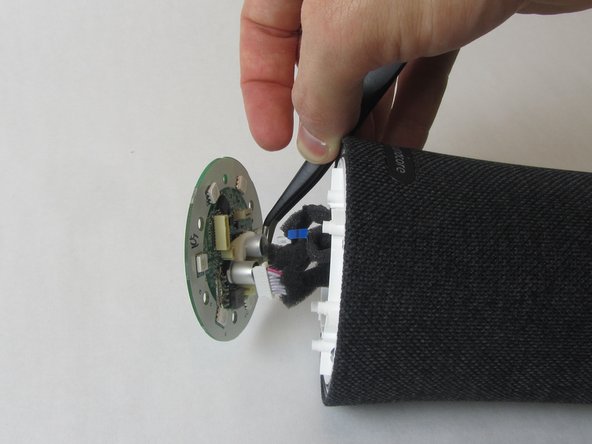
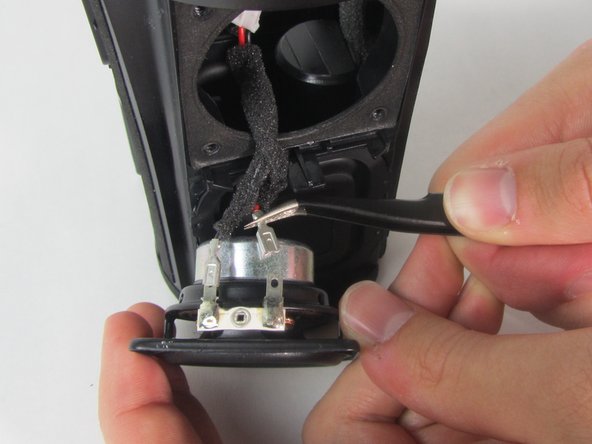
    • Use precision tweezers to peel the rubber cover off of the bottom of the speaker.

  2. Anker Soundcore Flare Mini Audio Drivers Replacement: paso 2, imagen 1 de 3 Anker Soundcore Flare Mini Audio Drivers Replacement: paso 2, imagen 2 de 3 Anker Soundcore Flare Mini Audio Drivers Replacement: paso 2, imagen 3 de 3
    • Remove six 10 mm screws holding the plastic cover in place using a Phillips #000 screwdriver.

    • Use your hand to pull the plastic cover off the bottom of the speaker.

  3. Anker Soundcore Flare Mini Audio Drivers Replacement, Motherboard: paso 3, imagen 1 de 3 Anker Soundcore Flare Mini Audio Drivers Replacement, Motherboard: paso 3, imagen 2 de 3 Anker Soundcore Flare Mini Audio Drivers Replacement, Motherboard: paso 3, imagen 3 de 3
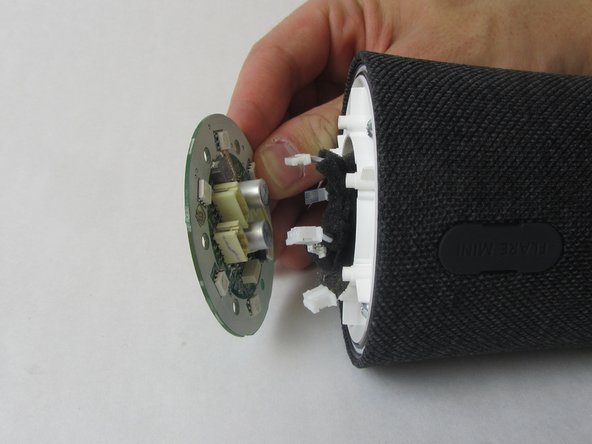
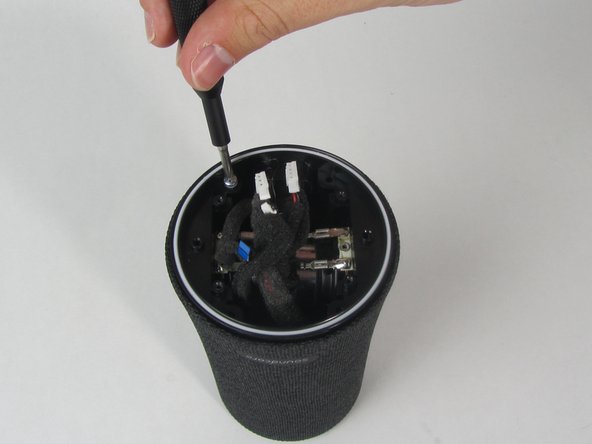
    • Remove the single 10 mm screw holding the motherboard in place using a Phillips #000 screwdriver.

    • Lift the motherboard up.

    • The motherboard is still attached to several wires underneath.

  4. Anker Soundcore Flare Mini Audio Drivers Replacement: paso 4, imagen 1 de 3 Anker Soundcore Flare Mini Audio Drivers Replacement: paso 4, imagen 2 de 3 Anker Soundcore Flare Mini Audio Drivers Replacement: paso 4, imagen 3 de 3
    • Use precision tweezers to firmly grasp the five power connectors and detach them from the back of the motherboard.

    • When removing the power connectors, do not pull the wires themselves.

    • Remove the motherboard from the speaker.

  5. Anker Soundcore Flare Mini Audio Drivers Replacement, Waterproof Outer Shell: paso 5, imagen 1 de 3 Anker Soundcore Flare Mini Audio Drivers Replacement, Waterproof Outer Shell: paso 5, imagen 2 de 3 Anker Soundcore Flare Mini Audio Drivers Replacement, Waterproof Outer Shell: paso 5, imagen 3 de 3
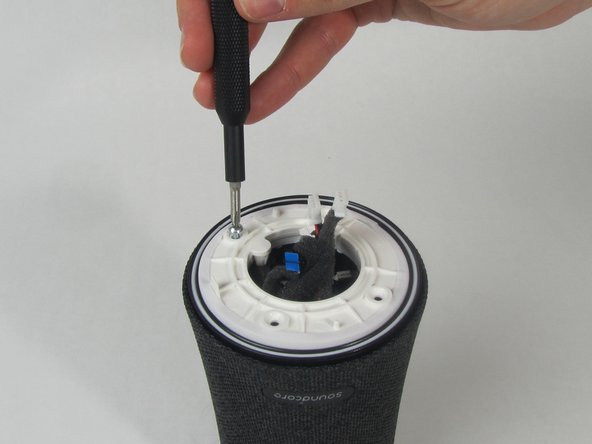
    • Remove the four 11 mm screws from the white plastic cover using a Phillips #1 screwdriver.

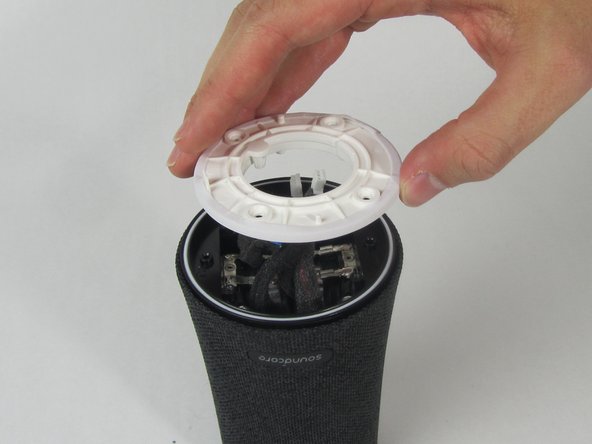
    • Remove the white plastic cover from the speaker.

  6. Anker Soundcore Flare Mini Audio Drivers Replacement: paso 6, imagen 1 de 2 Anker Soundcore Flare Mini Audio Drivers Replacement: paso 6, imagen 2 de 2
    • Remove the other four 11 mm screws holding the outer shell in place with a Phillips #1 screwdriver.

  7. Anker Soundcore Flare Mini Audio Drivers Replacement: paso 7, imagen 1 de 1
    • Pull the charging port away from the side of the speaker.

  8. Anker Soundcore Flare Mini Audio Drivers Replacement: paso 8, imagen 1 de 3 Anker Soundcore Flare Mini Audio Drivers Replacement: paso 8, imagen 2 de 3 Anker Soundcore Flare Mini Audio Drivers Replacement: paso 8, imagen 3 de 3
    • Use a spudger to loosen the cover from the inner components of the speaker.

    • Slide the cover completely off.

    • One wire will still be connected to the shell.

  9. Anker Soundcore Flare Mini Audio Drivers Replacement, Audio Drivers: paso 9, imagen 1 de 3 Anker Soundcore Flare Mini Audio Drivers Replacement, Audio Drivers: paso 9, imagen 2 de 3 Anker Soundcore Flare Mini Audio Drivers Replacement, Audio Drivers: paso 9, imagen 3 de 3
    • There are two drivers—one on each side of the speaker.

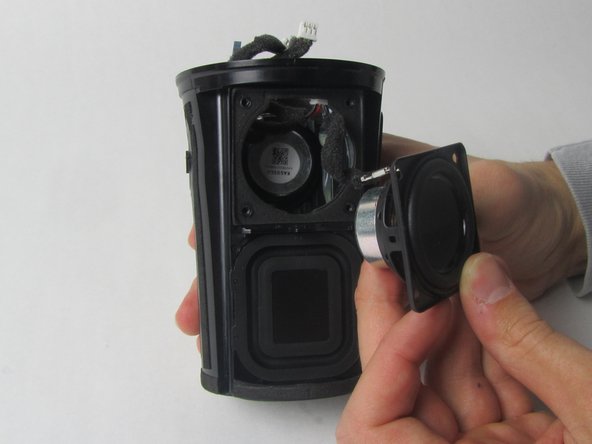
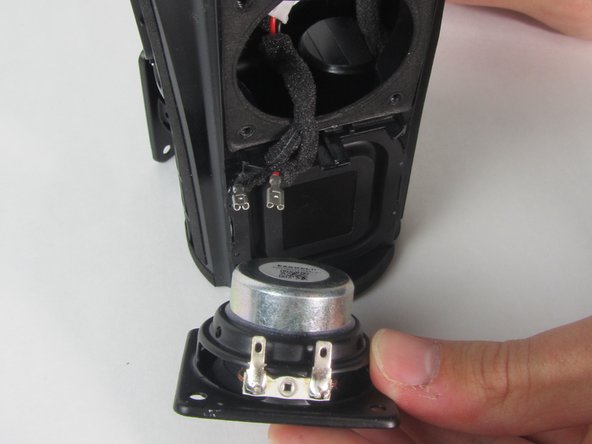
    • Use a Phillips #1 screwdriver to remove the four 11 mm screws from one driver.

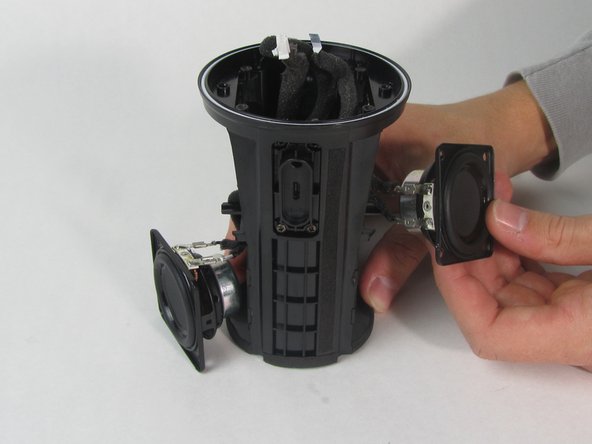
    • Use your hand to pull the driver out of the device.

    • Repeat this step with the other driver.

  10. Anker Soundcore Flare Mini Audio Drivers Replacement: paso 10, imagen 1 de 3 Anker Soundcore Flare Mini Audio Drivers Replacement: paso 10, imagen 2 de 3 Anker Soundcore Flare Mini Audio Drivers Replacement: paso 10, imagen 3 de 3
    • Use precision tweezers to detach the two wire connectors from the driver.

    • Both drivers are connected to the same wire so removing one side will separate the other driver from the device as well.

    • Remove both drivers from the device.

Conclusión

To reassemble your device, follow these instructions in reverse order.

Un comentario

what size are the speakers?

Chris - Contestar

Agregar Comentario

Ver Estadísticas:

Ultimas 24 horas: 0

Ultimos 7 días: 11

Ultimos 30 días: 33

Todo El Tiempo: 767