Saltar al contenido principal

Amazon Fire Game Controller Outer Shell Replacement

Qué necesitas

  1. Amazon Fire Game Controller Outer Shell Replacement, Motherboard: paso 1, imagen 1 de 1
    • Use a Triangle #2 screwdriver to remove the six 10 mm screws from the back of the controller.

  2. Amazon Fire Game Controller Outer Shell Replacement: paso 2, imagen 1 de 1
    • Pry the two shell pieces from one another from the top orientation with a plastic opening tool.

    • The weights will fall out.

  3. Amazon Fire Game Controller Outer Shell Replacement: paso 3, imagen 1 de 1
    • Disconnect the battery terminal wires and the play, pause, and stop wires from the motherboard.

  4. Amazon Fire Game Controller Outer Shell Replacement: paso 4, imagen 1 de 1
    • Use a J1 screwdriver to unscrew the four 7 mm screws from the motherboard.

  5. Amazon Fire Game Controller Outer Shell Replacement: paso 5, imagen 1 de 1
    • Lift the motherboard out of the controller casing.

  6. Amazon Fire Game Controller Outer Shell Replacement, Outer Shell: paso 6, imagen 1 de 1
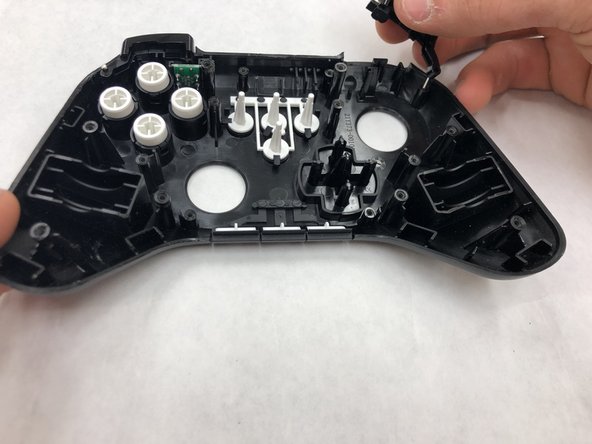
    • Use a JIS #0 screwdriver to remove the two 7 mm screws from the retaining bracket that secures the play, stop, and pause button wiring.

  7. Amazon Fire Game Controller Outer Shell Replacement: paso 7, imagen 1 de 1
    • Use a JIS #0 screwdriver to unscrew the 5 mm screws from the LED indicator assembly.

  8. Amazon Fire Game Controller Outer Shell Replacement: paso 8, imagen 1 de 2 Amazon Fire Game Controller Outer Shell Replacement: paso 8, imagen 2 de 2
    • Slide out the triggers and bumpers.

Conclusión

To reassemble your device, follow these instructions in reverse order.

Equipo

IUPUI, Team S4-G4, Wilson Summer 2019 Miembro de IUPUI, Team S4-G4, Wilson Summer 2019

IUPUI-WILSON-SU19S4G4

4 Miembros

4 Guías creadas

0 comentarios

Agregar Comentario

Ver Estadísticas:

Ultimas 24 horas: 0

Ultimos 7 días: 0

Ultimos 30 días: 6

Todo El Tiempo: 585