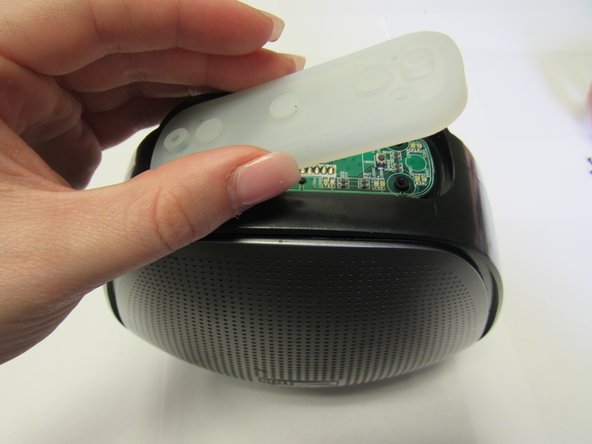
Saltar al contenido principal

Altec Lansing VersA Smart Volume Button Board Replacement

Qué necesitas

  1. Altec Lansing VersA Smart Volume Button Board Replacement, External Panels: paso 1, imagen 1 de 1
    • Remove external rubber cover.

  2. Altec Lansing VersA Smart Volume Button Board Replacement: paso 2, imagen 1 de 2 Altec Lansing VersA Smart Volume Button Board Replacement: paso 2, imagen 2 de 2
    • Use blue plastic opening tool to remove the external speaker face by placing it in the slight opening at the bottom.

    • Use a lever motion, push the tool down, lifting the speaker face.

    • Use fingers to grip and remove speaker face.

    • Repeat on reverse side to remove the second speaker face.

  3. Altec Lansing VersA Smart Volume Button Board Replacement: paso 3, imagen 1 de 2 Altec Lansing VersA Smart Volume Button Board Replacement: paso 3, imagen 2 de 2
    • Orient speaker so volume buttons are facing away from you, and Bluetooth and power buttons are on the left-hand side.

    • Remove the seven 14mm screws using the Phillips #1 screwdriver.

  4. Altec Lansing VersA Smart Volume Button Board Replacement: paso 4, imagen 1 de 1
    • Reorient speaker so Bluetooth and power buttons are now on the right-hand side.

    • Separate the two panels along the crease.

    • Blue plastic opening tool may be needed to separate panels.

    • Remove the panel with no buttons to expose internal area of the device.

    • Motherboard and all internal components are under this panel.

  5. Altec Lansing VersA Smart Volume Button Board Replacement, Volume Button Board: paso 5, imagen 1 de 2 Altec Lansing VersA Smart Volume Button Board Replacement, Volume Button Board: paso 5, imagen 2 de 2
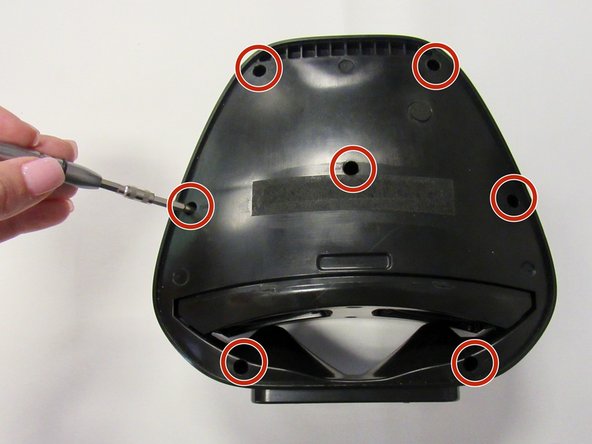
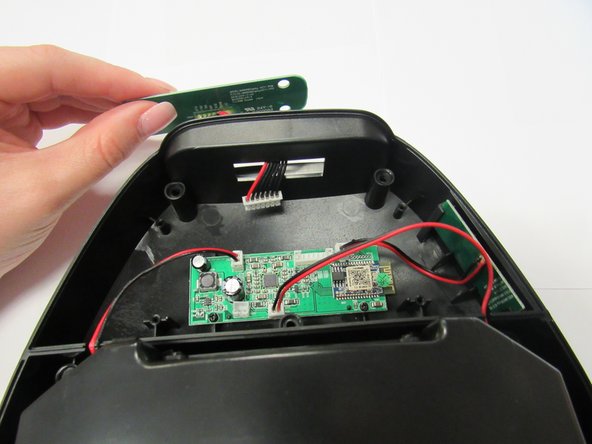
    • Orient speaker so volume buttons are facing up.

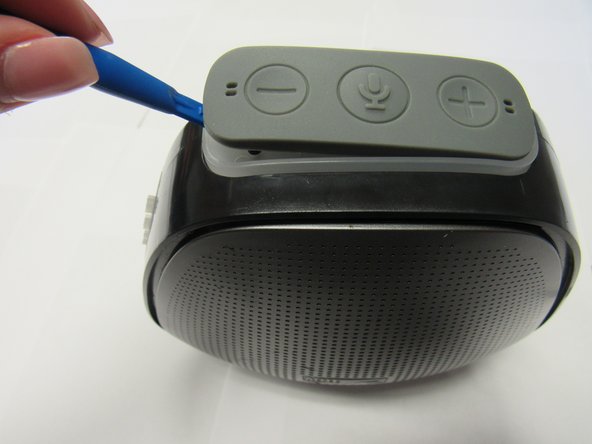
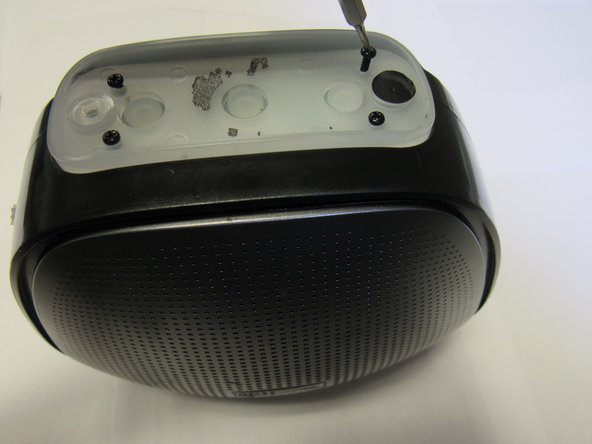
    • Remove rubber button piece using the blue plastic opening tool.

  6. Altec Lansing VersA Smart Volume Button Board Replacement: paso 6, imagen 1 de 2 Altec Lansing VersA Smart Volume Button Board Replacement: paso 6, imagen 2 de 2
    • Remove the four 9mm screws using the Torx T5 screwdriver.

  7. Altec Lansing VersA Smart Volume Button Board Replacement: paso 7, imagen 1 de 2 Altec Lansing VersA Smart Volume Button Board Replacement: paso 7, imagen 2 de 2
    • Once screws are removed, remove the plastic covering piece.

    • Remove the rubber piece below the plactic covering piece to expose the daughterboard.

  8. Altec Lansing VersA Smart Volume Button Board Replacement: paso 8, imagen 1 de 2 Altec Lansing VersA Smart Volume Button Board Replacement: paso 8, imagen 2 de 2
    • Orient speaker on its side with volume buttons facing away from you and Bluetooth and power buttons on the right.

    • Detach the wiring, located in the upper middle section of the motherboard.

    • Remove daughterboard piece from opening in the top of the speaker.

Conclusión

To reassemble your device, follow these instructions in reverse order.

0 comentarios

Agregar Comentario

Ver Estadísticas:

Ultimas 24 horas: 0

Ultimos 7 días: 0

Ultimos 30 días: 2

Todo El Tiempo: 414