Esta versión puede contener ediciones incorrectas. Cambie a la última instantánea verificada.
Qué necesitas
-
Este paso está sin traducir. Ayuda a traducirlo
-
Use blue plastic opening tool to remove the external speaker face by placing it in the slight opening at the bottom.
-
Use a lever motion, push the tool down, lifting the speaker face.
-
Use fingers to grip and remove speaker face.
-
Repeat on reverse side to remove the second speaker face.
-
-
Este paso está sin traducir. Ayuda a traducirlo
-
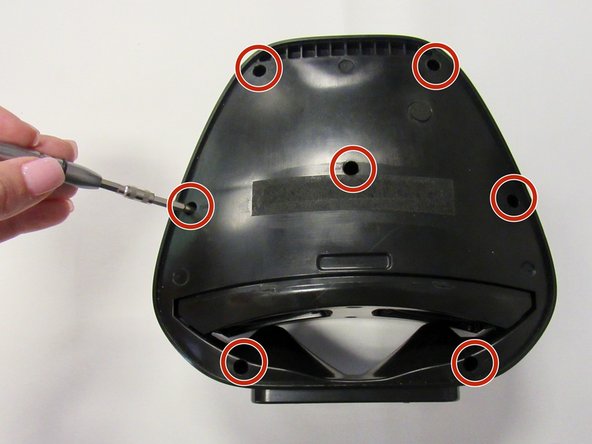
Orient speaker so volume buttons are facing away from you, and Bluetooth and power buttons are on the left-hand side.
-
Remove the seven 14mm screws using the Phillips #1 screwdriver.
-
-
-
Este paso está sin traducir. Ayuda a traducirlo
-
Reorient speaker so Bluetooth and power buttons are now on the right-hand side.
-
Separate the two panels along the crease.
-
Blue plastic opening tool may be needed to separate panels.
-
Remove the panel with no buttons to expose internal area of the device.
-
-
Este paso está sin traducir. Ayuda a traducirlo
-
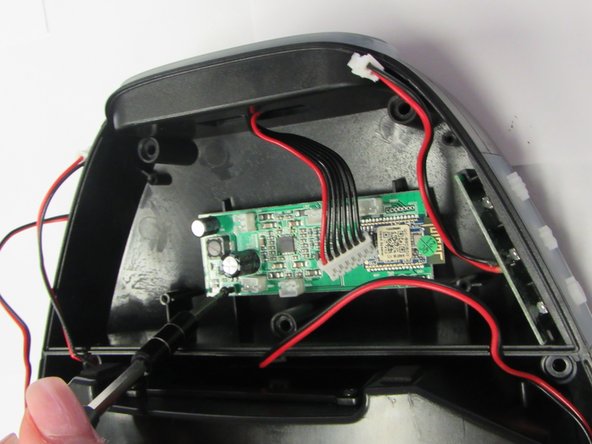
Remove the five wiring attachments (for the volume board, bluetooth board, speakers, and microUSB) from their connection to the motherboard by pulling slightly.
-
-
Este paso está sin traducir. Ayuda a traducirlo
-
Remove the two 9mm screws holding the motherboard in place using the Torx T5 screwdriver.
-
Cancelar: No complete esta guía.
Una persona más ha completado esta guía.


