Esta versión puede contener ediciones incorrectas. Cambiar a la última instantánea verificada.
Qué necesitas
-
Este paso está sin traducir. Ayuda a traducirlo
-
Remove all eight 1 cm Phillips head screws from the back panel of the AlphaSmart Pro with the Phillips #00 Screwdriver.
-
Carefully separate the front panel from the back panel.
-
-
-
Este paso está sin traducir. Ayuda a traducirlo
-
To remove the ribbon cable, use the spudger to lift each side of the connector from the socket.
-
Gently pull up on the connector to completely remove the connector from the socket.
-
You are now able to separate the front panel from the back panel.
-
-
Este paso está sin traducir. Ayuda a traducirlo
-
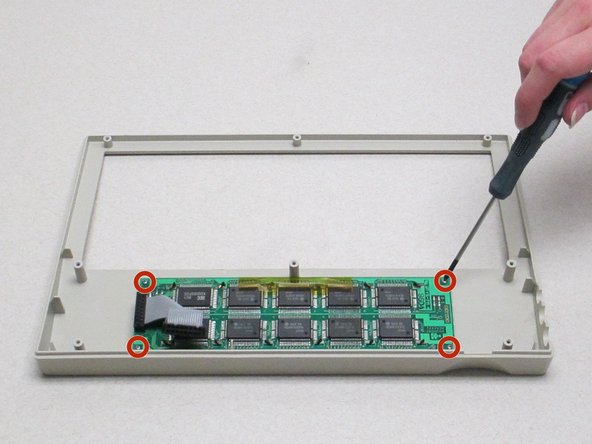
Looking at the front panel, use the Phillips #00 screwdriver to remove the four Phillips head 0.8 cm screws from each corner of the display motherboard.
-
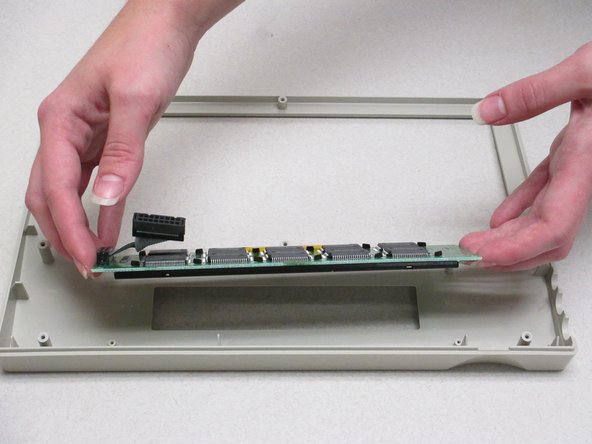
Lift the display screen and motherboard from the plastic front panel to separate the two pieces.
-


