Saltar al contenido principal

Alienware M17-R1 Screen Lock Assembly Replacement

Qué necesitas

  1. Alienware M17-R1 Screen Lock Assembly Replacement, Screen Lock Assembly: paso 1, imagen 1 de 1
    • Open the screen until it is flat.

    • Ensure that the surface you are working on can support both the screen and the base of the laptop.

  2. Alienware M17-R1 Screen Lock Assembly Replacement: paso 2, imagen 1 de 2 Alienware M17-R1 Screen Lock Assembly Replacement: paso 2, imagen 2 de 2
    • Remove the eight 7 mm screws around the edge of the screen using a Phillips #1 screwdriver.

    • Support the screen from the bottom to make it easier to remove the screws.

  3. Alienware M17-R1 Screen Lock Assembly Replacement: paso 3, imagen 1 de 2 Alienware M17-R1 Screen Lock Assembly Replacement: paso 3, imagen 2 de 2
    • Insert the plastic opening tool and gently slide it around the edge of the screen to lift the face of the screen away from its base.

    • Be careful not to break the face of the screen when lifting it.

  4. Alienware M17-R1 Screen Lock Assembly Replacement: paso 4, imagen 1 de 3 Alienware M17-R1 Screen Lock Assembly Replacement: paso 4, imagen 2 de 3 Alienware M17-R1 Screen Lock Assembly Replacement: paso 4, imagen 3 de 3
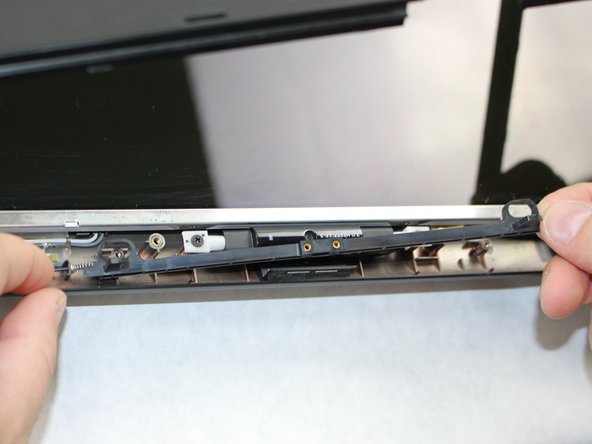
    • Remove the two 3 mm Phillips #1 screws using a Phillips #1 screwdriver.

    • Pull the assembly grip away to remove it.

    • Remove the two 5 mm screws using a Phillips #1 screwdriver.

  5. Alienware M17-R1 Screen Lock Assembly Replacement: paso 5, imagen 1 de 2 Alienware M17-R1 Screen Lock Assembly Replacement: paso 5, imagen 2 de 2
    • Push in the assembly towards the spring.

    • Gently lift the slider from the side opposite to the spring and pull the slider away from the spring.

    • The spring is loosely secured to the slider and may fall off and become lost when removing the slider.

  6. Alienware M17-R1 Screen Lock Assembly Replacement: paso 6, imagen 1 de 2 Alienware M17-R1 Screen Lock Assembly Replacement: paso 6, imagen 2 de 2
    • If the spring is defective, slide it off the end of the assembly and replace it.

Conclusión

To reassemble your device, follow these instructions in reverse order.

William Davis

Miembro Desde 10/09/18

323 Reputación

2 Guías creadas

0 comentarios

Agregar Comentario

Ver Estadísticas:

Ultimas 24 horas: 1

Ultimos 7 días: 2

Ultimos 30 días: 5

Todo El Tiempo: 400