Saltar al contenido principal

Alienware M17-R1 RAM Replacement

Qué necesitas

  1. Alienware M17-R1 RAM Replacement, Battery: paso 1, imagen 1 de 1
    • Push the slider until the battery is released from its socket.

  2. Alienware M17-R1 RAM Replacement: paso 2, imagen 1 de 1
    • Lift the battery using your fingers.

    • It may be necessary to use a plastic opening tool.

  3. Alienware M17-R1 RAM Replacement, RAM: paso 3, imagen 1 de 1
    • Place laptop down on a hard flat surface to begin the disassembly.

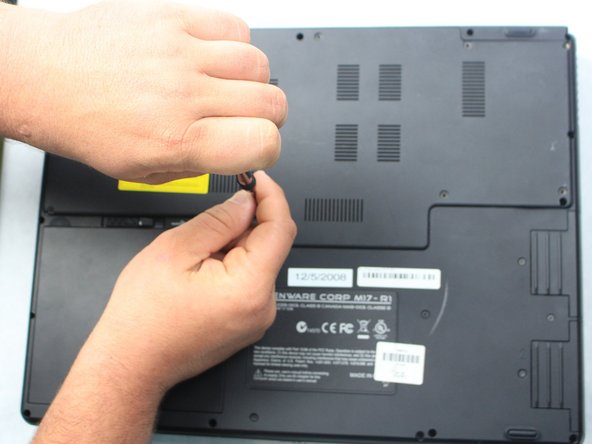
  4. Alienware M17-R1 RAM Replacement: paso 4, imagen 1 de 2 Alienware M17-R1 RAM Replacement: paso 4, imagen 2 de 2
    • Remove the nine 3 mm screws that secure the cover using a Phillips #1 screwdriver.

  5. Alienware M17-R1 RAM Replacement: paso 5, imagen 1 de 1
    • Once the cover is removed, locate the RAM compartment to begin the replacement.

  6. Alienware M17-R1 RAM Replacement: paso 6, imagen 1 de 2 Alienware M17-R1 RAM Replacement: paso 6, imagen 2 de 2
    • After locating the RAM, gently pull the two metal clips outward and lift the RAM card out of its socket.

    • The card will pop up once it has been released and can be removed.

  7. Alienware M17-R1 RAM Replacement: paso 7, imagen 1 de 1
    • To insert the new RAM, place it on top of the socket and carefully apply downward pressure until it snaps into place.

Conclusión

To reassemble your device, follow these instructions in reverse order.

LXA054

Miembro Desde 10/09/18

337 Reputación

3 Guías creadas

0 comentarios

Agregar Comentario

Ver Estadísticas:

Ultimas 24 horas: 1

Ultimos 7 días: 2

Ultimos 30 días: 6

Todo El Tiempo: 639