Saltar al contenido principal

Esta guía ha sufrido modificaciones. Revisa la última versión sin revisar.

Alienware M15x GPU Replacement

Qué necesitas

  1. Alienware M15x GPU Replacement, GPU: paso 1, imagen 1 de 1
    • Turn laptop over so that the bottom and battery are facing up.

  2. Alienware M15x GPU Replacement: paso 2, imagen 1 de 1
    • Locate the battery and remove it by releasing the latch and flipping the battery out.

  3. Alienware M15x GPU Replacement: paso 3, imagen 1 de 2 Alienware M15x GPU Replacement: paso 3, imagen 2 de 2
    • Remove the two 4mm marked screws with a small Philips head screwdriver #1. Then slide the compartment door away from the battery compartment and remove.

  4. Alienware M15x GPU Replacement: paso 4, imagen 1 de 1
    • Remove the four 4mm marked screws with a Phillips head screwdriver #1.

  5. Alienware M15x GPU Replacement: paso 5, imagen 1 de 1
    • Position laptop vertically so that the elbow is facing up and the laptop is slightly open towards the ground, creating an upside down V shape. Then, using a plastic opening tool, pry open the marked panel just slightly.

  6. Alienware M15x GPU Replacement: paso 6, imagen 1 de 3 Alienware M15x GPU Replacement: paso 6, imagen 2 de 3 Alienware M15x GPU Replacement: paso 6, imagen 3 de 3
    • Position the laptop normally, with the bottom on the ground and the screen flipped up towards you. Use the same plastic opening tool to lift the power button panel. Once lifted, unclip the power button using tweezers on the two black clips. Remove the panel completely.

  7. Alienware M15x GPU Replacement: paso 7, imagen 1 de 1
    • Remove two top right 4mm screws with a Philips head screwdriver #1.

  8. Alienware M15x GPU Replacement: paso 8, imagen 1 de 2 Alienware M15x GPU Replacement: paso 8, imagen 2 de 2
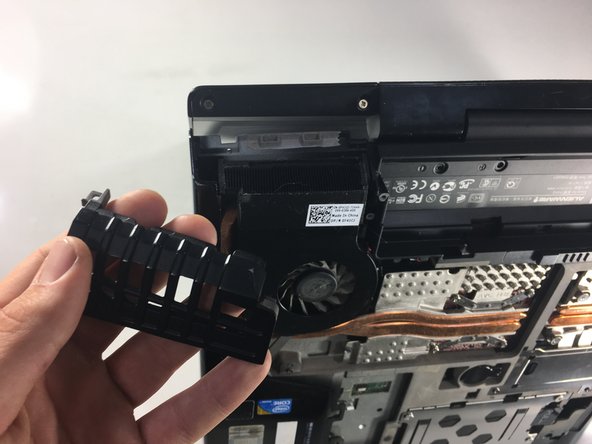
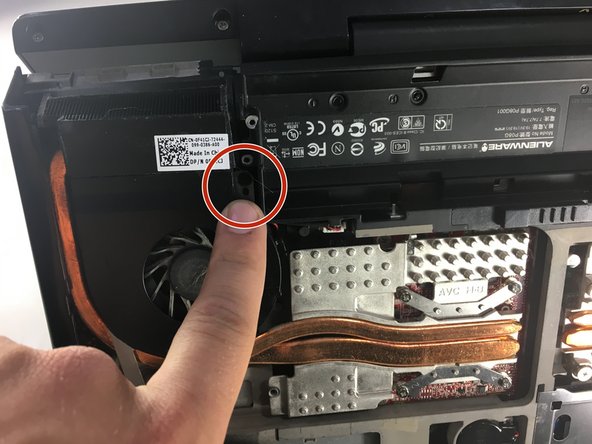
    • Use a Phillips #1 screwdriver to remove the 4 mm screw from the exhaust port cover.

    • Remove the exhaust port cover entirely.

  9. Alienware M15x GPU Replacement: paso 9, imagen 1 de 3 Alienware M15x GPU Replacement: paso 9, imagen 2 de 3 Alienware M15x GPU Replacement: paso 9, imagen 3 de 3
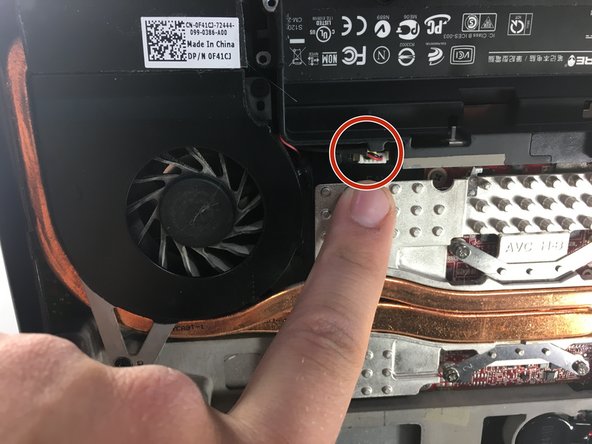
    • Use a Phillips head screwdriver #0 to remove the two 3mm screws holding the fan in place, then unclip the electrical connection using tweezers.

  10. Alienware M15x GPU Replacement: paso 10, imagen 1 de 1
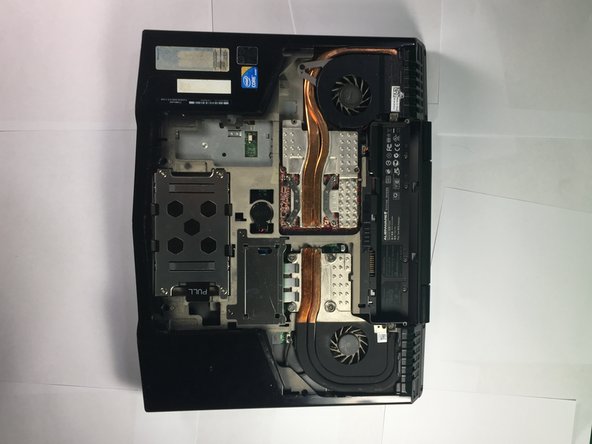
    • Remove the heat sink by loosening the 4 marked screws with a Phillips head screwdriver #0.

  11. Alienware M15x GPU Replacement: paso 11, imagen 1 de 1
    • This is the GPU. It can be removed or replaced by using a Phillips head screwdriver #1 or#0 to remove the two screws. Remember that when replacing the GPU, it is important to reapply thermal paste in a small line almost the length of the chip.

Conclusión

To reassemble your device, follow these instructions in reverse order.

Tomas Kronmark

Miembro Desde 01/22/18

193 Reputación

1 Guía escrita

Equipo

Cal Poly, Team S11-G3, Banghart Winter 2018 Miembro de Cal Poly, Team S11-G3, Banghart Winter 2018

CPSU-BANGHART-W18S11G3

5 Miembros

6 Guías creadas

0 comentarios

Agregar Comentario

Ver Estadísticas:

Ultimas 24 horas: 0

Ultimos 7 días: 5

Ultimos 30 días: 22

Todo El Tiempo: 1,614