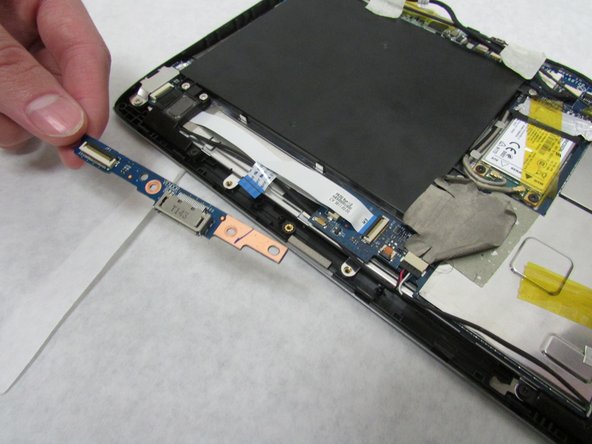
Saltar al contenido principal

Acer Iconia Tab A501 Docking Port Replacement

Qué necesitas

  1. Acer Iconia Tab A501 Docking Port Replacement, Back Cover: paso 1, imagen 1 de 3 Acer Iconia Tab A501 Docking Port Replacement, Back Cover: paso 1, imagen 2 de 3 Acer Iconia Tab A501 Docking Port Replacement, Back Cover: paso 1, imagen 3 de 3
    • Turn off your device before opening it.

    • Use a plastic opening tool to carefully separate the back cover, starting at the volume buttons.

    • Continue separating the back cover along the short side closest to the camera and around the device.

  2. Acer Iconia Tab A501 Docking Port Replacement: paso 2, imagen 1 de 1
    • When separated enough, a little more than halfway around the device, the back cover will be easy to take off.

  3. Acer Iconia Tab A501 Docking Port Replacement, Docking Port: paso 3, imagen 1 de 3 Acer Iconia Tab A501 Docking Port Replacement, Docking Port: paso 3, imagen 2 de 3 Acer Iconia Tab A501 Docking Port Replacement, Docking Port: paso 3, imagen 3 de 3
    • In the next step, be careful not to squeeze too hard or scratch the motherboard.

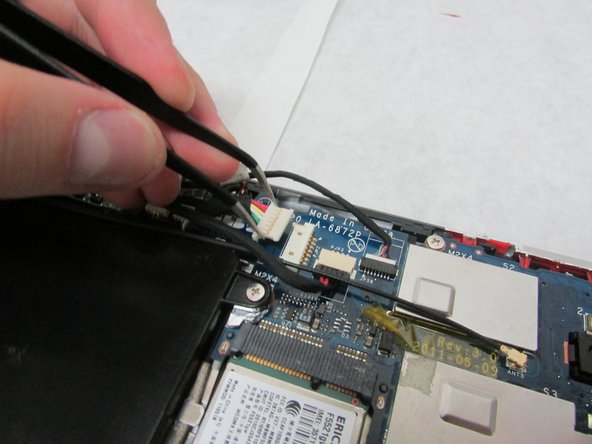
    • Use the angled tweezers to disconnect the white motherboard-battery connector in the middle of the side opposite the docking port.

  4. Acer Iconia Tab A501 Docking Port Replacement: paso 4, imagen 1 de 3 Acer Iconia Tab A501 Docking Port Replacement: paso 4, imagen 2 de 3 Acer Iconia Tab A501 Docking Port Replacement: paso 4, imagen 3 de 3
    • Use the plastic opening tool to flip up the locking mechanism for the ribbon cable on the docking port board that is flat, white, and folded.

    • Detach the folded, white ribbon cable on the docking port board.

  5. Acer Iconia Tab A501 Docking Port Replacement: paso 5, imagen 1 de 2 Acer Iconia Tab A501 Docking Port Replacement: paso 5, imagen 2 de 2
    • Use a Phillips #1 screwdriver to unscrew the three 3.0 mm Philips head screws holding the docking port in place.

  6. Acer Iconia Tab A501 Docking Port Replacement: paso 6, imagen 1 de 2 Acer Iconia Tab A501 Docking Port Replacement: paso 6, imagen 2 de 2
    • Remove the docking port.

Conclusión

To reassemble your device, follow these instructions in reverse order.

0 comentarios

Agregar Comentario

Ver Estadísticas:

Ultimas 24 horas: 0

Ultimos 7 días: 0

Ultimos 30 días: 1

Todo El Tiempo: 144