Saltar al contenido principal

Acer Iconia Tab A501 Charging Port Replacement

Qué necesitas

  1. Acer Iconia Tab A501 Charging Port  Replacement, Back Cover: paso 1, imagen 1 de 3 Acer Iconia Tab A501 Charging Port  Replacement, Back Cover: paso 1, imagen 2 de 3 Acer Iconia Tab A501 Charging Port  Replacement, Back Cover: paso 1, imagen 3 de 3
    • Turn off your device before opening it.

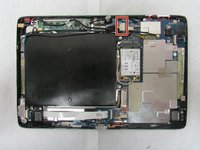
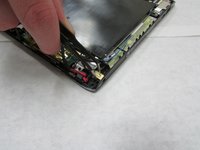
    • Use a plastic opening tool to carefully separate the back cover, starting at the volume buttons.

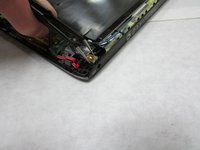
    • Continue separating the back cover along the short side closest to the camera and around the device.

  2. Acer Iconia Tab A501 Charging Port  Replacement: paso 2, imagen 1 de 1
    • When separated enough, a little more than halfway around the device, the back cover will be easy to take off.

  3. Acer Iconia Tab A501 Charging Port  Replacement, Charging Port: paso 3, imagen 1 de 1
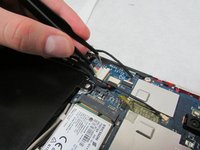
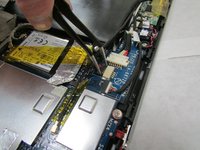
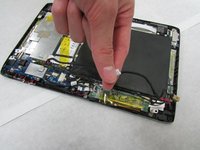
    • Remove any tape covering the black, braided cable connecting the charging port to the motherboard.
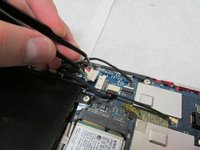
  4. Acer Iconia Tab A501 Charging Port  Replacement: paso 4, imagen 1 de 3 Acer Iconia Tab A501 Charging Port  Replacement: paso 4, imagen 2 de 3 Acer Iconia Tab A501 Charging Port  Replacement: paso 4, imagen 3 de 3
    Herramienta utilizada en este paso:
    Tweezers
    $3.99
    Comprar
    • In the next step, be careful not to squeeze too hard or scratch the motherboard.

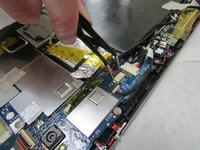
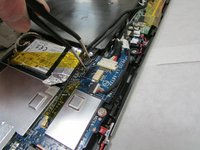
    • Use the angled tweezers to disconnect the motherboard-battery cable from the white connector in the middle of the side opposite the docking port.

  5. Acer Iconia Tab A501 Charging Port  Replacement: paso 5, imagen 1 de 3 Acer Iconia Tab A501 Charging Port  Replacement: paso 5, imagen 2 de 3 Acer Iconia Tab A501 Charging Port  Replacement: paso 5, imagen 3 de 3
    • In the next step, be careful not to squeeze too hard or scratch the motherboard.

    • Use the angled tweezers to disconnect the cable with red wires from the beige connector in the middle of the side opposite the docking port.

  6. Acer Iconia Tab A501 Charging Port  Replacement: paso 6, imagen 1 de 3 Acer Iconia Tab A501 Charging Port  Replacement: paso 6, imagen 2 de 3 Acer Iconia Tab A501 Charging Port  Replacement: paso 6, imagen 3 de 3
    • The port may be taped from underneath and need a bit of force to take out.

    • Use the angled tweezers to carefully remove the charging port, which is in the corner opposite the device's Micro-HDMI port.

Conclusión

To reassemble your device, follow these instructions in reverse order.

0 comentarios

Agregar Comentario

Ver Estadísticas:

Ultimas 24 horas: 2

Ultimos 7 días: 8

Ultimos 30 días: 24

Todo El Tiempo: 1,016