Saltar al contenido principal

Acer Iconia B1-A71 LCD Display Replacement

Qué necesitas

Resumen del Video

  1. Acer Iconia B1-A71 LCD Display Replacement, Acer Iconia B1-A71 LCD Display Replacement: paso 1, imagen 1 de 3 Acer Iconia B1-A71 LCD Display Replacement, Acer Iconia B1-A71 LCD Display Replacement: paso 1, imagen 2 de 3 Acer Iconia B1-A71 LCD Display Replacement, Acer Iconia B1-A71 LCD Display Replacement: paso 1, imagen 3 de 3
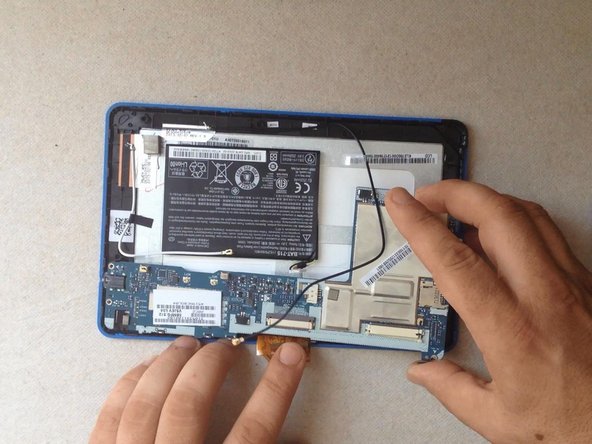
    • Switch-off the tablet.

    • If you can't switch it off, use the reset button to do this.

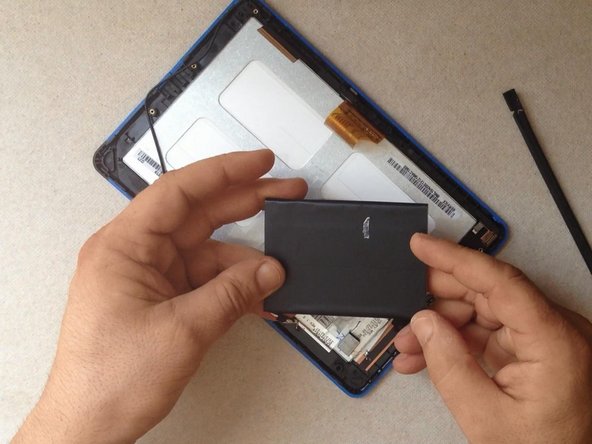
    • With a cutter and a plastic tool remove the back cover.

    • If you have a memory card inside, don't forget to remove it!

  2. Acer Iconia B1-A71 LCD Display Replacement: paso 2, imagen 1 de 2 Acer Iconia B1-A71 LCD Display Replacement: paso 2, imagen 2 de 2
    • First, disconnect the battery.

    • Now, disconnect the loudspeaker and remove the back cover.

    • Remove all scotch tapes and disconnect the touch screen flex cable...

    • LCD display flex cable,

    • the microphone,

    • and the WiFi and Bluetooth antennas flex cables.

  3. Acer Iconia B1-A71 LCD Display Replacement: paso 3, imagen 1 de 3 Acer Iconia B1-A71 LCD Display Replacement: paso 3, imagen 2 de 3 Acer Iconia B1-A71 LCD Display Replacement: paso 3, imagen 3 de 3
    • Unscrew 5x screws and rmove the main board.

  4. Acer Iconia B1-A71 LCD Display Replacement: paso 4, imagen 1 de 3 Acer Iconia B1-A71 LCD Display Replacement: paso 4, imagen 2 de 3 Acer Iconia B1-A71 LCD Display Replacement: paso 4, imagen 3 de 3
    • The battery is glued to the LCD display metal shield with a double sided adhesive tape.

    • Use plastic tools and carefully remove it.

    • Remove all tapes from the LCD display metal shield.

  5. Acer Iconia B1-A71 LCD Display Replacement: paso 5, imagen 1 de 3 Acer Iconia B1-A71 LCD Display Replacement: paso 5, imagen 2 de 3 Acer Iconia B1-A71 LCD Display Replacement: paso 5, imagen 3 de 3
    • The LCD display is held by metal frame and some locking clips on it.

    • Use a cutter and a plastic tool to separate the LCD.

    • You have to work slowly so as not to break the display.

    • Now, install the new LCD display and reassemble the tablet.

    • .

    • Did you do it successfully?

    • Please SUBSCRIBE to my channel ツ

Conclusión

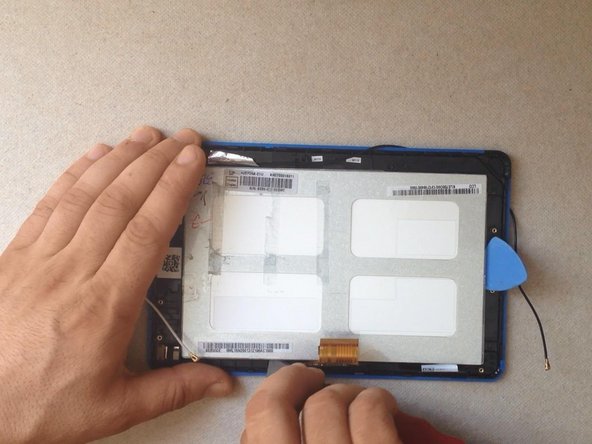
To reassemble your device, follow these instructions in reverse order.

6 personas más completaron esta guía.

ZFix

Miembro Desde 12/09/13

191,470 Reputación

330 Guías creadas

Equipo

Master Techs Miembro de Master Techs

Community

321 Miembros

1,482 Guías creadas

0 comentarios

Agregar Comentario

Ver Estadísticas:

Ultimas 24 horas: 0

Ultimos 7 días: 0

Ultimos 30 días: 15

Todo El Tiempo: 11,041