Saltar al contenido principal

Acer Iconia A1-830 Speaker Assembly Replacement

Qué necesitas

  1. Acer Iconia A1-830 Speaker Assembly Replacement, Disassembling Acer Iconia A1-830 Back Panel: paso 1, imagen 1 de 2 Acer Iconia A1-830 Speaker Assembly Replacement, Disassembling Acer Iconia A1-830 Back Panel: paso 1, imagen 2 de 2
    • Prepare your working space. The ideal work space has a flat, level surface that is clean and well lit.

    • Shut down your Acer Iconia A1-830.

    • Remove any cables or exterior covers from your tablet.

    • Place it on your work space, with the screen facing up.

  2. Acer Iconia A1-830 Speaker Assembly Replacement: paso 2, imagen 1 de 2 Acer Iconia A1-830 Speaker Assembly Replacement: paso 2, imagen 2 de 2
    • Wedge the plastic opening tool into the tiny gap between the white plastic front bezel and the aluminum rear panel.

    • Do not try to pry apart the top edge on the front side near the front-facing camera.

  3. Acer Iconia A1-830 Speaker Assembly Replacement, Battery: paso 3, imagen 1 de 2 Acer Iconia A1-830 Speaker Assembly Replacement, Battery: paso 3, imagen 2 de 2
    • Remove the small clear plastic cover on top of the battery cable with the nylon or metal spudger.

  4. Acer Iconia A1-830 Speaker Assembly Replacement: paso 4, imagen 1 de 1
    • Remove the battery cable by lifting it up with the pointy end of the black nylon spudger.

  5. Acer Iconia A1-830 Speaker Assembly Replacement: paso 5, imagen 1 de 2 Acer Iconia A1-830 Speaker Assembly Replacement: paso 5, imagen 2 de 2
    • Un-stick the battery from the metal plate using the black nylon spudger.

    • Be careful not to puncture the battery while removing it.

  6. Acer Iconia A1-830 Speaker Assembly Replacement, Speaker Assembly: paso 6, imagen 1 de 3 Acer Iconia A1-830 Speaker Assembly Replacement, Speaker Assembly: paso 6, imagen 2 de 3 Acer Iconia A1-830 Speaker Assembly Replacement, Speaker Assembly: paso 6, imagen 3 de 3
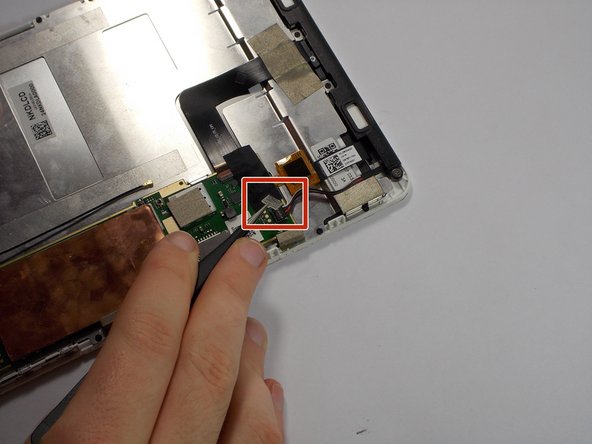
    • Remove the small clear plastic cover from the speaker connector with the metal tweezers.

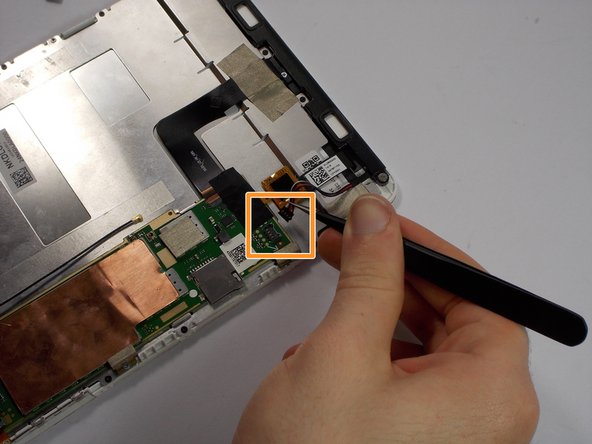
    • Lift out the speaker connector using the metal tweezers.

  7. Acer Iconia A1-830 Speaker Assembly Replacement: paso 7, imagen 1 de 1
    • Remove the two 2.8 mm Philips #00 screws using the #000 sized Philips screwdriver.

    • Remove the 3.7 mm Philips #000 screw using the #000 size Philips screwdriver.

  8. Acer Iconia A1-830 Speaker Assembly Replacement: paso 8, imagen 1 de 1
    • Lift out the speaker assembly form the plastic frame.

Conclusión

To reassemble your device, follow these instructions in reverse order.

Una persona más ha completado esta guía.

Equipo

UMass Dartmouth, Team 4-6, Catania Fall 2015 Miembro de UMass Dartmouth, Team 4-6, Catania Fall 2015

UMASSD-CATANIA-F15S4G6

3 Miembros

5 Guías creadas

0 comentarios

Agregar Comentario

Ver Estadísticas:

Ultimas 24 horas: 1

Ultimos 7 días: 2

Ultimos 30 días: 2

Todo El Tiempo: 619