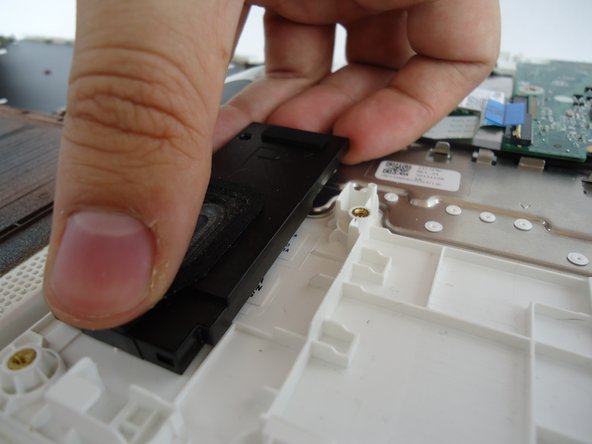
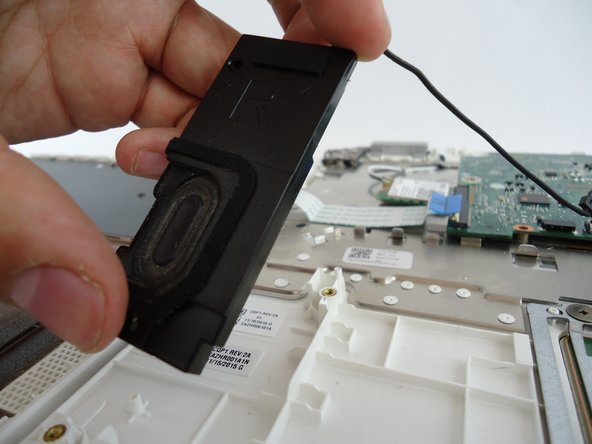
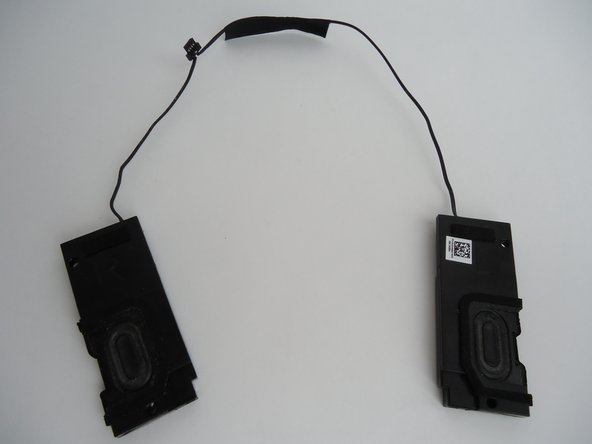
Saltar al contenido principal

Acer Chromebook CB3-131-C3KD Speakers Replacement

Qué necesitas

  1. Acer Chromebook CB3-131-C3KD Speakers Replacement, Battery: paso 1, imagen 1 de 2 Acer Chromebook CB3-131-C3KD Speakers Replacement, Battery: paso 1, imagen 2 de 2
    • Make sure you turn off the laptop before starting.

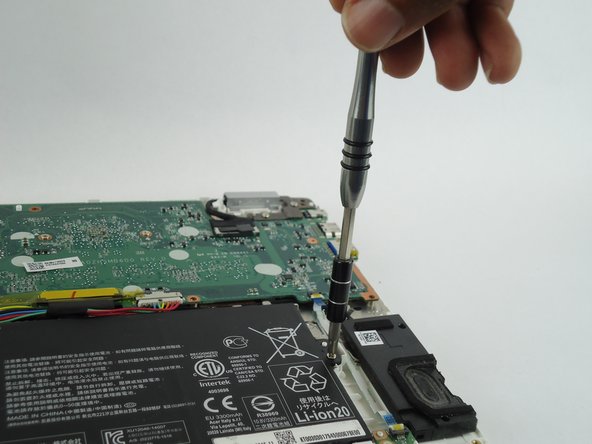
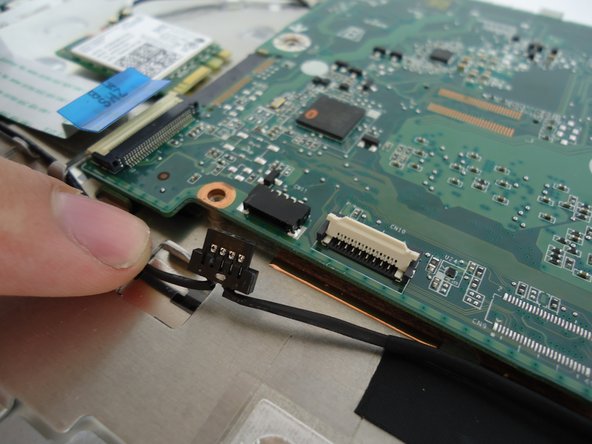
    • Unscrew and remove the (11) eleven 4mm J0 head screws on the underside of the laptop using the JIS #0 screwdriver.

  2. Acer Chromebook CB3-131-C3KD Speakers Replacement: paso 2, imagen 1 de 3 Acer Chromebook CB3-131-C3KD Speakers Replacement: paso 2, imagen 2 de 3 Acer Chromebook CB3-131-C3KD Speakers Replacement: paso 2, imagen 3 de 3
    • Use the plastic opening tool to remove the back cover.

    • Be careful not to damage the ribbon cable connecting the back cover to the laptop.

  3. Acer Chromebook CB3-131-C3KD Speakers Replacement: paso 3, imagen 1 de 2 Acer Chromebook CB3-131-C3KD Speakers Replacement: paso 3, imagen 2 de 2
    • Unscrew the (2) two 3mm J0 Phillips head screws that hold the battery in place.

  4. Acer Chromebook CB3-131-C3KD Speakers Replacement: paso 4, imagen 1 de 2 Acer Chromebook CB3-131-C3KD Speakers Replacement: paso 4, imagen 2 de 2
    • Disconnect the battery from the motherboard.

    • Carefully disconnect the cable parallel to the board, not at an angle. Otherwise, you could damage the port.

  5. Acer Chromebook CB3-131-C3KD Speakers Replacement: paso 5, imagen 1 de 2 Acer Chromebook CB3-131-C3KD Speakers Replacement: paso 5, imagen 2 de 2
    • Carefully lift the battery from one side, and then lift it out of the laptop.

  6. Acer Chromebook CB3-131-C3KD Speakers Replacement, Speakers: paso 6, imagen 1 de 3 Acer Chromebook CB3-131-C3KD Speakers Replacement, Speakers: paso 6, imagen 2 de 3 Acer Chromebook CB3-131-C3KD Speakers Replacement, Speakers: paso 6, imagen 3 de 3
    • Disconnect the three ribbon cables from the motherboard.

  7. Acer Chromebook CB3-131-C3KD Speakers Replacement: paso 7, imagen 1 de 2 Acer Chromebook CB3-131-C3KD Speakers Replacement: paso 7, imagen 2 de 2
    • Unplug the cable by putting both thumbs on each tab and unlocking the cable by pushing the tabs away.

  8. Acer Chromebook CB3-131-C3KD Speakers Replacement: paso 8, imagen 1 de 3 Acer Chromebook CB3-131-C3KD Speakers Replacement: paso 8, imagen 2 de 3 Acer Chromebook CB3-131-C3KD Speakers Replacement: paso 8, imagen 3 de 3
    • Remove speakers by placing index finger on top and thumb on bottom of the speakers.

    • Peel speakers away from the base that is connected by an adhesive.

  9. Acer Chromebook CB3-131-C3KD Speakers Replacement: paso 9, imagen 1 de 3 Acer Chromebook CB3-131-C3KD Speakers Replacement: paso 9, imagen 2 de 3 Acer Chromebook CB3-131-C3KD Speakers Replacement: paso 9, imagen 3 de 3
    • Peel the black cord connecting the two speakers together away from the Velcro located at the midpoint between the two speakers.

    • Remove speakers from laptop.

Conclusión

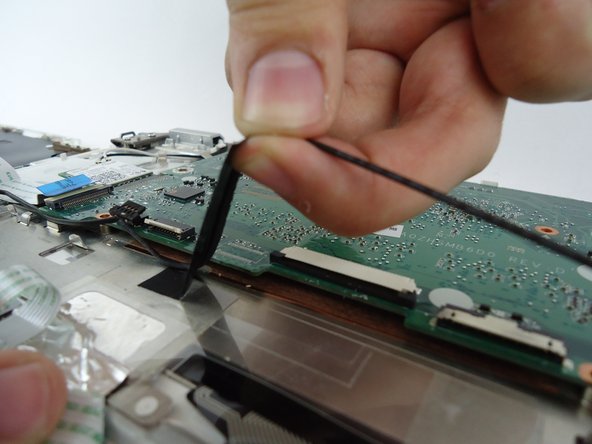
To reassemble your device, follow these instructions in reverse order.

Una persona más ha completado esta guía.

Johnathan

Miembro Desde 09/26/17

216 Reputación

2 Guías creadas

Equipo

USF Tampa, Team S11-G1, Passmore Fall 2017 Miembro de USF Tampa, Team S11-G1, Passmore Fall 2017

USFT-PASSMORE-F17S11G1

3 Miembros

10 Guías creadas

0 comentarios

Agregar Comentario

Ver Estadísticas:

Ultimas 24 horas: 0

Ultimos 7 días: 1

Ultimos 30 días: 1

Todo El Tiempo: 328