Saltar al contenido principal

Acer Chromebook C740-C4PE Battery Replacement

Qué necesitas

  1. Acer Chromebook C740-C4PE Battery Replacement, Battery: paso 1, imagen 1 de 3 Acer Chromebook C740-C4PE Battery Replacement, Battery: paso 1, imagen 2 de 3 Acer Chromebook C740-C4PE Battery Replacement, Battery: paso 1, imagen 3 de 3
    • Make sure the laptop is turned off and unplugged before starting.

    • Unscrew the thirteen 10mm screws on the back of the computer using the Phillips #0 screwdriver.

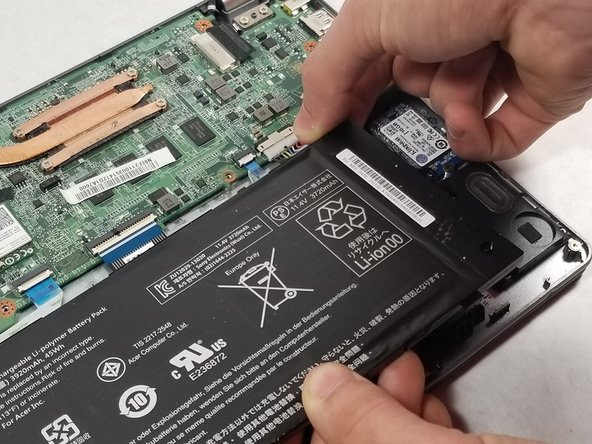
    • Using the spudger or other prying tool, gently pry the back off of the device.

    • Be sure not to pry too hard as it may result in snapping the back plate.

  2. Acer Chromebook C740-C4PE Battery Replacement: paso 2, imagen 1 de 1
    • Unscrew the two 5mm battery screws using the Phillips #0 screwdriver.

  3. Acer Chromebook C740-C4PE Battery Replacement: paso 3, imagen 1 de 1
    • Gently lift the battery up and away from the hooks on the bottom of the device keeping the battery in place.

    • Be sure the battery is away from the clips before pulling away so as not to break the clips.

  4. Acer Chromebook C740-C4PE Battery Replacement: paso 4, imagen 1 de 3 Acer Chromebook C740-C4PE Battery Replacement: paso 4, imagen 2 de 3 Acer Chromebook C740-C4PE Battery Replacement: paso 4, imagen 3 de 3
    • Detach the connecting cable from the motherboard by pulling away.

    • Remove the battery from the device.

Conclusión

To reassemble your device, follow these instructions in reverse order.

3 personas más completaron esta guía.

Jacob Kahn

Miembro Desde 10/17/17

273 Reputación

2 Guías creadas

Equipo

0 comentarios

Agregar Comentario

Ver Estadísticas:

Ultimas 24 horas: 0

Ultimos 7 días: 5

Ultimos 30 días: 6

Todo El Tiempo: 478