Saltar al contenido principal

Acer Chromebook C720-2827 Display Replacement

Qué necesitas

  1. Acer Chromebook C720-2827 Display Replacement, Back Panel Assembly: paso 1, imagen 1 de 2 Acer Chromebook C720-2827 Display Replacement, Back Panel Assembly: paso 1, imagen 2 de 2
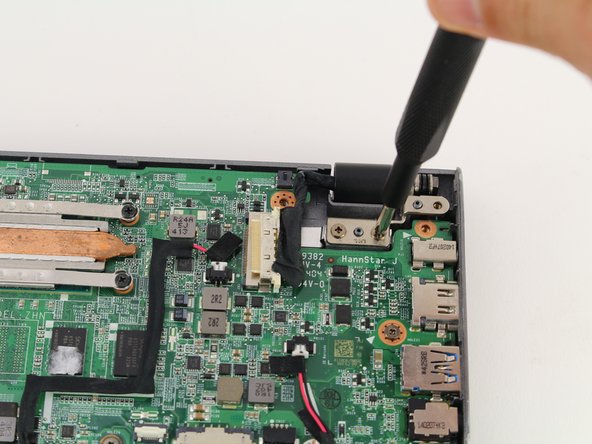
    • Remove the thirteen 6.0mm screws on the back panel using your Phillips #1 screwdriver.

  2. Acer Chromebook C720-2827 Display Replacement: paso 2, imagen 1 de 2 Acer Chromebook C720-2827 Display Replacement: paso 2, imagen 2 de 2
    • Pry the back panel open with the plastic opening tool.

  3. Acer Chromebook C720-2827 Display Replacement, Battery: paso 3, imagen 1 de 1
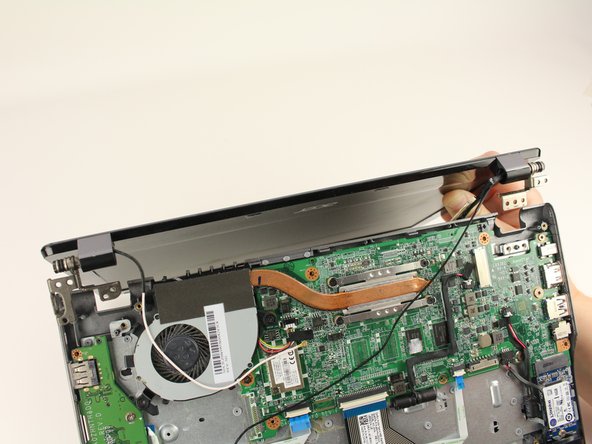
    • Remove the two 6.0mm screws securing the battery with your Phillips #1 screwdriver.

  4. Acer Chromebook C720-2827 Display Replacement: paso 4, imagen 1 de 2 Acer Chromebook C720-2827 Display Replacement: paso 4, imagen 2 de 2
    • Carefully pull out the battery wire connected to the battery port.

  5. Acer Chromebook C720-2827 Display Replacement: paso 5, imagen 1 de 1
    • Slowly lift the battery to remove it from the Chromebook.

  6. Acer Chromebook C720-2827 Display Replacement, Display: paso 6, imagen 1 de 2 Acer Chromebook C720-2827 Display Replacement, Display: paso 6, imagen 2 de 2
    • Using your fingers, pull the tape off of the display connector.

  7. Acer Chromebook C720-2827 Display Replacement: paso 7, imagen 1 de 2 Acer Chromebook C720-2827 Display Replacement: paso 7, imagen 2 de 2
    • Use the spudger to disconnect the display connector from the motherboard.

  8. Acer Chromebook C720-2827 Display Replacement: paso 8, imagen 1 de 3 Acer Chromebook C720-2827 Display Replacement: paso 8, imagen 2 de 3 Acer Chromebook C720-2827 Display Replacement: paso 8, imagen 3 de 3
    • Use the spudger to gently disconnect the black and white coaxial antenna cables off of the WLAN card.

  9. Acer Chromebook C720-2827 Display Replacement: paso 9, imagen 1 de 3 Acer Chromebook C720-2827 Display Replacement: paso 9, imagen 2 de 3 Acer Chromebook C720-2827 Display Replacement: paso 9, imagen 3 de 3
    • Using your Phillips #1 screwdriver, unscrew two 3.7mm screws from the right display hinge.

    • Using your Phillips #1 screwdriver, unscrew two 5.7mm screws from the left display hinge.

    • When removing the display, be careful to unthread the black coaxial antenna cable underneath the motherboard from the opposite side of the panel.

Conclusión

To reassemble your device, follow these instructions in reverse order.

Sarah Westberg

Miembro Desde 03/11/19

23,043 Reputación

70 Guías creadas

Equipo

iFixit Miembro de iFixit

Staff

135 Miembros

16,732 Guías creadas

0 comentarios

Agregar Comentario

Ver Estadísticas:

Ultimas 24 horas: 0

Ultimos 7 días: 1

Ultimos 30 días: 4

Todo El Tiempo: 354