Saltar al contenido principal

Acer Aspire One Cloudbook 11 AO1-131-C7DW Motherboard Replacement

Qué necesitas

  1. Acer Aspire One Cloudbook 11 AO1-131-C7DW Motherboard Replacement, Back Panel: paso 1, imagen 1 de 3 Acer Aspire One Cloudbook 11 AO1-131-C7DW Motherboard Replacement, Back Panel: paso 1, imagen 2 de 3 Acer Aspire One Cloudbook 11 AO1-131-C7DW Motherboard Replacement, Back Panel: paso 1, imagen 3 de 3
    • Power the laptop off.

    • Flip the laptop over and position it so the opening faces you.

    • Remove the rubber foot located near the opening side of the device using tweezers.

  2. Acer Aspire One Cloudbook 11 AO1-131-C7DW Motherboard Replacement: paso 2, imagen 1 de 2 Acer Aspire One Cloudbook 11 AO1-131-C7DW Motherboard Replacement: paso 2, imagen 2 de 2
    • Unscrew the five 5-mm screws using the PH0 screwdriver.

  3. Acer Aspire One Cloudbook 11 AO1-131-C7DW Motherboard Replacement: paso 3, imagen 1 de 3 Acer Aspire One Cloudbook 11 AO1-131-C7DW Motherboard Replacement: paso 3, imagen 2 de 3 Acer Aspire One Cloudbook 11 AO1-131-C7DW Motherboard Replacement: paso 3, imagen 3 de 3
    • Identify the HDMI port located in the side of the laptop opposite to the power button.

    • Insert the plastic opening tool into the divet of the back panel located above the HDMI port.

    • Pry along the laptop frame until the back panel comes loose.

    • Do not pull the back panel too hard as the battery is still connected to the back panel and the motherboard. This can damage your device.

  4. Acer Aspire One Cloudbook 11 AO1-131-C7DW Motherboard Replacement: paso 4, imagen 1 de 2 Acer Aspire One Cloudbook 11 AO1-131-C7DW Motherboard Replacement: paso 4, imagen 2 de 2
    • Rotate the device so the opening faces you again.

    • Hold the back panel away from the laptop and remove the 4-mm screw using the PH0 screwdriver.

    • This screw is fastening the battery to the laptop.

    • Lift the back panel gently.

  5. Acer Aspire One Cloudbook 11 AO1-131-C7DW Motherboard Replacement: paso 5, imagen 1 de 2 Acer Aspire One Cloudbook 11 AO1-131-C7DW Motherboard Replacement: paso 5, imagen 2 de 2
    • Unplug the cable that connects the battery to the motherboard.

    • Detach the back panel, which still includes the battery.

  6. Acer Aspire One Cloudbook 11 AO1-131-C7DW Motherboard Replacement, WiFi Module: paso 6, imagen 1 de 2 Acer Aspire One Cloudbook 11 AO1-131-C7DW Motherboard Replacement, WiFi Module: paso 6, imagen 2 de 2
    • Position the computer so the opening side faces you.

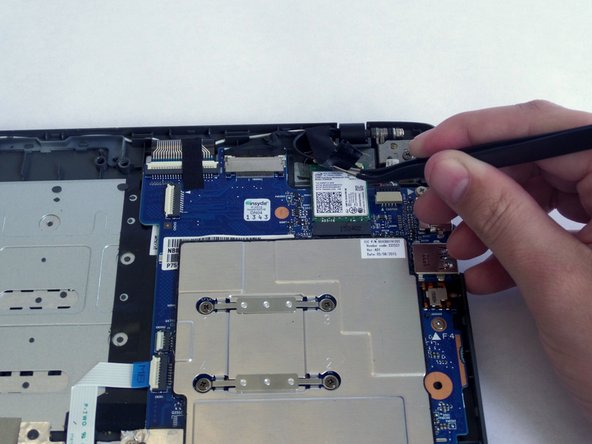
    • Remove the tape holding the WiFi module using tweezers.

  7. Acer Aspire One Cloudbook 11 AO1-131-C7DW Motherboard Replacement: paso 7, imagen 1 de 1
    • Unplug the white and black wires by lifting them up by hand or using tweezers.

  8. Acer Aspire One Cloudbook 11 AO1-131-C7DW Motherboard Replacement: paso 8, imagen 1 de 1
    • Remove the 3-mm screw that holds the WiFi module to the motherboard using the PH0 screwdriver.

  9. Acer Aspire One Cloudbook 11 AO1-131-C7DW Motherboard Replacement: paso 9, imagen 1 de 2 Acer Aspire One Cloudbook 11 AO1-131-C7DW Motherboard Replacement: paso 9, imagen 2 de 2
    • Pull the WiFi module out of the connector.

  10. Acer Aspire One Cloudbook 11 AO1-131-C7DW Motherboard Replacement, Motherboard: paso 10, imagen 1 de 2 Acer Aspire One Cloudbook 11 AO1-131-C7DW Motherboard Replacement, Motherboard: paso 10, imagen 2 de 2
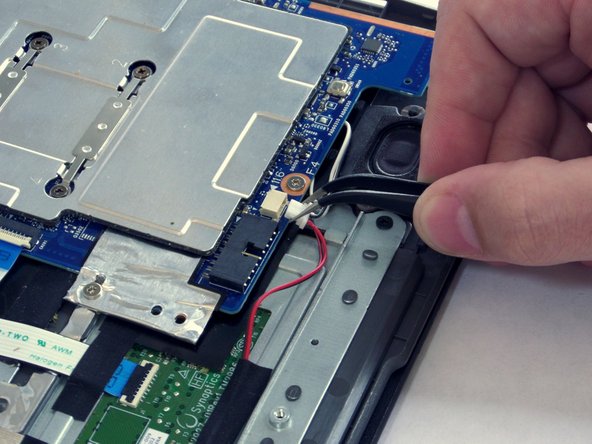
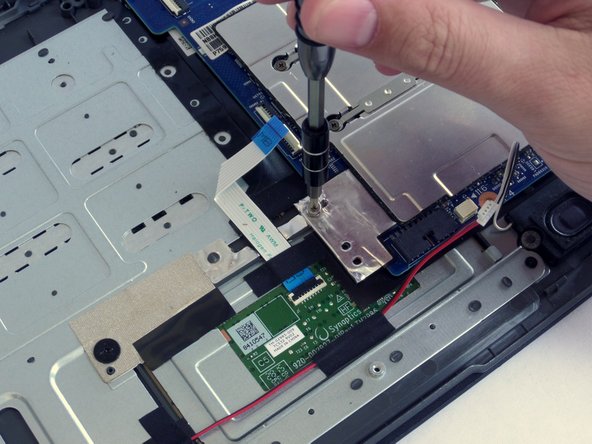
    • Unplug the speaker connector using tweezers.

  11. Acer Aspire One Cloudbook 11 AO1-131-C7DW Motherboard Replacement: paso 11, imagen 1 de 2 Acer Aspire One Cloudbook 11 AO1-131-C7DW Motherboard Replacement: paso 11, imagen 2 de 2
    • Lift the white hinge that holds the cable with a blue plastic strip.

    • Pull the blue strip away from the motherboard.

  12. Acer Aspire One Cloudbook 11 AO1-131-C7DW Motherboard Replacement: paso 12, imagen 1 de 2 Acer Aspire One Cloudbook 11 AO1-131-C7DW Motherboard Replacement: paso 12, imagen 2 de 2
    • Lift the wider hinge located at the top of the motherboard holding another grey strip cable.

    • Pull the strip cable away from the motherboard.

    • These cables look similar so make sure not to mix them up when putting the laptop back together.

  13. Acer Aspire One Cloudbook 11 AO1-131-C7DW Motherboard Replacement: paso 13, imagen 1 de 2 Acer Aspire One Cloudbook 11 AO1-131-C7DW Motherboard Replacement: paso 13, imagen 2 de 2
    • Unplug the black covered cable from the top of the motherboard.

    • This cable is located to the right of the last strip cable from the previous step.

  14. Acer Aspire One Cloudbook 11 AO1-131-C7DW Motherboard Replacement: paso 14, imagen 1 de 2 Acer Aspire One Cloudbook 11 AO1-131-C7DW Motherboard Replacement: paso 14, imagen 2 de 2
    • Remove the four 4-mm screws holding the metallic plate using a PH0 screwdriver.

  15. Acer Aspire One Cloudbook 11 AO1-131-C7DW Motherboard Replacement: paso 15, imagen 1 de 1
    • Detach the motherboard by lifting it up and away from the body of the laptop.

Conclusión

To reassemble your device, follow these instructions in reverse order.

Una persona más ha completado esta guía.

Luz Villegas

Miembro Desde 09/08/17

452 Reputación

4 Guías creadas

Equipo

CSU Fullerton, Team S1-G4, Bruce Fall 2017 Miembro de CSU Fullerton, Team S1-G4, Bruce Fall 2017

CSUF-BRUCE-F17S1G4

3 Miembros

6 Guías creadas

Un comentario

Can i have link of a datasheet for this motherboard.

Bryan S. - Contestar

Agregar Comentario

Ver Estadísticas:

Ultimas 24 horas: 0

Ultimos 7 días: 4

Ultimos 30 días: 14

Todo El Tiempo: 1,892