Saltar al contenido principal

Acer Aspire One 751h-1948 Network Card Replacement

Qué necesitas

  1. Acer Aspire One 751h-1948 Network Card Replacement, Battery: paso 1, imagen 1 de 1
    • Close the laptop and flip it over to view the back of the laptop.

  2. Acer Aspire One 751h-1948 Network Card Replacement: paso 2, imagen 1 de 3 Acer Aspire One 751h-1948 Network Card Replacement: paso 2, imagen 2 de 3 Acer Aspire One 751h-1948 Network Card Replacement: paso 2, imagen 3 de 3
    • Unlock the right side of the battery by sliding the battery lock to the right. Then slide the left lock to the left and remove the battery.

  3. Acer Aspire One 751h-1948 Network Card Replacement, Network Card: paso 3, imagen 1 de 2 Acer Aspire One 751h-1948 Network Card Replacement, Network Card: paso 3, imagen 2 de 2
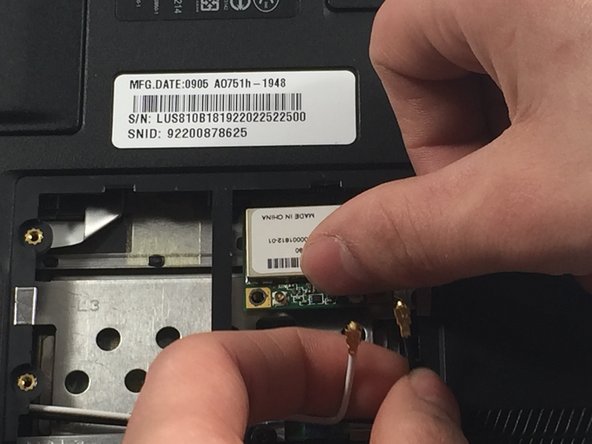
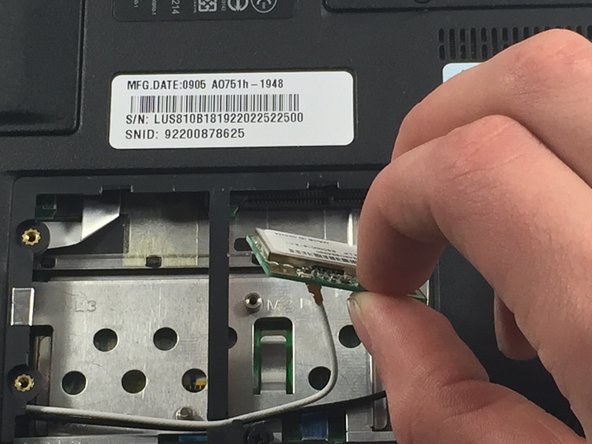
    • Unscrew the two Phillips #0 (M2-L2.5 mm) holding down the network card panel.

    • These screws don't come all the way out.

  4. Acer Aspire One 751h-1948 Network Card Replacement: paso 4, imagen 1 de 3 Acer Aspire One 751h-1948 Network Card Replacement: paso 4, imagen 2 de 3 Acer Aspire One 751h-1948 Network Card Replacement: paso 4, imagen 3 de 3
    • Unplug the two connecting cables by lifting them up. They should unclip easily.

  5. Acer Aspire One 751h-1948 Network Card Replacement: paso 5, imagen 1 de 3 Acer Aspire One 751h-1948 Network Card Replacement: paso 5, imagen 2 de 3 Acer Aspire One 751h-1948 Network Card Replacement: paso 5, imagen 3 de 3
    • Remove the screw Phillips #0 (M2-L3 mm) holding down the network card. Pull out the card.

Conclusión

To reassemble your device, follow these instructions in reverse order.

0 comentarios

Agregar Comentario

Ver Estadísticas:

Ultimas 24 horas: 0

Ultimos 7 días: 2

Ultimos 30 días: 5

Todo El Tiempo: 184