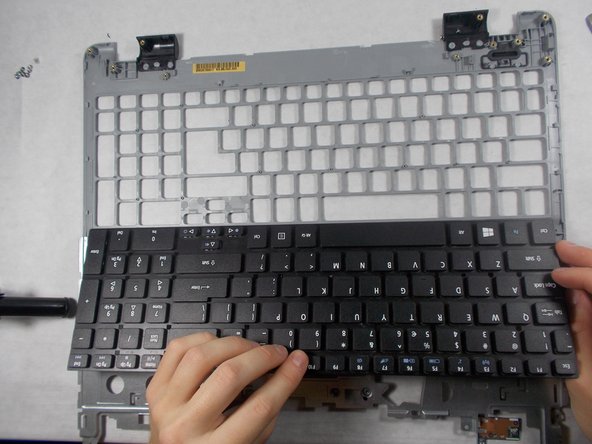
Saltar al contenido principal

Acer Aspire E5-571-58CG Keyboard Replacement

Qué necesitas

  1. Acer Aspire E5-571-58CG Keyboard Replacement, Battery: paso 1, imagen 1 de 2 Acer Aspire E5-571-58CG Keyboard Replacement, Battery: paso 1, imagen 2 de 2
    • Make sure the laptop is powered off.

    • Flip the laptop over and locate the battery release switch.

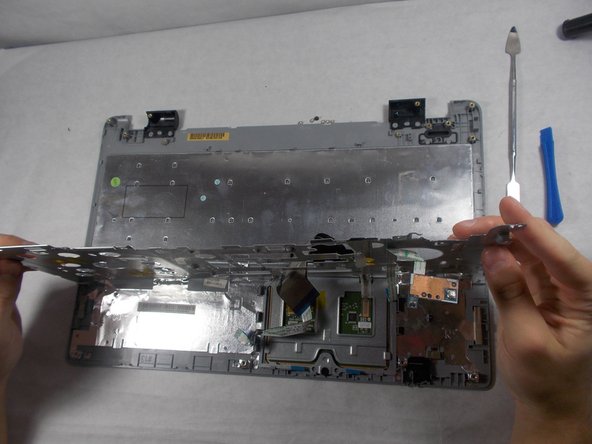
    • Insert the pointed end of the spudger into the battery release switch.

    • Push the battery release switch to the right.

  2. Acer Aspire E5-571-58CG Keyboard Replacement: paso 2, imagen 1 de 3 Acer Aspire E5-571-58CG Keyboard Replacement: paso 2, imagen 2 de 3 Acer Aspire E5-571-58CG Keyboard Replacement: paso 2, imagen 3 de 3
    • While the battery release switch is pushed to the right, carefully slide the battery out of its socket.

  3. Acer Aspire E5-571-58CG Keyboard Replacement, Keyboard: paso 3, imagen 1 de 3 Acer Aspire E5-571-58CG Keyboard Replacement, Keyboard: paso 3, imagen 2 de 3 Acer Aspire E5-571-58CG Keyboard Replacement, Keyboard: paso 3, imagen 3 de 3
    • Make sure laptop is upright.

    • Pry the keyboard cover off with the plastic opening tool.

  4. Acer Aspire E5-571-58CG Keyboard Replacement: paso 4, imagen 1 de 3 Acer Aspire E5-571-58CG Keyboard Replacement: paso 4, imagen 2 de 3 Acer Aspire E5-571-58CG Keyboard Replacement: paso 4, imagen 3 de 3
    • Flip the keyboard cover upside down.

    • Use the JIS #000 screw bit to remove the marked M1.4 x 2 mm screws from the back of the metal panel.

  5. Acer Aspire E5-571-58CG Keyboard Replacement: paso 5, imagen 1 de 3 Acer Aspire E5-571-58CG Keyboard Replacement: paso 5, imagen 2 de 3 Acer Aspire E5-571-58CG Keyboard Replacement: paso 5, imagen 3 de 3
    • Push the metal panel forward to unlock it from plastic holders on both sides.

    • Lift the metal panel up and peel it back to expose the keyboard component.

  6. Acer Aspire E5-571-58CG Keyboard Replacement: paso 6, imagen 1 de 3 Acer Aspire E5-571-58CG Keyboard Replacement: paso 6, imagen 2 de 3 Acer Aspire E5-571-58CG Keyboard Replacement: paso 6, imagen 3 de 3
    • Use the metal spudger to lift the keyboard component out of the metal panel.

Conclusión

To reassemble your device, follow these instructions in reverse order.

Matthew Barboza

Miembro Desde 10/19/18

159 Reputación

1 Guía escrita

Equipo

0 comentarios

Agregar Comentario

Ver Estadísticas:

Ultimas 24 horas: 0

Ultimos 7 días: 0

Ultimos 30 días: 5

Todo El Tiempo: 449