Saltar al contenido principal

Acer Aspire E1-510-2500 Webcam Replacement

Qué necesitas

  1. Acer Aspire E1-510-2500 Webcam Replacement, Battery: paso 1, imagen 1 de 1
    • Ensure that your laptop is completely switched off, and disconnected from the power source.

    • Flip the laptop so that the base of the laptop is facing up.

  2. Acer Aspire E1-510-2500 Webcam Replacement: paso 2, imagen 1 de 2 Acer Aspire E1-510-2500 Webcam Replacement: paso 2, imagen 2 de 2
    • Insert a spudger into the battery release latch.

    • Slide the battery release latch to the right, this will eject the battery for safe removal.

  3. Acer Aspire E1-510-2500 Webcam Replacement: paso 3, imagen 1 de 2 Acer Aspire E1-510-2500 Webcam Replacement: paso 3, imagen 2 de 2
    • Carefully slide the battery out of the battery's home.

  4. Acer Aspire E1-510-2500 Webcam Replacement, Screen: paso 4, imagen 1 de 3 Acer Aspire E1-510-2500 Webcam Replacement, Screen: paso 4, imagen 2 de 3 Acer Aspire E1-510-2500 Webcam Replacement, Screen: paso 4, imagen 3 de 3
    • Using a Phillips 1 screwdriver, remove the 17 9mm screws from the bottom of the laptop, including the one in the back panel.

    • Using a plastic opening tool, carefully remove the back panel.

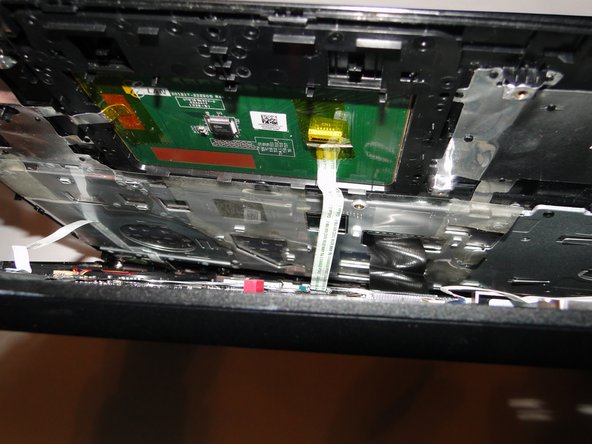
    • Remove the 9mm screw under the back panel.

    • When reassembling, insert the panel from the bottom edge first.

  5. Acer Aspire E1-510-2500 Webcam Replacement: paso 5, imagen 1 de 1
    • Using a plastic opening tool, carefully separate the frame along the edges of the laptop. This should separate the keyboard assembly from the bottom portion of the laptop.

  6. Acer Aspire E1-510-2500 Webcam Replacement: paso 6, imagen 1 de 3 Acer Aspire E1-510-2500 Webcam Replacement: paso 6, imagen 2 de 3 Acer Aspire E1-510-2500 Webcam Replacement: paso 6, imagen 3 de 3
    • Open the laptop, leaving the screen flat on the table.

    • Carefully pull the keyboard assembly out away from the base of the laptop. There should be three connections visible in the gap between the keyboard assembly and the base.

    • Using tweezers, carefully detach the connections from the base.

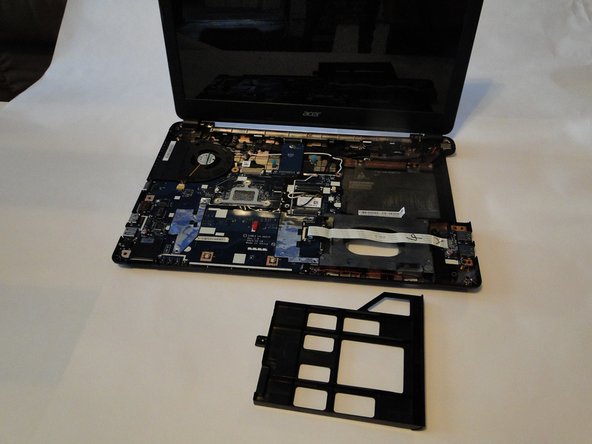
    • Place the keyboard assembly and disk tray place holder aside.

    • For reassembly, leave the disk tray place holder out until after the blue tape connector has been reconnected, to have enough space to reattach the tape.

  7. Acer Aspire E1-510-2500 Webcam Replacement: paso 7, imagen 1 de 3 Acer Aspire E1-510-2500 Webcam Replacement: paso 7, imagen 2 de 3 Acer Aspire E1-510-2500 Webcam Replacement: paso 7, imagen 3 de 3
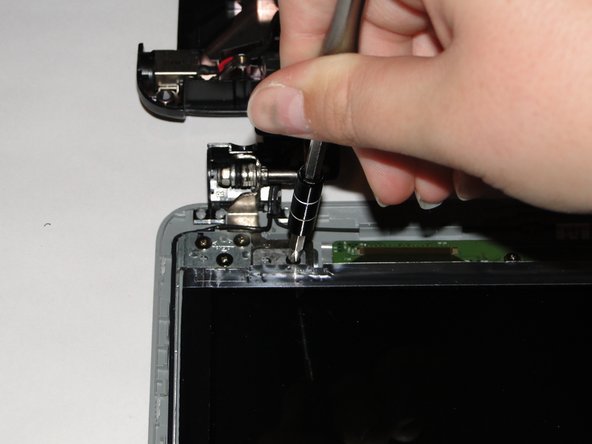
    • Locate the backs of the hinges and remove the two 4mm screws using a Phillips 1 screwdriver. If this is the first time removing these screws, there will be a black covering over each screw. The black covering can be removed with a pair of tweezers.

    • Lay the laptop base down with the screen still open.

    • Detach the wire connection from the screen to the motherboard.

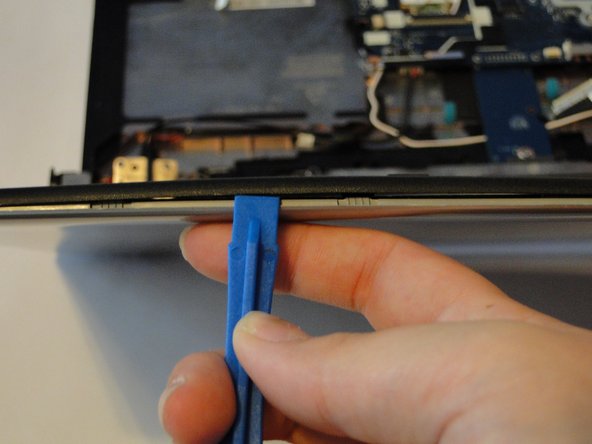
    • Using a plastic opening tool, carefully separate the front bezel from the top case.

  8. Acer Aspire E1-510-2500 Webcam Replacement: paso 8, imagen 1 de 2 Acer Aspire E1-510-2500 Webcam Replacement: paso 8, imagen 2 de 2
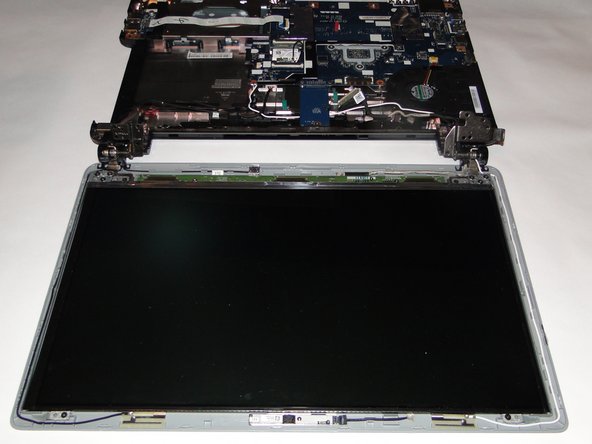
    • Remove the five 5mm screws on the hinges using the Phillips 1 screwdriver. This will release the laptop screen from the base, so be sure to brace it against something so that it does not fall.

    • Lay the screen flat on the table. There should still be two wires on each side in or around the hinges that go from the top portion to the base.

  9. Acer Aspire E1-510-2500 Webcam Replacement: paso 9, imagen 1 de 3 Acer Aspire E1-510-2500 Webcam Replacement: paso 9, imagen 2 de 3 Acer Aspire E1-510-2500 Webcam Replacement: paso 9, imagen 3 de 3
    • Remove the six silver 3mm screws from the screen attachment points using a Phillips 1 screwdriver.

    • Remove the four black 3mm screws from the screen attachment points using a Phillips 1 screwdriver.

    • Detach the wire connection for the camera.

  10. Acer Aspire E1-510-2500 Webcam Replacement: paso 10, imagen 1 de 1
    • Carefully move the wire attached to the screen out of the hinge.

    • Remove the screen.

    • Be careful of the LED attached at the base of the screen because it is not immediately noticeable and can be easily damaged.

  11. Acer Aspire E1-510-2500 Webcam Replacement, Webcam: paso 11, imagen 1 de 2 Acer Aspire E1-510-2500 Webcam Replacement, Webcam: paso 11, imagen 2 de 2
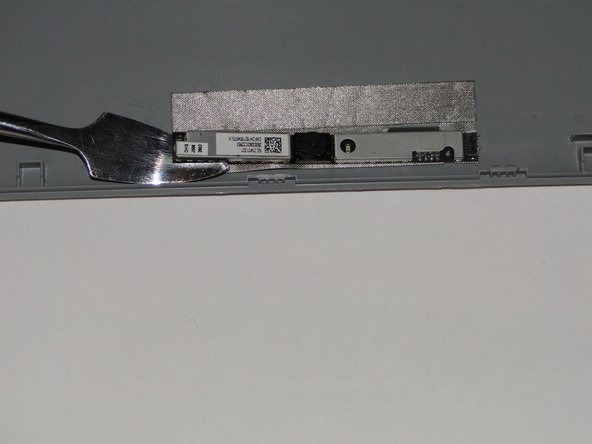
    • Carefully detach the camera from the back bezel using a spudger and careful upward pressure.

    • Glue is required to reattach the camera to the frame.

Conclusión

To reassemble your device, follow these instructions in reverse order.

Sebastian Taylor

Miembro Desde 10/19/17

709 Reputación

6 Guías creadas

Equipo

0 comentarios

Agregar Comentario

Ver Estadísticas:

Ultimas 24 horas: 0

Ultimos 7 días: 2

Ultimos 30 días: 13

Todo El Tiempo: 1,534