Saltar al contenido principal
Únete a la Comunidad de Reparación - Crear Cuenta

Acer Aspire E1-470P-6659 LCD Panel & Faceplate Replacement

Qué necesitas

    1. Acer Aspire E1-470P-6659  LCD Panel & Faceplate Replacement, Battery: paso 1, imagen 1 de 1
      • Turn off the laptop and disconnect all device cords.

      Pregunta a FixBot

      Agregar Comentario

    2. Acer Aspire E1-470P-6659  LCD Panel & Faceplate Replacement: paso 2, imagen 1 de 1
      • Flip the laptop over so the bottom is facing you.

      Pregunta a FixBot

      Agregar Comentario

    3. Acer Aspire E1-470P-6659  LCD Panel & Faceplate Replacement: paso 3, imagen 1 de 3 Acer Aspire E1-470P-6659  LCD Panel & Faceplate Replacement: paso 3, imagen 2 de 3 Acer Aspire E1-470P-6659  LCD Panel & Faceplate Replacement: paso 3, imagen 3 de 3
      • Use your finger or a spuger to pull the battery release switch.

      Pregunta a FixBot

      Agregar Comentario

    4. Acer Aspire E1-470P-6659  LCD Panel & Faceplate Replacement: paso 4, imagen 1 de 3 Acer Aspire E1-470P-6659  LCD Panel & Faceplate Replacement: paso 4, imagen 2 de 3 Acer Aspire E1-470P-6659  LCD Panel & Faceplate Replacement: paso 4, imagen 3 de 3
      • Remove the battery from the laptop.

      Pregunta a FixBot

      Agregar Comentario

    1. Acer Aspire E1-470P-6659  LCD Panel & Faceplate Replacement, LCD Panel & Faceplate: paso 5, imagen 1 de 1
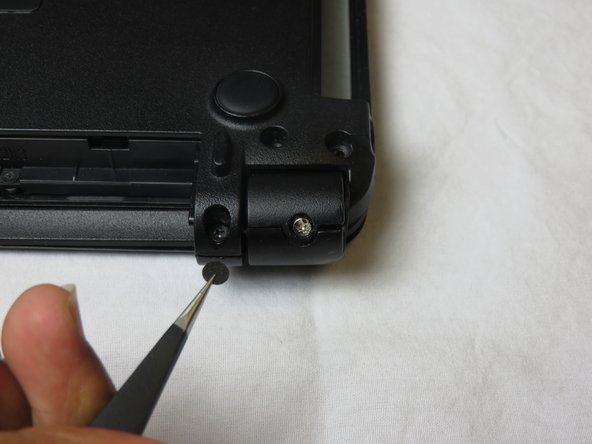
      • Locate the screws connected to the hinge of the laptop. Small, black stickers hide them from immediate view.

      Pregunta a FixBot

      Agregar Comentario

    2. Acer Aspire E1-470P-6659  LCD Panel & Faceplate Replacement: paso 6, imagen 1 de 3 Acer Aspire E1-470P-6659  LCD Panel & Faceplate Replacement: paso 6, imagen 2 de 3 Acer Aspire E1-470P-6659  LCD Panel & Faceplate Replacement: paso 6, imagen 3 de 3
      Herramienta utilizada en este paso:
      Tweezers
      $4.99
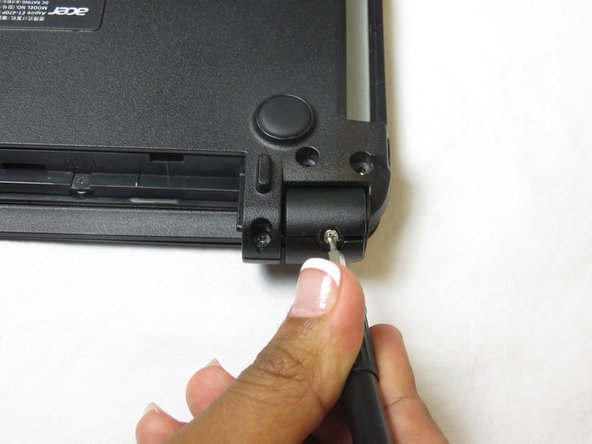
      • On both corners, use tweezers to remove small plastic sticker hiding the screws.

      • Remove screws using Phillips #0 screwdriver.

      Pregunta a FixBot

      Agregar Comentario

    3. Acer Aspire E1-470P-6659  LCD Panel & Faceplate Replacement: paso 7, imagen 1 de 3 Acer Aspire E1-470P-6659  LCD Panel & Faceplate Replacement: paso 7, imagen 2 de 3 Acer Aspire E1-470P-6659  LCD Panel & Faceplate Replacement: paso 7, imagen 3 de 3
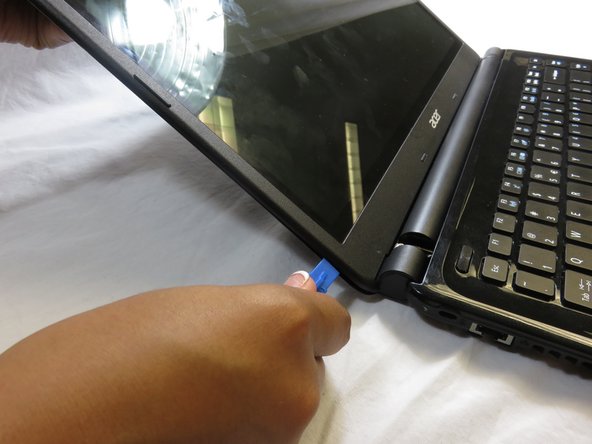
      • Turn the laptop over and open it up.

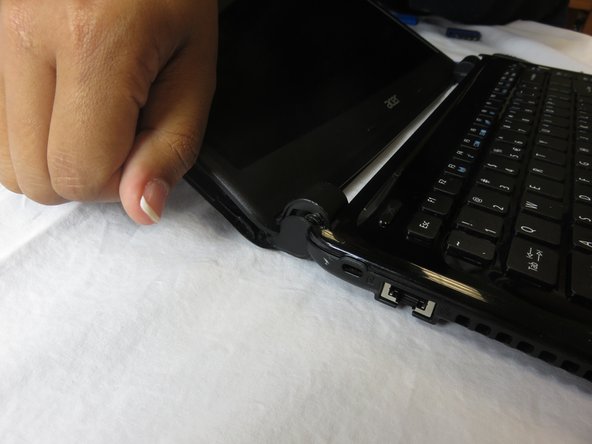
      • Using a prying tool, run along all edges of the display to pry the front face plate from the cover.

      • Use your fingers to pull the LCD panel and faceplate from the backing.

      Pregunta a FixBot

      Agregar Comentario

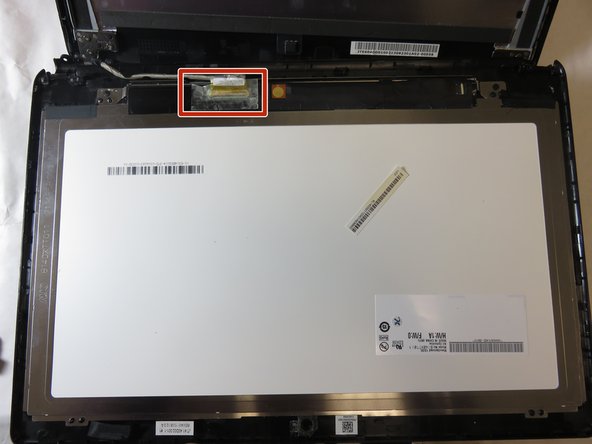
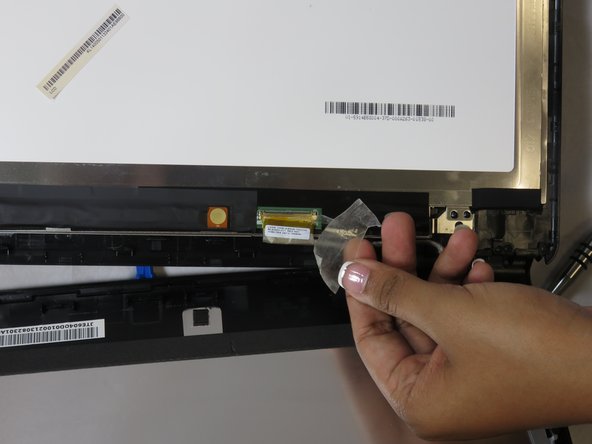
    4. Acer Aspire E1-470P-6659  LCD Panel & Faceplate Replacement: paso 8, imagen 1 de 3 Acer Aspire E1-470P-6659  LCD Panel & Faceplate Replacement: paso 8, imagen 2 de 3 Acer Aspire E1-470P-6659  LCD Panel & Faceplate Replacement: paso 8, imagen 3 de 3
      • LCD with faceplate should separate, be careful not to pull completely away because there is a cable still attached to the display.

      • Carefully peel tape away from cable lead and separate cable from LCD panel.

      Pregunta a FixBot

      Agregar Comentario

    5. Acer Aspire E1-470P-6659  LCD Panel & Faceplate Replacement: paso 9, imagen 1 de 1
      • Remove the LCD Panel and faceplate from the device.

      Pregunta a FixBot

      Agregar Comentario

Conclusión

To reassemble your device, follow these instructions in reverse order.

Cancelar: No complete esta guía.

Joel Humes

Miembro Desde 10/22/18

178 Reputación

1 Guía escrita

Equipo

UC Davis, Team S4-G5, Lore Fall 2018 Miembro de UC Davis, Team S4-G5, Lore Fall 2018

UCD-LORE-F18S4G5

Miembros de 3

50 Guías creadas

1Guía Comentario

Need more guide how to safe instal lcd, cause peel tape and need new one.. Overall good and detail love it

Kusuma Wijaya - Contestar Compartir

Agregar Comentario

Ver Estadísticas:

Ultimas 24 horas: 0

Ultimos 7 días: 13

Ultimos 30 días: 54

Todo El Tiempo: 1,114