Saltar al contenido principal

Acer Aspire 5750-6667 Memory Replacement

Qué necesitas

  1. Acer Aspire 5750-6667 Memory Replacement, Battery: paso 1, imagen 1 de 2 Acer Aspire 5750-6667 Memory Replacement, Battery: paso 1, imagen 2 de 2
    • Unplug the charging cable from the laptop and the wall. Failure to disconnect the charging cable could result in electric shock.

    • Turn the laptop over.

    • Locate the orange switch next to the battery.

  2. Acer Aspire 5750-6667 Memory Replacement: paso 2, imagen 1 de 3 Acer Aspire 5750-6667 Memory Replacement: paso 2, imagen 2 de 3 Acer Aspire 5750-6667 Memory Replacement: paso 2, imagen 3 de 3
    Herramienta utilizada en este paso:
    Tweezers
    $4.99
    Comprar
    • Using a small tool such as tweezers or a pen, slide the orange switch completely to the left to unlock the battery.

    • While holding the orange switch in place, lift the battery by the lip and pull it away from the laptop.

  3. Acer Aspire 5750-6667 Memory Replacement, Bottom Access Panel: paso 3, imagen 1 de 3 Acer Aspire 5750-6667 Memory Replacement, Bottom Access Panel: paso 3, imagen 2 de 3 Acer Aspire 5750-6667 Memory Replacement, Bottom Access Panel: paso 3, imagen 3 de 3
    • Flip the laptop over and locate the bottom access panel. It is opposite the battery.

    • Locate the 2 screws that hold the panel in place and unscrew them using a Phillips PH0 screwdriver.

  4. Acer Aspire 5750-6667 Memory Replacement: paso 4, imagen 1 de 3 Acer Aspire 5750-6667 Memory Replacement: paso 4, imagen 2 de 3 Acer Aspire 5750-6667 Memory Replacement: paso 4, imagen 3 de 3
    • Use the blue plastic opening tool to lift the panel away from the laptop.

  5. Acer Aspire 5750-6667 Memory Replacement, RAM: paso 5, imagen 1 de 3 Acer Aspire 5750-6667 Memory Replacement, RAM: paso 5, imagen 2 de 3 Acer Aspire 5750-6667 Memory Replacement, RAM: paso 5, imagen 3 de 3
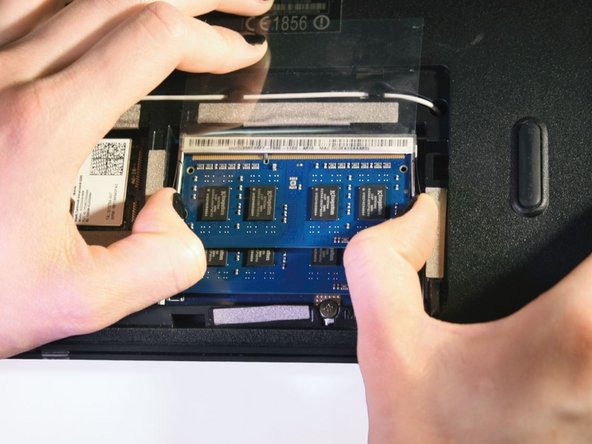
    • Lift the clear plastic flap and locate the pair of metal brackets that are holding the top RAM in place.

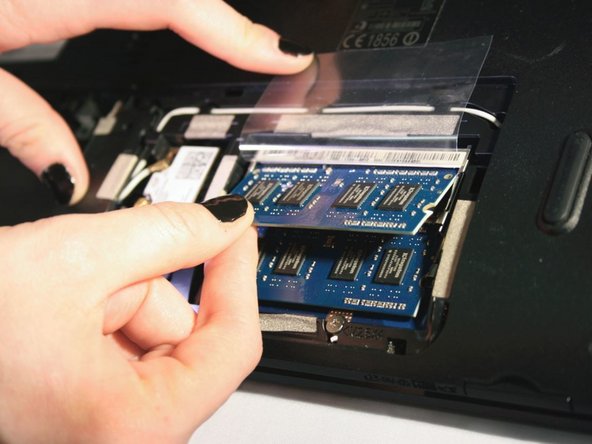
    • Using your thumbs, push the brackets away from the RAM . It should pop up when released.

    • You can now gently pull the top RAM out of the laptop.

  6. Acer Aspire 5750-6667 Memory Replacement: paso 6, imagen 1 de 3 Acer Aspire 5750-6667 Memory Replacement: paso 6, imagen 2 de 3 Acer Aspire 5750-6667 Memory Replacement: paso 6, imagen 3 de 3
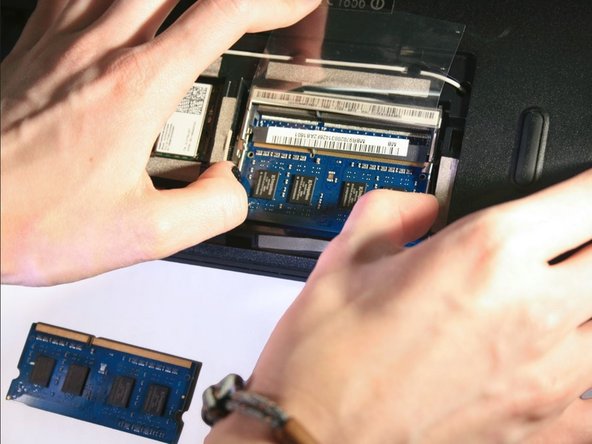
    • Locate the second pair of metal clasps holding the bottom RAM in place.

    • Using your thumbs, push the brackets away from the RAM . The RAM board should pop up when released.

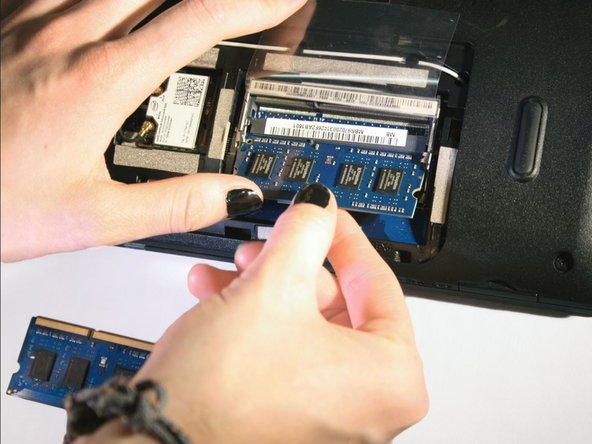
    • You can now gently pull the top RAM out of the laptop. Repeat for any other RAM boards that may be in the device.

Conclusión

To reassemble your device, follow these instructions in reverse order.

2 personas más completaron esta guía.

0 comentarios

Agregar Comentario

Ver Estadísticas:

Ultimas 24 horas: 2

Ultimos 7 días: 5

Ultimos 30 días: 14

Todo El Tiempo: 866