Saltar al contenido principal

ATT EL52300 LCD Screen on Handset Replacement

Qué necesitas

  1. ATT EL52300 LCD Screen on Handset Replacement, Battery: paso 1, imagen 1 de 2 ATT EL52300 LCD Screen on Handset Replacement, Battery: paso 1, imagen 2 de 2
    • Find the bump where the battery cover meets the phone. Put your thumb here, and push and slide the cover down.

  2. ATT EL52300 LCD Screen on Handset Replacement: paso 2, imagen 1 de 1
    • Unplug the battery by squeezing your hands on the small white plug and lifting it up.

    • Do not pull on the wire itself because you might damage the wire!

    • The battery is now detached and ready to be removed by lifting it out.

  3. ATT EL52300 LCD Screen on Handset Replacement, Motherboard: paso 3, imagen 1 de 2 ATT EL52300 LCD Screen on Handset Replacement, Motherboard: paso 3, imagen 2 de 2
    • Remove the two 3.75 mm screws with a PH1 screwdriver.

  4. ATT EL52300 LCD Screen on Handset Replacement: paso 4, imagen 1 de 2 ATT EL52300 LCD Screen on Handset Replacement: paso 4, imagen 2 de 2
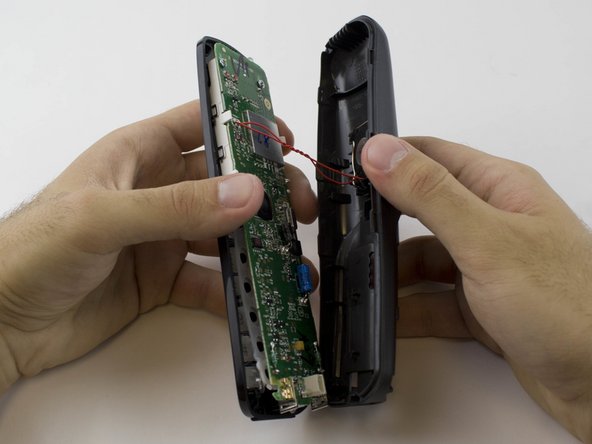
    • Use a plastic opening tool to remove the handset case.

    • Be careful to not lift the case too far as the ringer cable is attached to the case.

  5. ATT EL52300 LCD Screen on Handset Replacement: paso 5, imagen 1 de 2 ATT EL52300 LCD Screen on Handset Replacement: paso 5, imagen 2 de 2
    Herramienta utilizada en este paso:
    Anti-Static Wrist Strap
    $7.95
    Comprar
    • Remove the two 3.65 mm screws on the motherboard with a PH1 screwdriver.

    • Use an anti-static wrist strap to prevent damage to the motherboard.

  6. ATT EL52300 LCD Screen on Handset Replacement, LCD Screen on Handset: paso 6, imagen 1 de 2 ATT EL52300 LCD Screen on Handset Replacement, LCD Screen on Handset: paso 6, imagen 2 de 2
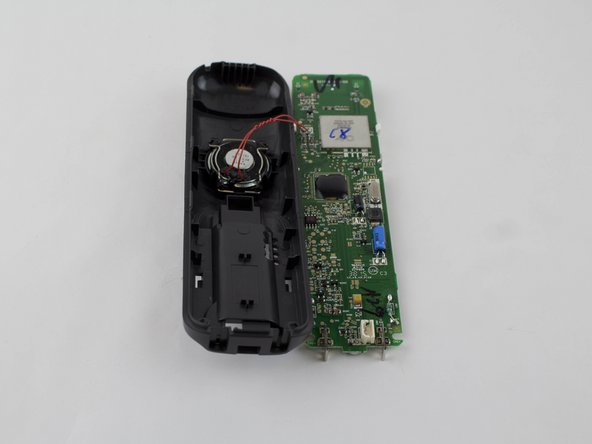
    • The motherboard is connected to the ringer, which is clipped on to the back plate of your handset.

    • Pop off the indicated clip using a pointed tweezer.

    • With the motherboard disconnected from the back plate, turn it over so that the screen is facing you.

  7. ATT EL52300 LCD Screen on Handset Replacement: paso 7, imagen 1 de 3 ATT EL52300 LCD Screen on Handset Replacement: paso 7, imagen 2 de 3 ATT EL52300 LCD Screen on Handset Replacement: paso 7, imagen 3 de 3
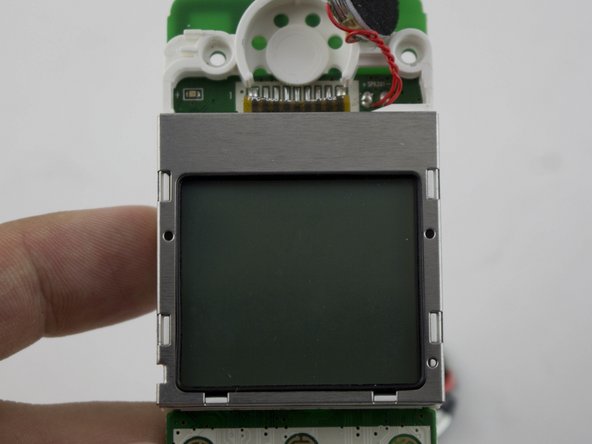
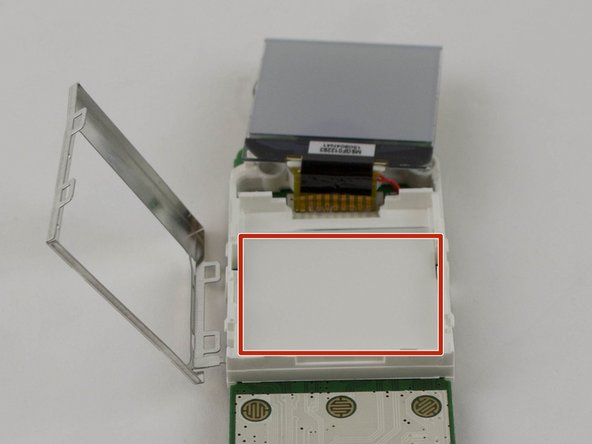
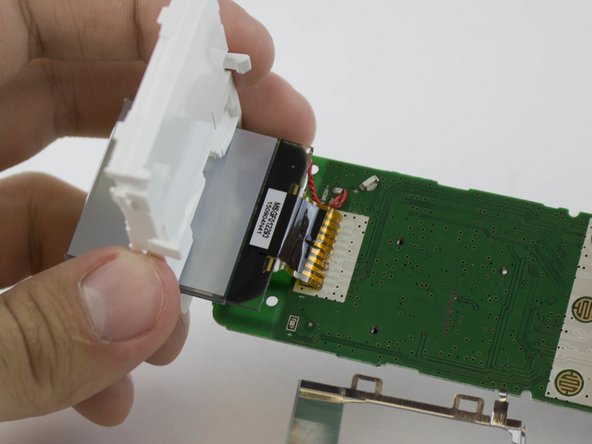
    • To get to the connection between the display and the motherboard, remove the casing for the display using a plastic opening tool.

    • The white casing has a hole cut into it. You are going to slide the display and the speaker through this hole.

  8. ATT EL52300 LCD Screen on Handset Replacement: paso 8, imagen 1 de 1
    • The display has a line of soldered connections to the motherboard. These all need to be undone with a soldering tool, so the screen can be removed.

    • Please refer to the Cómo soldar y desoldar conexiones for soldering help.

Conclusión

To reassemble your device, follow these instructions in reverse order.

Katty

Miembro Desde 08/27/15

313 Reputación

3 Guías creadas

Equipo

USF Tampa, Team 1-1, Sullivan Spring 2016 Miembro de USF Tampa, Team 1-1, Sullivan Spring 2016

USFT-SULLIVAN-S16S1G1

4 Miembros

10 Guías creadas

0 comentarios

Agregar Comentario

Ver Estadísticas:

Ultimas 24 horas: 0

Ultimos 7 días: 1

Ultimos 30 días: 3

Todo El Tiempo: 426