Saltar al contenido principal

ASUS ZENFONE 3 Zoom Speaker/Charger Port/Headphone Jack Replacement

Qué necesitas

  1. ASUS ZENFONE 3 Zoom Speaker/Charger Port/Headphone Jack Replacement, Battery: paso 1, imagen 1 de 2 ASUS ZENFONE 3 Zoom Speaker/Charger Port/Headphone Jack Replacement, Battery: paso 1, imagen 2 de 2
    • Using a pair of tweezers, pull put the SIM card tray and set it to the side.

  2. ASUS ZENFONE 3 Zoom Speaker/Charger Port/Headphone Jack Replacement: paso 2, imagen 1 de 1
    • Remove the two 2 mm screws using a Torx T2 screwdriver.

  3. ASUS ZENFONE 3 Zoom Speaker/Charger Port/Headphone Jack Replacement: paso 3, imagen 1 de 2 ASUS ZENFONE 3 Zoom Speaker/Charger Port/Headphone Jack Replacement: paso 3, imagen 2 de 2
    • Insert a prying tool between the screen and the metal backing of the phone at the bottom to remove backing from phone.

    • There will be a thin film connecting the two pieces. You do not need to remove this. Just fold the two pieces apart with the inside facing up.

  4. ASUS ZENFONE 3 Zoom Speaker/Charger Port/Headphone Jack Replacement: paso 4, imagen 1 de 1
    • Remove the two 3 mm screws, using the Phillips #00 screwdriver, on the silver band at the top of the battery and remove the band.

  5. ASUS ZENFONE 3 Zoom Speaker/Charger Port/Headphone Jack Replacement: paso 5, imagen 1 de 1
    • Peel back the silver tape.

  6. ASUS ZENFONE 3 Zoom Speaker/Charger Port/Headphone Jack Replacement: paso 6, imagen 1 de 1
    • Disconnect the battery connections.

  7. ASUS ZENFONE 3 Zoom Speaker/Charger Port/Headphone Jack Replacement: paso 7, imagen 1 de 1
    • Pry and remove the battery.

    • The underside of the battery is adhesive so make sure to pry the battery off gently.

  8. ASUS ZENFONE 3 Zoom Speaker/Charger Port/Headphone Jack Replacement, Speaker/Charger Port/Headphone Jack: paso 8, imagen 1 de 3 ASUS ZENFONE 3 Zoom Speaker/Charger Port/Headphone Jack Replacement, Speaker/Charger Port/Headphone Jack: paso 8, imagen 2 de 3 ASUS ZENFONE 3 Zoom Speaker/Charger Port/Headphone Jack Replacement, Speaker/Charger Port/Headphone Jack: paso 8, imagen 3 de 3
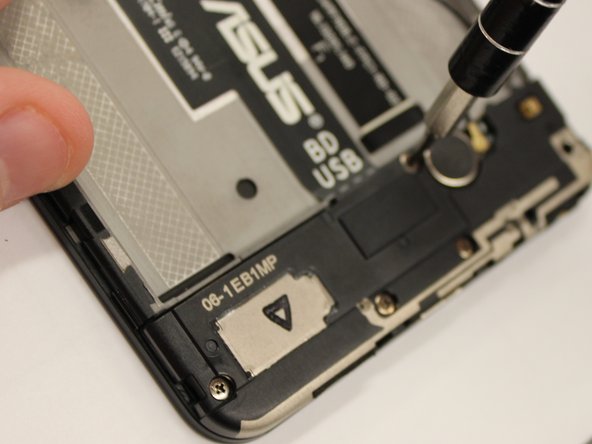
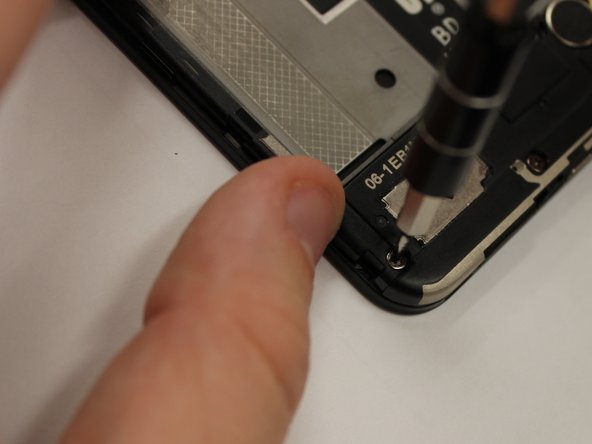
    • Remove all screws 3mm, using the Phillips #00 screwdriver, at the bottom of the device.

  9. ASUS ZENFONE 3 Zoom Speaker/Charger Port/Headphone Jack Replacement: paso 9, imagen 1 de 1
    • Remove the black piece.

  10. ASUS ZENFONE 3 Zoom Speaker/Charger Port/Headphone Jack Replacement: paso 10, imagen 1 de 2 ASUS ZENFONE 3 Zoom Speaker/Charger Port/Headphone Jack Replacement: paso 10, imagen 2 de 2
    • Unplug the wires.

  11. ASUS ZENFONE 3 Zoom Speaker/Charger Port/Headphone Jack Replacement: paso 11, imagen 1 de 3 ASUS ZENFONE 3 Zoom Speaker/Charger Port/Headphone Jack Replacement: paso 11, imagen 2 de 3 ASUS ZENFONE 3 Zoom Speaker/Charger Port/Headphone Jack Replacement: paso 11, imagen 3 de 3
    • Using the pry tool, pry up the circular piece and remove the board.

Conclusión

To reassemble your device, follow these instructions in reverse order.

Una persona más ha completado esta guía.

0 comentarios

Agregar Comentario

Ver Estadísticas:

Ultimas 24 horas: 0

Ultimos 7 días: 2

Ultimos 30 días: 5

Todo El Tiempo: 1,016