Saltar al contenido principal

Esta versión puede contener ediciones incorrectas. Cambie a la última instantánea verificada.

Qué necesitas

  1. Este paso está sin traducir. Ayuda a traducirlo

    : paso 1, imagen 1 de 2 : paso 1, imagen 2 de 2
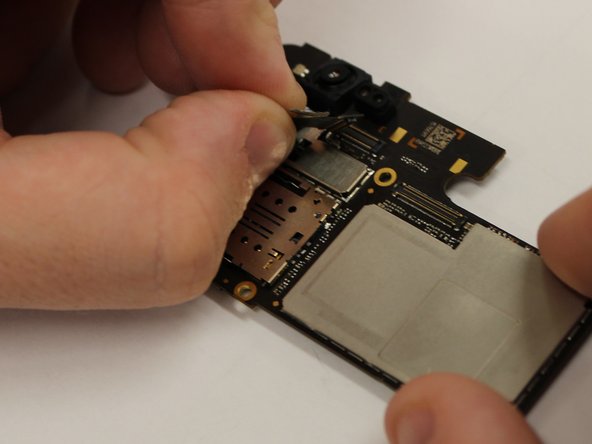
    • Using a pair of tweezers, pull put the SIM card tray and set it to the side.

  2. Este paso está sin traducir. Ayuda a traducirlo

    : paso 2, imagen 1 de 1
    • Remove the two 2 mm screws using a Torx T2 screwdriver.

  3. Este paso está sin traducir. Ayuda a traducirlo

    : paso 3, imagen 1 de 2 : paso 3, imagen 2 de 2
    • Insert a prying tool between the screen and the metal backing of the phone at the bottom to remove backing from phone.

    • There will be a thin film connecting the two pieces. You do not need to remove this. Just fold the two pieces apart with the inside facing up.

  4. Este paso está sin traducir. Ayuda a traducirlo

    : paso 4, imagen 1 de 1
    • Remove the two 3 mm screws, using the Phillips #00 screwdriver, on the silver band at the top of the battery and remove the band.

  5. Este paso está sin traducir. Ayuda a traducirlo

    : paso 5, imagen 1 de 1
    • Peel back the silver tape.

  6. Este paso está sin traducir. Ayuda a traducirlo

    : paso 6, imagen 1 de 1
    • Disconnect the battery connections.

  7. Este paso está sin traducir. Ayuda a traducirlo

    : paso 7, imagen 1 de 1
    • Pry and remove the battery.

    • The underside of the battery is adhesive so make sure to pry the battery off gently.

  8. Este paso está sin traducir. Ayuda a traducirlo

    : paso 8, imagen 1 de 1
    • Peel the copper adhesive off.

  9. Este paso está sin traducir. Ayuda a traducirlo

    : paso 9, imagen 1 de 3 : paso 9, imagen 2 de 3 : paso 9, imagen 3 de 3
    • Unplug the front camera.

Linea de Meta

Una persona más ha completado esta guía.

0 comentarios

Agregar Comentario

Ver Estadísticas:

Ultimas 24 horas: 0

Ultimos 7 días: 1

Ultimos 30 días: 2

Todo El Tiempo: 546