Saltar al contenido principal

ASUS VivoBook S400C Motherboard Replacement

Qué necesitas

  1. ASUS VivoBook S400C Motherboard Replacement, Remove the Bottom Cover: paso 1, imagen 1 de 1
    • Flip the device over and remove the ten 5.7 mm screws with a Phillips #0 screwdriver.

  2. ASUS VivoBook S400C Motherboard Replacement: paso 2, imagen 1 de 2 ASUS VivoBook S400C Motherboard Replacement: paso 2, imagen 2 de 2
    • Use a spudger or your fingers to go around and lift the edges and release the back panel.

  3. ASUS VivoBook S400C Motherboard Replacement, Disconnect the Battery: paso 3, imagen 1 de 1
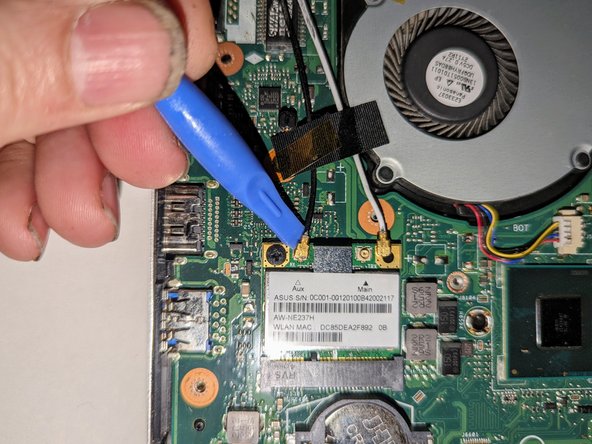
    • Using a spudger, lift up the plug connecting the battery to the motherboard.

  4. ASUS VivoBook S400C Motherboard Replacement, Battery: paso 4, imagen 1 de 1
    • With a Phillips #0 screwdriver, remove the four 5.7 mm screws holding the battery to the laptop.

  5. ASUS VivoBook S400C Motherboard Replacement: paso 5, imagen 1 de 1
    • Carefully lift the battery up and out of the device.

  6. ASUS VivoBook S400C Motherboard Replacement, Hard Drive: paso 6, imagen 1 de 1
    • Remove the three Phillips #0 screws holding the the hard drive in place:

    • Two 3.8 mm screws.

    • One 5.7 mm screw.

  7. ASUS VivoBook S400C Motherboard Replacement: paso 7, imagen 1 de 1
    • Pull left and lift out the hard drive.

  8. ASUS VivoBook S400C Motherboard Replacement, Heat Shield: paso 8, imagen 1 de 2 ASUS VivoBook S400C Motherboard Replacement, Heat Shield: paso 8, imagen 2 de 2
    • Remove the black shield covering the display connector and the heat sink.

    • You may need to use double-sided adhesive tape to resecure the shield.

  9. ASUS VivoBook S400C Motherboard Replacement, Display Assembly: paso 9, imagen 1 de 1
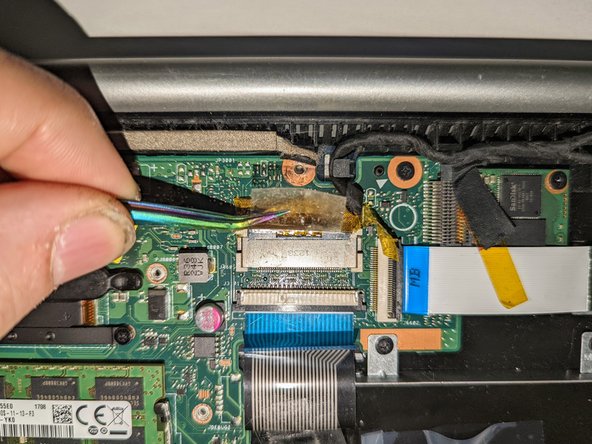
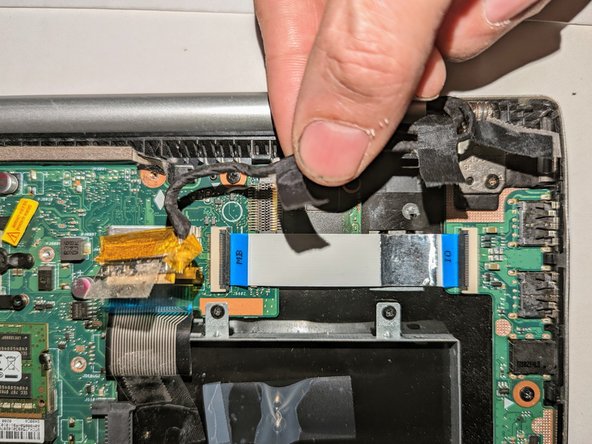
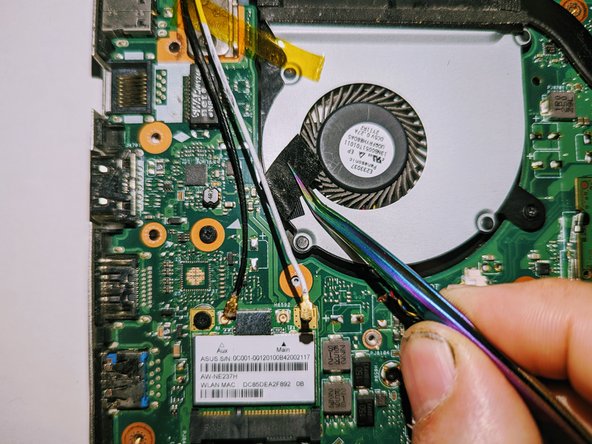
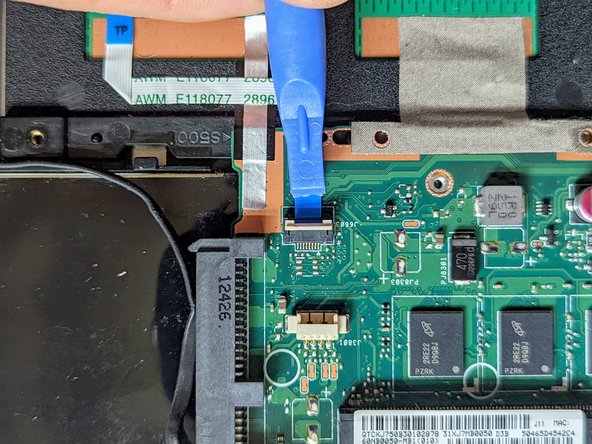
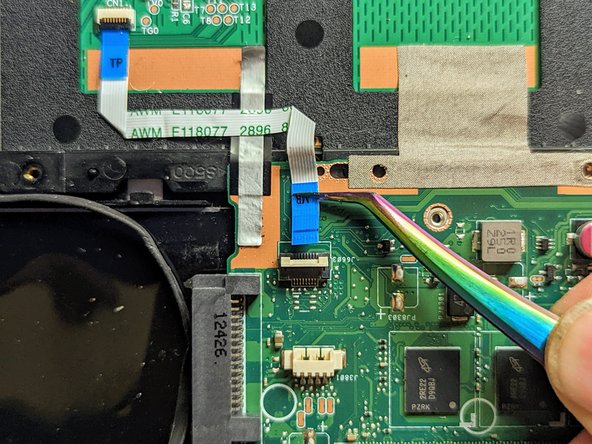
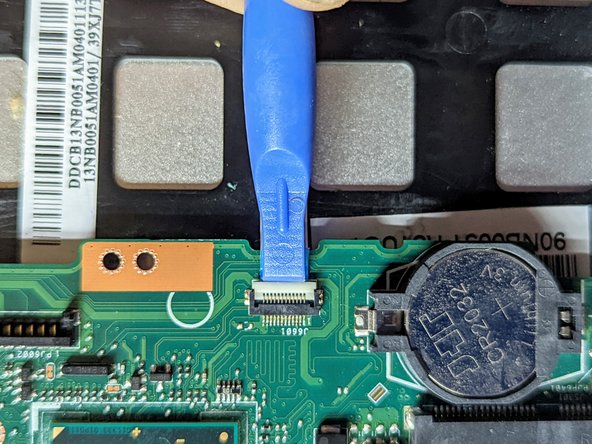
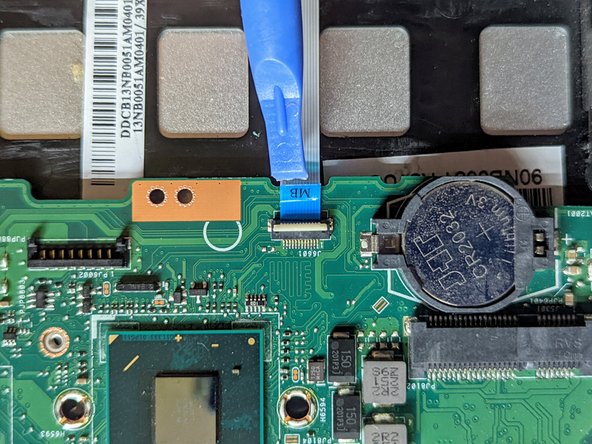
    • Remove the black tape securing the keyboard ribbon cable to the display connector.

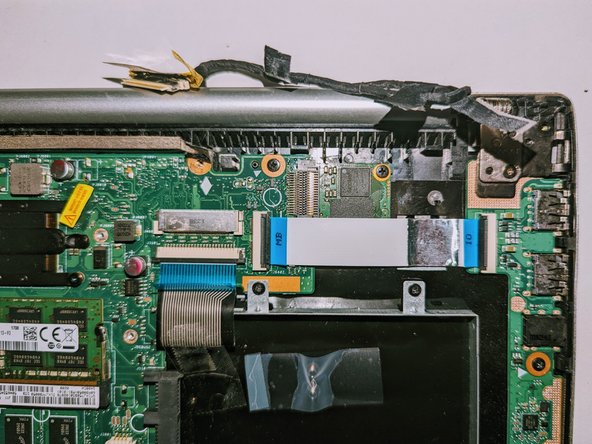
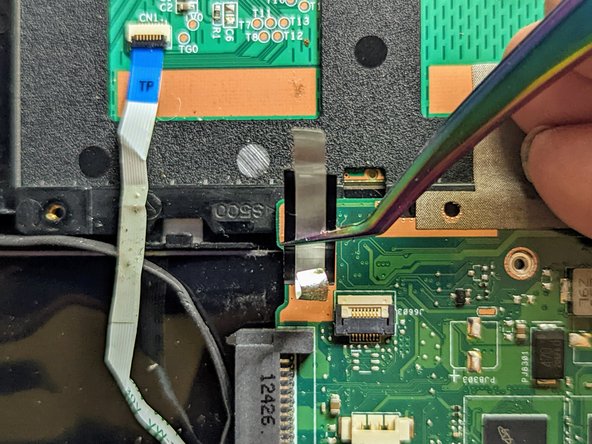
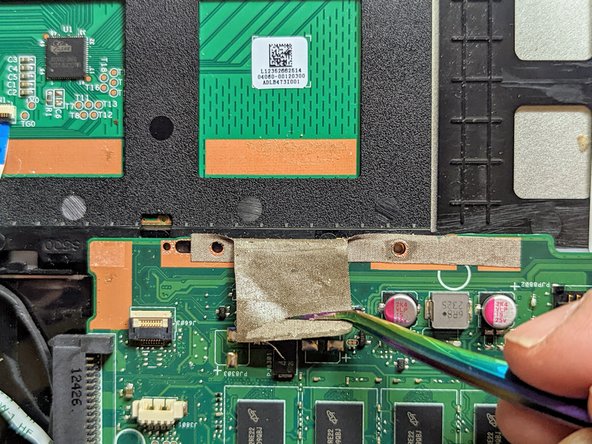
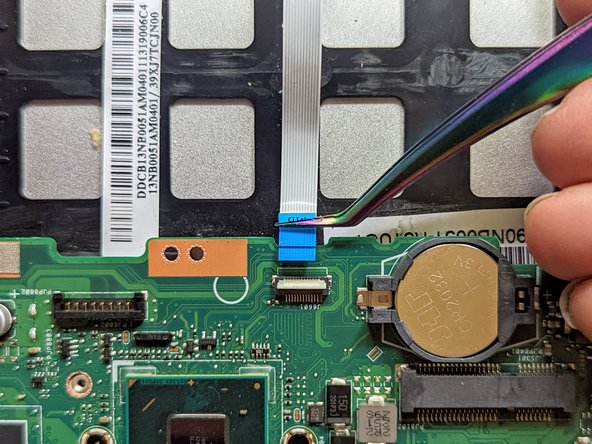
    • Fold the ribbon cable the opposite way, resecuring it to the hard drive to keep it out of the way.

  10. ASUS VivoBook S400C Motherboard Replacement: paso 10, imagen 1 de 2 ASUS VivoBook S400C Motherboard Replacement: paso 10, imagen 2 de 2
    • Peel off the clear tape from the motherboard display connector.

  11. ASUS VivoBook S400C Motherboard Replacement: paso 11, imagen 1 de 2 ASUS VivoBook S400C Motherboard Replacement: paso 11, imagen 2 de 2
    • Position spudgers on the white tabs on either side of the connector and push evenly to unplug the display.

  12. ASUS VivoBook S400C Motherboard Replacement: paso 12, imagen 1 de 3 ASUS VivoBook S400C Motherboard Replacement: paso 12, imagen 2 de 3 ASUS VivoBook S400C Motherboard Replacement: paso 12, imagen 3 de 3
    • Peel off the three pieces of black tape securing the display cable to the motherboard.

    • Deroute the cable from the channel it sits in.

    • Move the cable to the side, out of the way.

  13. ASUS VivoBook S400C Motherboard Replacement: paso 13, imagen 1 de 3 ASUS VivoBook S400C Motherboard Replacement: paso 13, imagen 2 de 3 ASUS VivoBook S400C Motherboard Replacement: paso 13, imagen 3 de 3
    • Use a spudger to release the cables from the wifi card.

  14. ASUS VivoBook S400C Motherboard Replacement: paso 14, imagen 1 de 3 ASUS VivoBook S400C Motherboard Replacement: paso 14, imagen 2 de 3 ASUS VivoBook S400C Motherboard Replacement: paso 14, imagen 3 de 3
    • Lift the tapes securing the wires to the motherboard.

    • Move the wires to the side out of the way.

  15. ASUS VivoBook S400C Motherboard Replacement, Disconnect the Hinges: paso 15, imagen 1 de 2 ASUS VivoBook S400C Motherboard Replacement, Disconnect the Hinges: paso 15, imagen 2 de 2
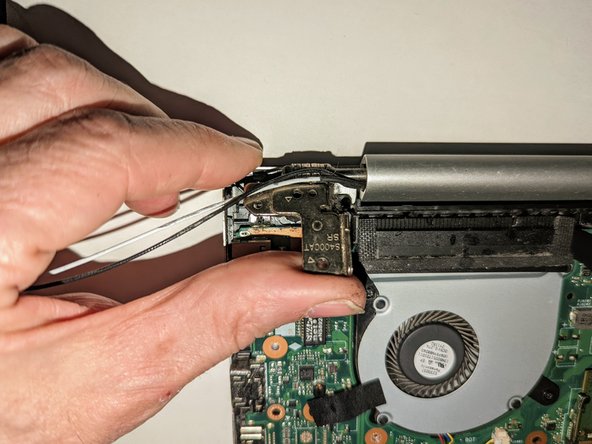
    • Remove the two screws securing the hinge on the left.

    • Pry the hinge up by hand to a 90 degree angle.

  16. ASUS VivoBook S400C Motherboard Replacement: paso 16, imagen 1 de 2 ASUS VivoBook S400C Motherboard Replacement: paso 16, imagen 2 de 2
    • Remove the two screws securing the hinge on the right.

    • Pry the hinge up by hand to a 90 degree angle.

  17. ASUS VivoBook S400C Motherboard Replacement, Remove the Display: paso 17, imagen 1 de 3 ASUS VivoBook S400C Motherboard Replacement, Remove the Display: paso 17, imagen 2 de 3 ASUS VivoBook S400C Motherboard Replacement, Remove the Display: paso 17, imagen 3 de 3
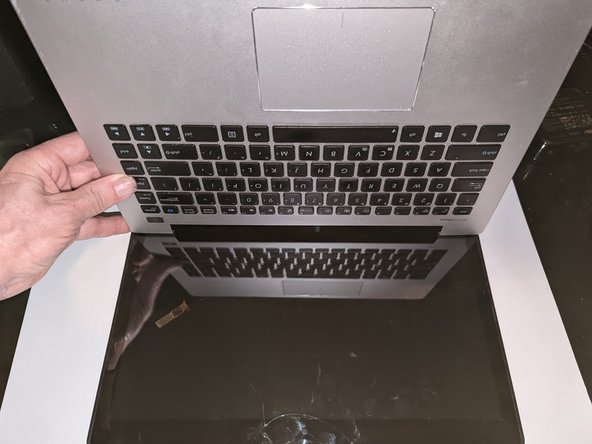
    • Lift the base of the laptop from the front.

    • Raise it to a 90 degree angle.

    • Slide it forward slightly to clear the hinges.

    • The display is now free.

  18. ASUS VivoBook S400C Motherboard Replacement, Wifi Card: paso 18, imagen 1 de 2 ASUS VivoBook S400C Motherboard Replacement, Wifi Card: paso 18, imagen 2 de 2
    • Use a spudger to release the cables from the wifi card.

  19. ASUS VivoBook S400C Motherboard Replacement: paso 19, imagen 1 de 1
    • Remove the singular 3.8 mm screw with a Phillips #0 screwdriver.

  20. ASUS VivoBook S400C Motherboard Replacement: paso 20, imagen 1 de 1
    • Pull the wifi card up and out.

  21. ASUS VivoBook S400C Motherboard Replacement, RAM: paso 21, imagen 1 de 3 ASUS VivoBook S400C Motherboard Replacement, RAM: paso 21, imagen 2 de 3 ASUS VivoBook S400C Motherboard Replacement, RAM: paso 21, imagen 3 de 3
    • Hook a thumbnail in each of the metal retainers on either side of the RAM module and spread them apart slightly.

    • The RAM module will pop up at an angle.

  22. ASUS VivoBook S400C Motherboard Replacement: paso 22, imagen 1 de 3 ASUS VivoBook S400C Motherboard Replacement: paso 22, imagen 2 de 3 ASUS VivoBook S400C Motherboard Replacement: paso 22, imagen 3 de 3
    • Slide the RAM out in a straight line to remove it.

    • When replacing the RAM, insert it at the same angle and be sure to slide it fully into the slot before snapping it down. The latches on the sides should fit exactly into the cutouts on the side of the memory module.

  23. ASUS VivoBook S400C Motherboard Replacement, SSD Card: paso 23, imagen 1 de 3 ASUS VivoBook S400C Motherboard Replacement, SSD Card: paso 23, imagen 2 de 3 ASUS VivoBook S400C Motherboard Replacement, SSD Card: paso 23, imagen 3 de 3
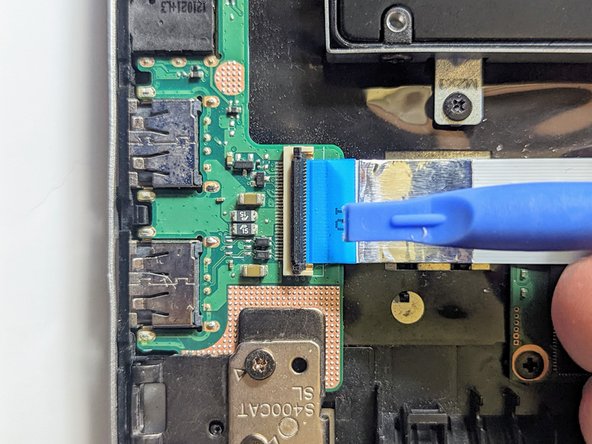
    • Disconnect the I/O Board ribbon cable from the motherboard.

    • Flip up the retaining latch with a spudger.

  24. ASUS VivoBook S400C Motherboard Replacement: paso 24, imagen 1 de 2 ASUS VivoBook S400C Motherboard Replacement: paso 24, imagen 2 de 2
    • Grasp the ribbon cable by the blue tab and pull it straight out from the connector.

  25. ASUS VivoBook S400C Motherboard Replacement: paso 25, imagen 1 de 3 ASUS VivoBook S400C Motherboard Replacement: paso 25, imagen 2 de 3 ASUS VivoBook S400C Motherboard Replacement: paso 25, imagen 3 de 3
    • Disconnect the I/O Board ribbon cable from the I/O board.

    • Flip up the latch with a spudger.

  26. ASUS VivoBook S400C Motherboard Replacement: paso 26, imagen 1 de 3 ASUS VivoBook S400C Motherboard Replacement: paso 26, imagen 2 de 3 ASUS VivoBook S400C Motherboard Replacement: paso 26, imagen 3 de 3
    • Grasp the ribbon cable by the blue tab and pull it straight out from the connector.

    • Remove the ribbon cable to expose the SSD device.

  27. ASUS VivoBook S400C Motherboard Replacement: paso 27, imagen 1 de 1
    • If present, remove any insulating sheet covering the SSD.

    • Remove the single retaining screw.

  28. ASUS VivoBook S400C Motherboard Replacement, Unplug the SSD from the motherboard: paso 28, imagen 1 de 2 ASUS VivoBook S400C Motherboard Replacement, Unplug the SSD from the motherboard: paso 28, imagen 2 de 2
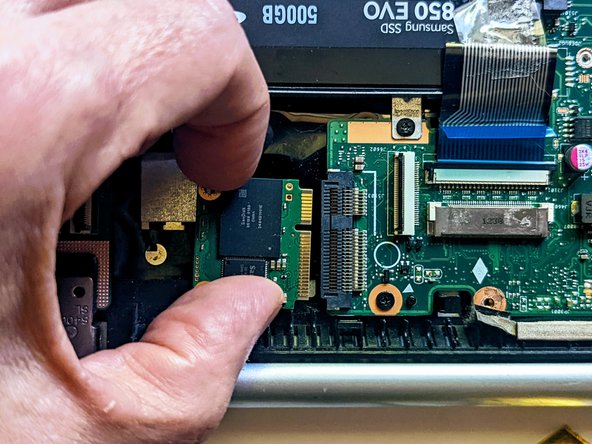
    • Grasp the SSD by the sides and slide it out of the connector.
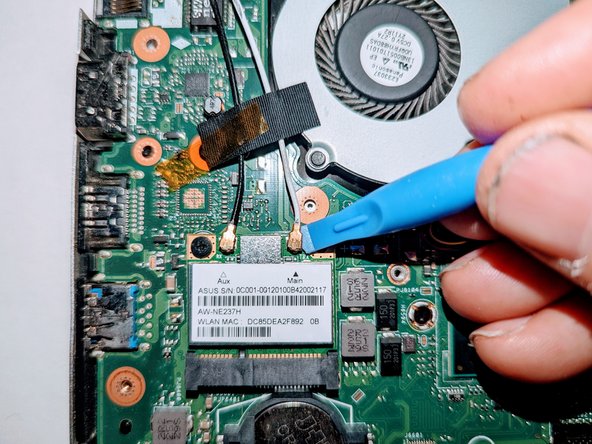
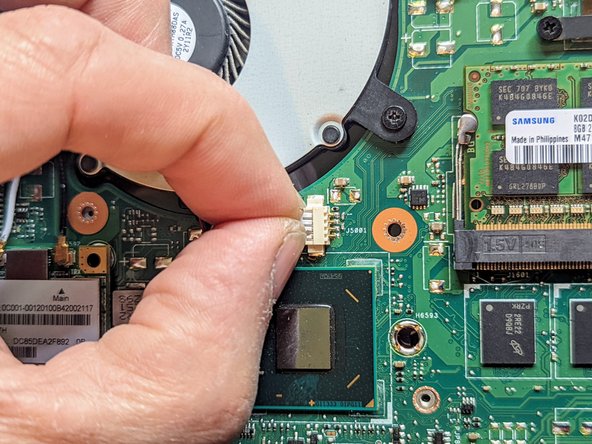
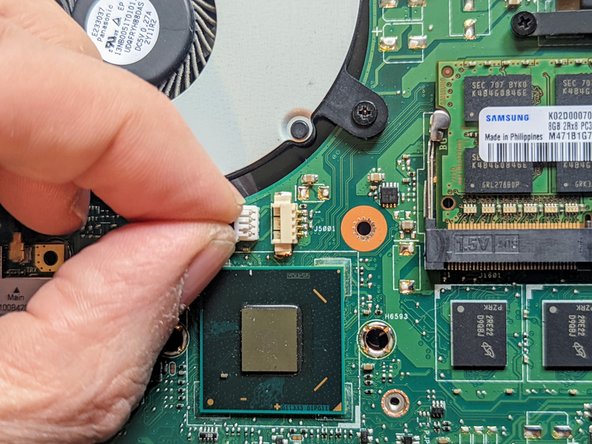
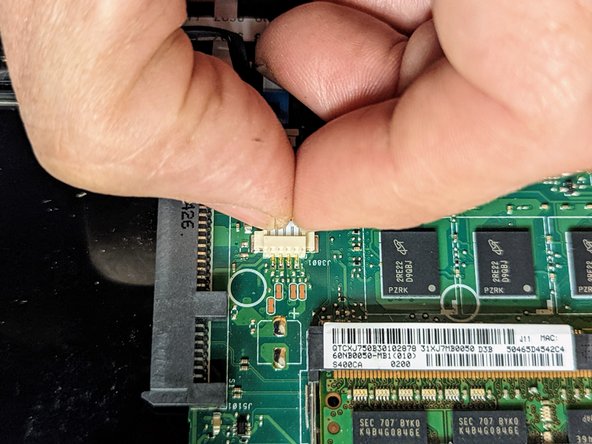
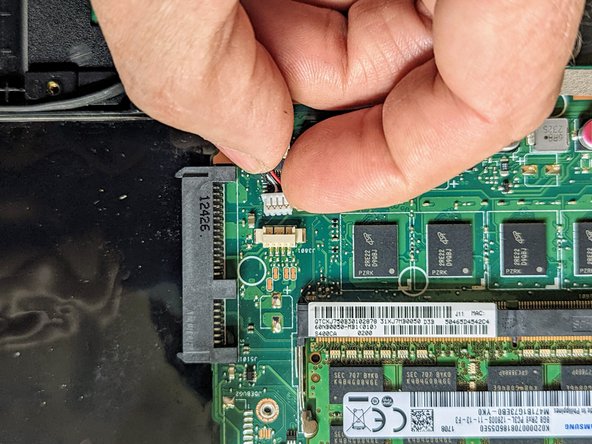
  29. ASUS VivoBook S400C Motherboard Replacement, CPU Fan / Heat Sink Assembly: paso 29, imagen 1 de 3 ASUS VivoBook S400C Motherboard Replacement, CPU Fan / Heat Sink Assembly: paso 29, imagen 2 de 3 ASUS VivoBook S400C Motherboard Replacement, CPU Fan / Heat Sink Assembly: paso 29, imagen 3 de 3
    • Unplug the fan.

    • Grasp the plug with a fingernail on either side and pull it straight out from the connector.

  30. ASUS VivoBook S400C Motherboard Replacement, Remove the Fan and Heatsink Screws: paso 30, imagen 1 de 1
    • Remove the two 5 mm screws securing the fan.

    • Remove the four 3 mm screws securing the heat sink.

    • Removing the screw covered by the warning label will void your warranty.

  31. ASUS VivoBook S400C Motherboard Replacement, Remove the Fan and Heatsink: paso 31, imagen 1 de 1
    • Lift the fan and heatsink straight up to remove it.

    • Before reassembly it is essential to clean off the old thermal paste from the processor and the heatsink and to apply new. How to apply thermal paste explains how.

  32. ASUS VivoBook S400C Motherboard Replacement, Motherboard: paso 32, imagen 1 de 3 ASUS VivoBook S400C Motherboard Replacement, Motherboard: paso 32, imagen 2 de 3 ASUS VivoBook S400C Motherboard Replacement, Motherboard: paso 32, imagen 3 de 3
    • Unplug the black cable connecting the motherboard to the speakers.

  33. ASUS VivoBook S400C Motherboard Replacement, Disconnect the Trackpad: paso 33, imagen 1 de 3 ASUS VivoBook S400C Motherboard Replacement, Disconnect the Trackpad: paso 33, imagen 2 de 3 ASUS VivoBook S400C Motherboard Replacement, Disconnect the Trackpad: paso 33, imagen 3 de 3
    • Flip up the trackpad ribbon cable retainer with a spudger.

  34. ASUS VivoBook S400C Motherboard Replacement: paso 34, imagen 1 de 3 ASUS VivoBook S400C Motherboard Replacement: paso 34, imagen 2 de 3 ASUS VivoBook S400C Motherboard Replacement: paso 34, imagen 3 de 3
    • Pull the cable straight out from the connector.

    • Peel the trackpad cable off the conductive tape strip below it.

  35. ASUS VivoBook S400C Motherboard Replacement: paso 35, imagen 1 de 2 ASUS VivoBook S400C Motherboard Replacement: paso 35, imagen 2 de 2
    • Remove the first of the two conductive tapes grounding the trackpad.

  36. ASUS VivoBook S400C Motherboard Replacement: paso 36, imagen 1 de 2 ASUS VivoBook S400C Motherboard Replacement: paso 36, imagen 2 de 2
    • Remove the second conductive tape grounding the trackpad.

  37. ASUS VivoBook S400C Motherboard Replacement, Disconnect the LED Board Cable: paso 37, imagen 1 de 3 ASUS VivoBook S400C Motherboard Replacement, Disconnect the LED Board Cable: paso 37, imagen 2 de 3 ASUS VivoBook S400C Motherboard Replacement, Disconnect the LED Board Cable: paso 37, imagen 3 de 3
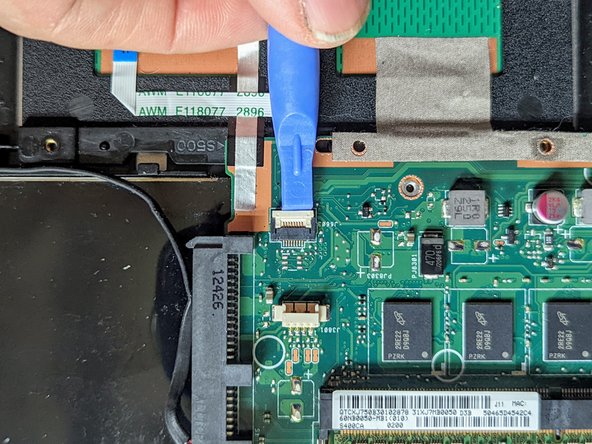
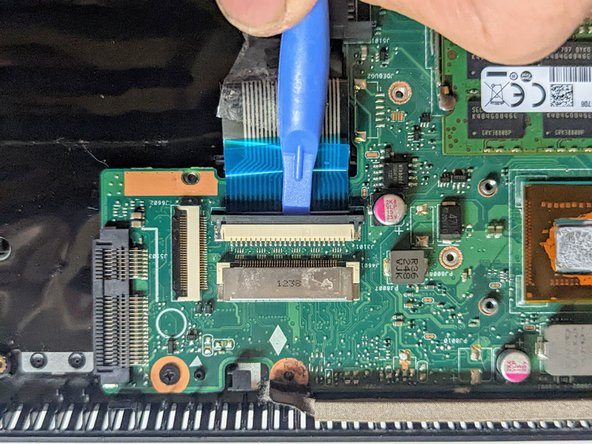
    • Use a spudger to flip up the LED board cable retainer.

  38. ASUS VivoBook S400C Motherboard Replacement: paso 38, imagen 1 de 2 ASUS VivoBook S400C Motherboard Replacement: paso 38, imagen 2 de 2
    • Pull the ribbon cable straight out from the connector.

  39. ASUS VivoBook S400C Motherboard Replacement, Disconnect the Keyboard: paso 39, imagen 1 de 3 ASUS VivoBook S400C Motherboard Replacement, Disconnect the Keyboard: paso 39, imagen 2 de 3 ASUS VivoBook S400C Motherboard Replacement, Disconnect the Keyboard: paso 39, imagen 3 de 3
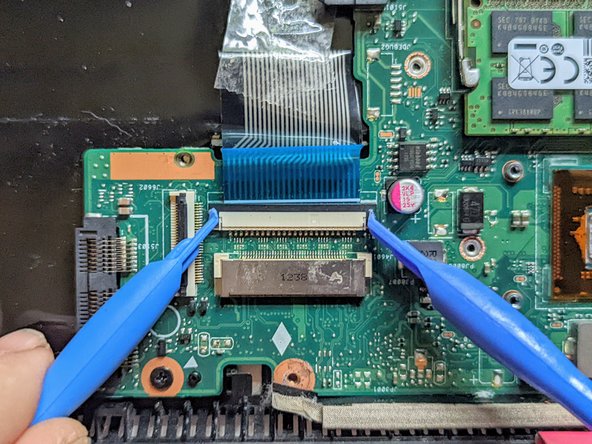
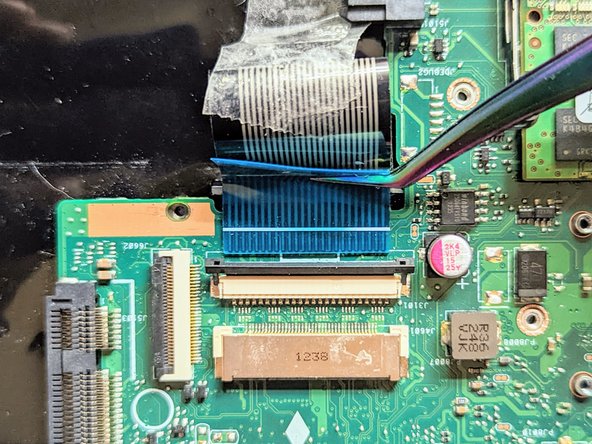
    • Place a spudger on the ears on either side of the keyboard ribbon cable connector and push evenly on both sides to release it.

    • The retainer will only move a very short distance then stop.

    • Lift it slightly to relieve the tension.

  40. ASUS VivoBook S400C Motherboard Replacement: paso 40, imagen 1 de 2 ASUS VivoBook S400C Motherboard Replacement: paso 40, imagen 2 de 2
    • Unplug the keyboard ribbon cable.

  41. ASUS VivoBook S400C Motherboard Replacement, Remove the Mounting Screws: paso 41, imagen 1 de 1
    • Remove the two mounting screws.

    • There are triangular arrows printed on the board pointing to each of them.

  42. ASUS VivoBook S400C Motherboard Replacement, Remove the Motherboard: paso 42, imagen 1 de 2 ASUS VivoBook S400C Motherboard Replacement, Remove the Motherboard: paso 42, imagen 2 de 2
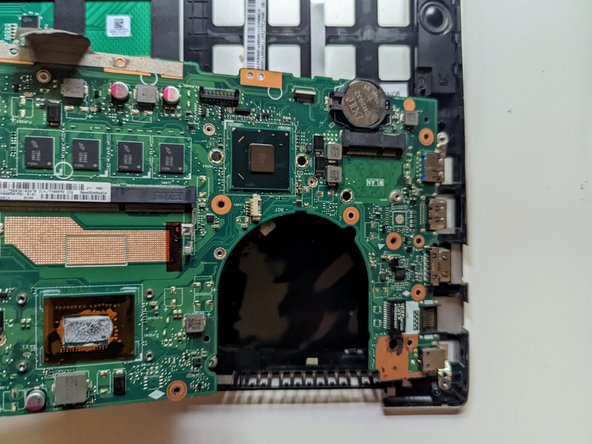
    • Lift and slide the motherboard toward the hard drive to clear the connectors on the opposite side from the case.

Conclusión

To reassemble your device, follow these instructions in reverse order.

Jerry Wheeler

Miembro Desde 03/21/22

57,767 Reputación

69 Guías creadas

Equipo

Oregonians Miembro de Oregonians

Community

7 Miembros

176 Guías creadas

0 comentarios

Agregar Comentario

Ver Estadísticas:

Ultimas 24 horas: 0

Ultimos 7 días: 1

Ultimos 30 días: 9

Todo El Tiempo: 483