Qué necesitas
-
-
Flip the laptop upside-down, battery side facing you.
-
Move the left latch to the left. You can let go after moving it.
-
Move the right latch to the right, and don't let go.
-
Pull the battery out with your other hand.
-
-
-
-
Remove the eight longer Philips screws securing the palmrest to the base.
-
Remove thet four longer and thicker Philips screws securing the palmrest to the base.
-
Remove the single remaining small Philips screw securing the palmrest to the base.
-
Remove the cover hiding the last remaining, medium-length Philips screw.
-
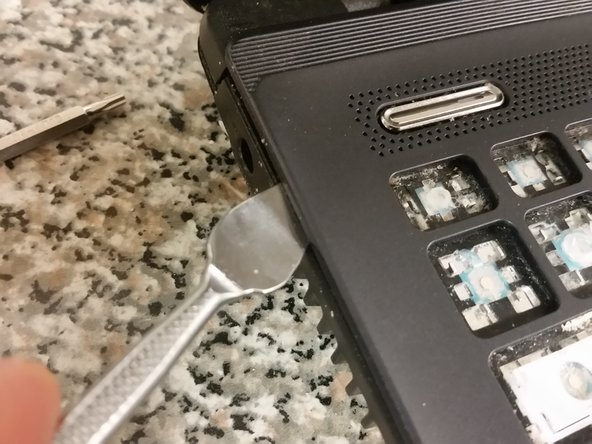
Use a spudger to separate the palmrest from the base.
-
-
-
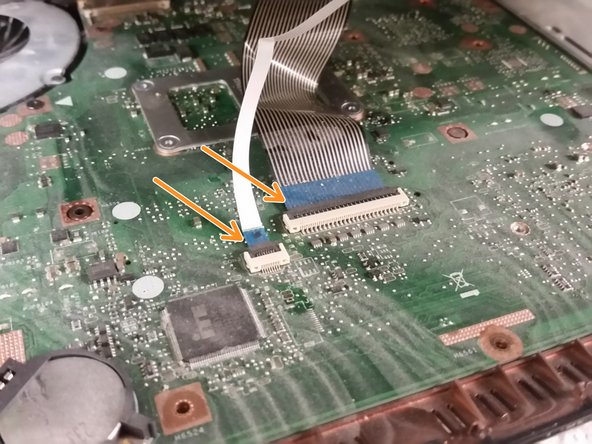
Slowly move the palmrest to the right, until you begin to see a ZIF cable. Stop moving the palmrest once you see the cable. Remove the cable.
-
Now, lift the palmrest up slowly, until you see more ZIF cables. Remove both of them.
-
There are no more cables, so you may now take the palmrest away from the laptop.
-
-
-
Remove the nine pan-head Philips screws.
-
Remove the five rather annoying small Philips screws.
-
Peel back the metal tape holding the keyboard plate, and also peel back the cable attached to it.
-
Now yank the keyboard plate out. Be sure you didn't miss any screws.
-
You're done disassembling!
-


To reassemble your device, follow these instructions in reverse order.
To reassemble your device, follow these instructions in reverse order.
