Introducción
In this guide, you will be able to disconnect the screen from the rest of the laptop. Exercise caution while dealing with wires, make sure to not sever any while completing this guide.
Qué necesitas
-
-
Remove the 6 screws on the edge of the laptop using a screwdriver.
-
Remove the back casing being held on by the one single screw. First, lift the casing at the edge where the screw once was, then carefully lift at the rest of the edges to loosen the casing. Pull the casing towards the edge where the screw was.
-
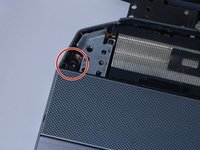
Remove the battery by sliding the switch circled in the picture and pulling the battery out.
-
-
-
-
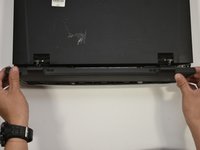
Flip the laptop over and pop the back cover off behind the screen, by grabbing it on either side and pulling it up, vertically off of the laptop.
-
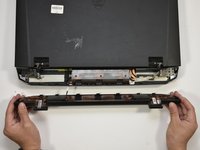
There is a cable connecting the cover to the laptop, shown in picture 2.
-
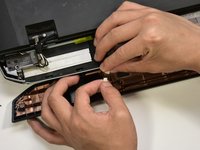
Disconnect the cable by pulling apart the white connectors, shown in picture 3.
-
-
-
You may now remove the keyboard plate. Simply lift from the back, and pull it off all the way around.
-
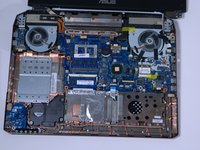
Caution with removing the keyboard, as there are 5 ribbon cables that connect the motherboard to the keyboard (motherboard port locations shown in picture 2).
-
The ribbon cables must be carefully disconnected from the motherboard side, by flipping a latch on the port and pulling the ribbon out.
-
-
-
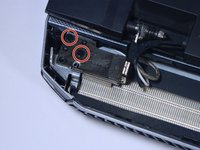
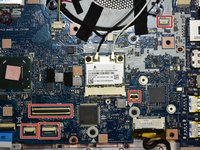
Disconnect the two wires from the WiFi chip by pulling up from the motherboard.
-
Disconnect the large cable to the left of the fan.
-
Disconnect the cable to the right of the fan by sliding it towards the back of the laptop and out of its port.
-
There was a fifth cable connecting to the screen, but that was disconnected in an earlier step.
-


To reassemble your device, follow these instructions in reverse order.
To reassemble your device, follow these instructions in reverse order.
Cancelar: No complete esta guía.
4 personas más completaron esta guía.
Equipo

Cal Poly, Team 8-3, Banghart Winter 2017 Miembro de Cal Poly, Team 8-3, Banghart Winter 2017
CPSU-BANGHART-W17S8G3
Miembros de 4
8 Guías creadas