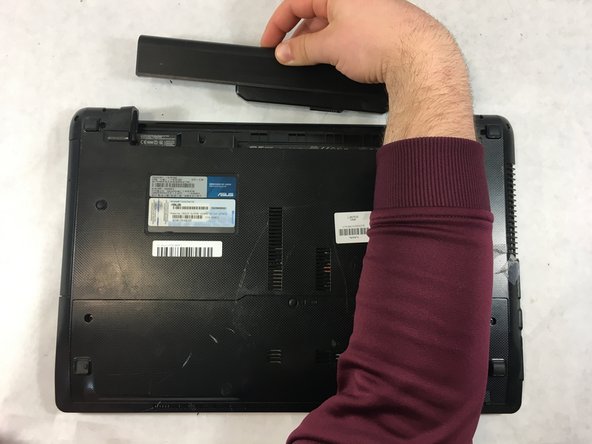
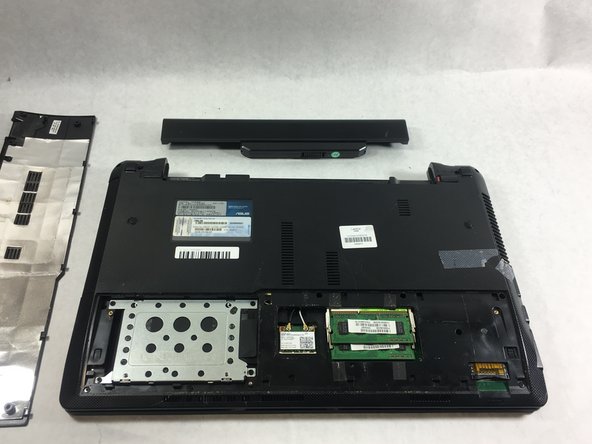
Saltar al contenido principal

ASUS K53E-BBR1 Hard Drive Replacement

Qué necesitas

  1. ASUS K53E-BBR1 Hard Drive Replacement, Battery: paso 1, imagen 1 de 1
    • Flip the laptop over so you can see the battery.

  2. ASUS K53E-BBR1 Hard Drive Replacement: paso 2, imagen 1 de 1
    • Slide the lock on the right side of the battery to the right. If done correctly the slider will stay in place and there will be a red indicator.

  3. ASUS K53E-BBR1 Hard Drive Replacement: paso 3, imagen 1 de 3 ASUS K53E-BBR1 Hard Drive Replacement: paso 3, imagen 2 de 3 ASUS K53E-BBR1 Hard Drive Replacement: paso 3, imagen 3 de 3
    • Slide the other sliding lock on the left side of the battery to the left, and with your other hand slide the battery out from the laptop.

  4. ASUS K53E-BBR1 Hard Drive Replacement, Hard Drive: paso 4, imagen 1 de 2 ASUS K53E-BBR1 Hard Drive Replacement, Hard Drive: paso 4, imagen 2 de 2
    • Remove the two 4mm Phillips #0 screws on either side of the laptop.

  5. ASUS K53E-BBR1 Hard Drive Replacement: paso 5, imagen 1 de 2 ASUS K53E-BBR1 Hard Drive Replacement: paso 5, imagen 2 de 2
    • Slide the back panel towards you until it stops.

    • Lift the panel up out of the laptop casing.

  6. ASUS K53E-BBR1 Hard Drive Replacement: paso 6, imagen 1 de 1
    • Remove the four 3mm Phillips #0 screws holding the hard drive in place.

  7. ASUS K53E-BBR1 Hard Drive Replacement: paso 7, imagen 1 de 1
    • Disconnect the hard drive from the laptop by sliding it towards the outside edge.

  8. ASUS K53E-BBR1 Hard Drive Replacement: paso 8, imagen 1 de 2 ASUS K53E-BBR1 Hard Drive Replacement: paso 8, imagen 2 de 2
    • Grab hold of the black cloth tab and pull the hard drive out from the laptop.

Conclusión

To reassemble your device, follow these instructions in reverse order.

Matthew Merlo

Miembro Desde 03/20/19

267 Reputación

2 Guías creadas

Equipo

0 comentarios

Agregar Comentario

Ver Estadísticas:

Ultimas 24 horas: 0

Ultimos 7 días: 1

Ultimos 30 días: 9

Todo El Tiempo: 257