Esta versión puede contener ediciones incorrectas. Cambiar a la última instantánea verificada.
Qué necesitas
-
Este paso está sin traducir. Ayuda a traducirlo
-
Begin by putting the needle into the hole in the disk tray.
-
-
Este paso está sin traducir. Ayuda a traducirlo
-
Unscrew both 8mm phillip's head screws that hold on the access gate.
-
-
Este paso está sin traducir. Ayuda a traducirlo
-
Use either the your finger, the screw driver, or a spudger to pop out the gate.
-
-
Este paso está sin traducir. Ayuda a traducirlo
-
From here, you can access the hardrive, motherboard, SSD, and RAM.
-
-
-
Este paso está sin traducir. Ayuda a traducirlo
-
Start by unplugging the laptop and turning it upside down. There are 3 screws in the disk drive, remove those using a Phillips #0 screwdriver.
-
-
Este paso está sin traducir. Ayuda a traducirlo
-
Remove the medium sized panel attached on the back. Then using your Phillips #0 screwdriver, remove all 8 screws.
-
-
Este paso está sin traducir. Ayuda a traducirlo
-
Remove the entire large back panel (outer shell) by removing the screws closer to the outer edge.
-
-
Este paso está sin traducir. Ayuda a traducirlo
-
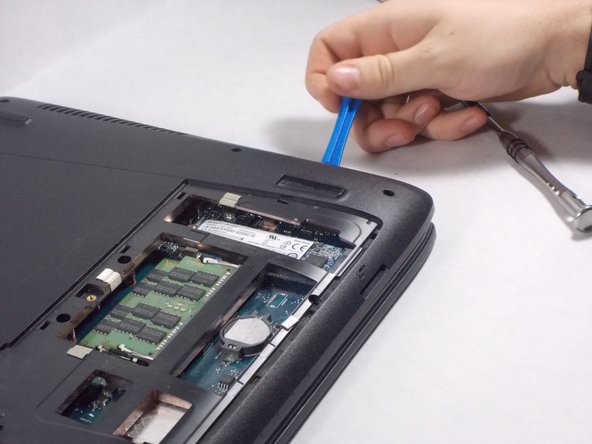
Use the blue opening tool to gently separate the back panel by loosening it on all sides to ease the outer shell of the laptop until it separates.
-
-
Este paso está sin traducir. Ayuda a traducirlo
-
Gently lift the outer shell up until the white, gold and silver power strips are visible. Proceed by removing the strips from the bottom side of the keyboard. Finish removing the outer shell.
-
-
Este paso está sin traducir. Ayuda a traducirlo
-
Remove the two Phillips #0 screws located on the panel above the white power strip.
-
-
Este paso está sin traducir. Ayuda a traducirlo
-
Gently take off the metal keyboard cover by using the blue opening tool.
-
-
Este paso está sin traducir. Ayuda a traducirlo
-
Lift up the keyboard panel and replace it with the new one.
-


Cancelar: No complete esta guía.
5 personas más completaron esta guía.
Equipo

UMass Dartmouth, Team S1-G3, Isaacson Fall 2017 Miembro de UMass Dartmouth, Team S1-G3, Isaacson Fall 2017
UMASSD-ISAACSON-F17S1G3
3 Miembros
5 Guías creadas
3 comentarios
This is an extremely useful tutorial for those who have patience and curious to learn. Excellent job by the authors. Thank you.
This guide needs more work. The metal keyboard has small black pins that keep it in place. They will need to be melted by a heating/soldering gun, and then remelted to keep the new keyboard in place.
This guide is incomplete. You will require a soldering pencil to reattach the new keyboard to its metal backing plate and the laptop faceplate. It could also be useful in releasing the old keyboard from the backing plate and faceplate. if you are slow and cautious it will probably take you 90 to 120 minutes to complete. 40 minutes is only if you have done this type of keyboard before.
Also read the comments regarding the access bay screws that need to be removed during disassembly and remember to remove the sata drive as well.