Saltar al contenido principal

ASUS Eee PC 900HD Hard Drive Replacement

Qué necesitas

  1. ASUS Eee PC 900HD Hard Drive Replacement, Hard Drive: paso 1, imagen 1 de 3 ASUS Eee PC 900HD Hard Drive Replacement, Hard Drive: paso 1, imagen 2 de 3 ASUS Eee PC 900HD Hard Drive Replacement, Hard Drive: paso 1, imagen 3 de 3
    • Remove the four 4.76 mm Philips screws on the back of the laptop using the Phillips J0 Screwdriver.

  2. ASUS Eee PC 900HD Hard Drive Replacement: paso 2, imagen 1 de 2 ASUS Eee PC 900HD Hard Drive Replacement: paso 2, imagen 2 de 2
    • Use a plastic opening tool to remove the back cover.

  3. ASUS Eee PC 900HD Hard Drive Replacement: paso 3, imagen 1 de 3 ASUS Eee PC 900HD Hard Drive Replacement: paso 3, imagen 2 de 3 ASUS Eee PC 900HD Hard Drive Replacement: paso 3, imagen 3 de 3
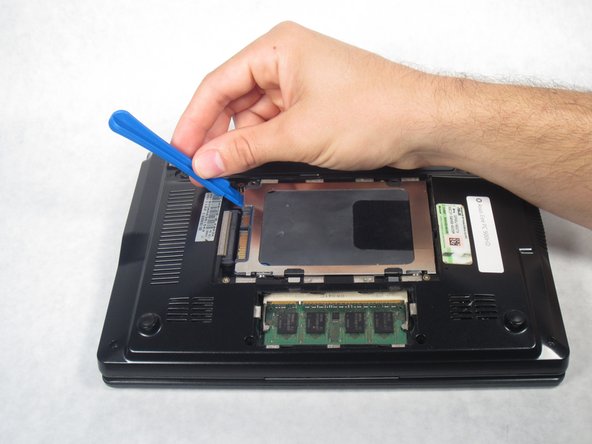
    • Starting from the left, use a plastic opening tool to slide the hard drive all the way to the right.

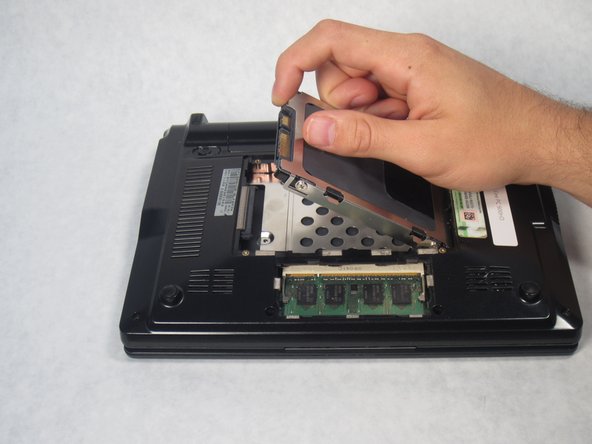
    • Once the hard drive is completely to the right, pull up on the hard drive to remove.

Conclusión

To reassemble your device, follow these instructions in reverse order.

Una persona más ha completado esta guía.

0 comentarios

Agregar Comentario

Ver Estadísticas:

Ultimas 24 horas: 0

Ultimos 7 días: 2

Ultimos 30 días: 14

Todo El Tiempo: 757