Introducción
This is the ASUS Chromebook (Model C424MA-DH48F), here we will be guiding you though replacing the speakers for the ASUS Chromebook.
Reasons to replace the speakers include:
- Physical damage
- Poor sound quality
- No sound at all
- Sound distortion
Qué necesitas
-
-
Use a Phillips #0 screwdriver to remove the eleven 6.9 mm screws that secure the lower case.
-
Insert an opening pick into the gap between the lower case and chassis.
-
Slide the pick around the entire perimeter of the laptop until the lower case fully releases.
-
Remove the lower case.
-
-
-
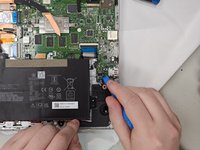
Use an opening tool to pop up the silver locking bar securing the battery connector.
-
Push the battery connector directly out of its motherboard port.
-
-
-
-
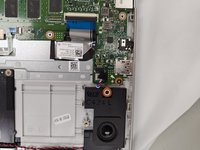
Use an opening tool or your fingernails to gently "walk" the speaker connector directly out of its motherboard socket.
-


To reassemble your device, follow these instructions in reverse order.
To reassemble your device, follow these instructions in reverse order.

Equipo

University of North Texas, Team 1-6, Kilpatrick Fall 2024 Miembro de University of North Texas, Team 1-6, Kilpatrick Fall 2024
UNT-KILPATRICK-F24S1G6
Miembros de 4
5 Guías creadas